Saturday, 24 August 2013

The Verdict on Paints...

Welcome everyone and lovely to see you here today!
I don't know about you, but I have always loved to use paints in my projects, mainly for backgrounds of course. The two kind of paints that seem to be talked about most in blogland, at least the corner of it where I tend to visit, are Tim Holtz Distress Paints and Paper Artsy Fresco paints. Now I do have a rather small collection of the Fresco paints, a slightly larger collection of the Distress Paints, but the colours that I use most often and have by far the widest range of, are Golden Fluid Acrylics. Today I felt like messing about with paints and so I thought I would put all of them to the test to see which ones I liked best.

Now I could write a long resume of the outcome of my musings, but I doubt you would want to read it all, most of us are busy and there are a lot of blogs to visit. So I'll try and keep this brief:
Paper Artsy Frescos: Love their chalkyness and the depth of colour you can reach by layering first the opaque and then the semi translucent and translucent ones over the top. I have 9 different colours in total and I used 8 of them to make the background to this piece
Tim Holtz Distress Paints: Love the ease of application, and  blendability and I was amazed how I could use them to add a few highlights to my background, even though they are so translucent, they stayed on the surface of the chalky Frescos somehow.
Golden Fluid Acrylics: Their purity of colour and high pigmentation are unbeatable, most likely they will always be my paint of choice, though I did hardly use them in this piece.

So the outcome: Well I love them all and found they work pretty well together too!
So here are a few close ups of my piece still:
 Before starting on my painted background I had added some texture paste to my board and stamped into it with various detailed stamps slightly wetted with water.
 The flower was created with a Paper Artsy Stamp (Hot Pick 1004), stamped twice, cut out by hand (I don't have the matching die), shaped and layered. The centre is a Wild Orchid Crafts flower.
 The butterfly is a Spellbinders die, painted with a mix of paints and high lighted with Treasure Gold in various colours.
Stamps were Tim Holtz and Prima, stamped with Stazon and Fresco Paints.

Well there you have it, a little exploration into paints. Hope I haven't bored you too much. Of course many of you, specially Andy Skinner fans, will have Decoarts paints too. I don't have any of them, so I can't tell you anything about them, but I know some people swear by them.....

Hope you like my little board, thank you for visiting and hopefully see you soon again!

Friday, 23 August 2013

Autumn's in the Air

Hello everyone, welcome and I am so happy you are visiting!
This last week I have had a visitor, this meant a lot less time for crafting and blogging, but it did mean two trips into the Highlands which was lovely, but also left me without doubt, that Autumn is definitely in the air in the corner of the world where I am living.

These autumnal colours were the inspiration behind this little mixed media board which I started a while back (when Annie and Rita were visiting, see this post). I made it from a piece of mount board, starting in the usual way: some strips of paper, texture paste through a stencil or two and then playing about with paints, tissue tape, stamping on tissue paper and inks. By the end of it all, it definitely needed a vocal point, that's how the butterfly (a freebie from somewhere on the net I seem to remember) came into play.
And finally embellishing with some hand made flowers and rusty bits


A stamped banner, one of my new Sin City Stamps

And a few remnant rubs to finish it all off.
Hope you like it and have a great weekend, thank you for visiting and I hope there will be some sunshine still where you are, here it's all cloudy and misty, very much like Autumn already.

Tuesday, 20 August 2013

The end of procrastination....

Good morning and welcome, so lovely to see you here.
Today I am sharing an accordion card, - you may well have come across this type of card in other corners of crafty blogland.
The first time I came upon this type of card was on the blog of the wonderful Red Anne HERE

I left her a comment and this amazing lady then got in touch with me and offered to cut me some dies and all the bits and pieces needed to create one of my own. It duly arrived soon after, with enough bits and pieces to make several of these cards and some lovely papers to use with it as well, how kind was that? Well, to be honest, it all looked pretty complicated, even though Anne described clearly how it should work (and there are videos  you can look at too), but I kept procrastinating. Other projects kept coming in between and it has taken me all this time to finally sit down and make the first one. Trust me, it is quite easy just as everyone says! Here you can see my version:


Even though of course this is a Sizzix die, I found that one of my Spellbinders Nestabilities, fitted it pretty well. I chose a wild flower theme to go with the beautiful papers Anne had included. They are from Chocolate Baroque. I stamped in Versafine Sepia,while still in the die, then sponged with various colours of distress inks and coloured the images further with Distress Markers and my water brush. The bees and butterflies are from an Artemio set.

I had great fun making this and can't wait to do another one soon, and of course I now need that die lol...

Here you can see it on a shelf in my hallway, but it won't stay there long as it will become the birthday card for a special friend.

Well, that's it from me for today. Thank you for dropping by
Hugs

Sunday, 18 August 2013

Some good old happy crafty fun...

Hi everyone and thank you so much for dropping in here today! A special warm welcome to new followers, lovely to have you joining me here.
Well, regulars here know that one of the things I love doing is mixed media projects, altered canvasses etc. But, every now and so often I also love to play with papers, embellies and stamps, and here is one of those kind of projects...
The idea of making book marks and putting them in their own holder, was something I saw on Pinterest and I loved the idea. It turns a simple bookmark into a special little gift and I always like having some of those handy.
The papers are from Pion Design Vintage Garden collection, I won this collection a while back, and this project was perfect for some of the 6 x 6 papers.
Here they are one by one, first the holders:


I left the back of the holders plain, just a bit of background stamping on one of them. These papers are so pretty, they do all the work for you..
And here are the bookmarks themselves, the only embellishment here is stamping as I wanted them flat so they easily fit in their holders and into a book of course.
Chocolate Baroque wild flower stamp, coloured with Distress Iks and markers

Stamps from the Stamping Up Elegance set stamped in Versamark Sepia


Well there you have it, - a fun afternoon crafting project. Hope you like it.....
Have a great week and thank you so much for visiting and I always hugely appreciate your comments!


Friday, 16 August 2013

Guesting for Country View Challenges

Hello everyone, lovely to see you here and thanks so much for dropping by.

Recently I was invited to be guest designer at the Country ViewCrafts Challenge site and needless to say I was delighted to do so, especially when I found out that the theme was Quotes and Sayings, as I love adding these to my projects.

Here is a little preview, full details of how I put my piece together can be found HERE 

Hope you'll take the time to take a look, thank you for visiting today and hope you have a creative one!


Thursday, 15 August 2013

Clean and simple???

Hello everyone and I hope you are all well and happy.

As you may have noticed, Fashionable Stamping Challenges are having a challenge this fourtnight with the theme of one layer cards or CAS cards.

Now anybody who knows me, also knows that I do not do CAS. Though I have been stamping for years I have only once in my life done a CAS card, and that was just recently for a design team piece which I will show towards the end of the month. Now I did really enjoy making that one and as I also felt I could well do with some more practice, I decided to play in the challenge, so here is my card.

I used a beautiful stamp from La Blanche, stamped it on their special stamping paper in black archival, masked it and then stamped an old Tim Holtz scrip stamp over it
I used an Inkylicious Ink Duster brush to blend some Antique Linen, Gathered Twigs and Bundled Sage lightly over and around it and then coloured the thistle and clock part with Distress Markers. I then blended a little bit of Bundled Sage through some sequin waste to add a bit of texture

A sentiment stamp and Remnant Rub finished it all off.

I had a really hard time just leaving it like that, it somehow looked unfinished, so in the end I mounted it on some green card. (Really, I had too, because I had totally messed up the back ...)
So, now it is really a two layer card, but for me it still is Clean and Simple, so I just hope the ladies will let me off....

Things I have learnt:
1. Clean your craft mat really thoroughly before starting (or in my case probably purchase a new one... :o(  )
2. Mask off the edges of your card, so that you don't mess up when blending ink
3. Use a sentiment with a really clean font (I think my sentiment does not look right with that font)
4. Keep practising to get better.....
5. These cards are loads of fun to do and are quite quick to make!

Well, there you have it, hope you won't think it's too bad and thank you for visiting!
I am adding this to the FSC challenge

Tuesday, 13 August 2013

Enjoy the Journey Shabby Chic Style

Hello everyone and happy Tuesday!
Today it's my turn for another project over at the Artistic Stamper Creative Team blog
I made a Wall Plaque Shabby Chic Style
For details on how I put it all together, please click HERE  and if you like it I would love it if you left me a comment there.
Happy Crafting and thanks for your visit like always!


Monday, 12 August 2013

And a happy crafty day was had by all.....


Happy Monday everyone, hope you will have a good start to your new week! Lovely to have you drop by here.

Well as some of you know, on Saturday my two lovely crafty friends, Annie and Rita came to visit and we had so much fun!! We altered two canvasses, well one canvas and one piece of mount board to be precise.
We used acrylic paints, stencils, paper serviettes and stamping and finished our first pieces with a little photo image to be the vocal point and finish it all off. We had so much fun, - there was a lot of chatting, laughter as well as moments of silent concentration, and the best bit was that even though we all used exactly the same products and techniques, each piece turned out totally differently, reflecting our own personal styles.
 For Rita and Annie most of these techniques were new, so for those of you who are also not so familiar with mixed media techniques, and because several have asked for it in the past, I'll talk you through a quick step by step. (I can only show you detailed photos of the finished project though, because of course we were way too busy to take step by step photos.
So here goes:
1. Select some stencils and smear on some texture paste. Annie had brought two of the new Tim Holtz ones, so of course I chose one of those. Dry with a heat gun, (the pastes we used, Liquitex Ceramic Stucco and Golden Moulding Paste don't really puff up when you heat them with a heat gun, so are ideal when you want things to dry fast)
2. Select about 3 colours of acrylic paint (we used a mixture of Tim Holtz Distress Paints and Golden Fluid Acrylics) and blend them over the canvas, keeping it quite light at this stage.
3. Select a couple of paper serviettes, (Rita had brought a fab collection, lucky us) just the thin top layer, tear out the bits you want to use and adhere them to the canvas with Gel medium,, put the medium both underneath and over the top of the scraps of the serviette, smooth it all out a bit and dry it again.
3. Return to your chosen paint colours and carefully blend them around and partly over the serviette bits, that way they will melt into the background. A baby wipe can be very useful at this stage, or a bit of scrunched up kitchen roll, which can also add a bit more texture still.
4. The finishing touches: Some background stamping, best done with Archival or other none water based inks, a vocal image, either stamped, or as in this case a digital image and if you want a sentiment of some kind, add some Treasure Gold or other gilding wax over the raised textured bits, and your canvas is done.

We did the second piece in a slightly different way, but that will come in another post (I still need to finish mine, way too much chatting going on)
Here are some detailed photos:
Some tiny scraps of serviettes, they easily blend in even over the raised texture.

Treasure Gold carefully rubbed over the raised bits.

Careful painting around the images almost blends them completely into the background, but in this close up you can just see the edge a little bit.

Some blending around the edges of the vocal image with a charcoal pencil, to add a bit of shadow and depth

And here we are, after a long and happy day of crafting.

Don't know why I am pulling such a silly face, probably trying to stop myself from too much giggling....
I am sure both Annie and Rita will be showing their canvasses on their blogs, in fact they may have beaten me to it already, so if you haven't seen them yet, make sure to check them out!!

Thank you for visiting and have a wonderful week!

Friday, 9 August 2013

A box to treasure...

Hello everyone and welcome to my little creative place. So kind of you to drop by!
Today I would like to share an altered box with you

On Saturday two of my arty friends will come and visit, the lovely Annie and her wonderful mum Rita. A few weeks ago I visited them and Rita gave me this box, that started life just plain white, to play with. It's been around for a while but I just never got round to blog about it and stupidly I forgot to take a picture of it before, so all I can do is tell you how I went about altering it....
It started life as a sturdy, plain white box, just perfect for altering. I began by adding some texture with the help of a Prima corner stencil that was just the right size. I then Gessoed over it to take away the slight sheen of the texture paste (Golden Moulding Paste) I had used. As I wanted my box to look vintage and old I then added some Rock Candy Crackle paint in the corners and along the sides of the lid. Next I stamped various images (sorry they are all really old stamps from my stash and apart from the leaf and the feather one that are la Blanche, I have no idea where they came from) in Plum Archival and then coloured the corners and sides of the box with the same colour, darkening a bit more with some Expresso Adirondack Die ink. That particular brown colour has a slight purple tone which matched the Plum Archival. Some White Fire Treasure gold rubbed over the raised bits, finished it all off.


Here you can see the flower, this was one of the flowers Rita taught me to make when I visited with them and I sprayed it with various sprays to match the box.

I stamped the La Blanche Feather and Script stamp along the sides of the actual box, then masked it and over stamped with a script stamp. I think I over did it a bit, as it does not look quite right, but hey ho, you live and learn (embrace imperfection and all that...)

I left the inside of the box unaltered, it was so perfectly finished already, so there you have it.

Hope you like it and that you will have a a great creative and peaceful weekend. Thank you for visiting!

Related Posts Plugin for WordPress, Blogger...

One World One Heart

Photo

FEEDJIT Live Traffic Feed

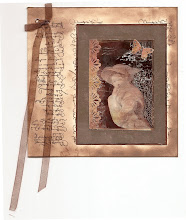
Birthday Card

Birthday Card
Just got a whole lot of new stamps from a brilliant place called the Stamp Smith. This is the image that I first saw on Docraft and really liked. I asked the friend who has used it in an ATC, where she got it. Well she borrowed it from a friend who got it from ebay as a one off. But.... it had a title. I googled the title, and hey presto found the site. They have great stamps and offer a really friendly fast service. I highly recommend them!

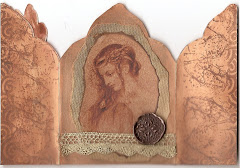
Gothic Arch Trifold inside

Gothic Arch Trifold inside

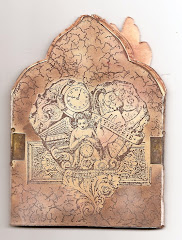
Back of Gothic Arch Trifold

Back of Gothic Arch Trifold

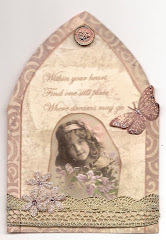
Gothic Arch Within the Heart

Gothic Arch Within the Heart

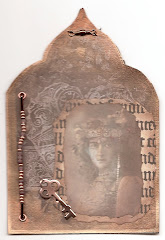
Gothic Arch, the Key

Gothic Arch, the Key