Monday 29 June 2015

Vintage scrapping for Calico Crafts

Hello everyone, I hope the month of June has been going well for you!
I have been extremely busy and apologize for not being a very good blogger this month....
Today I am sharing a post over at the Calico Crafts blog, so like usual, just a sneek here...
More details can of course be found on the Calico blog like usual. Hope you'll check it out.
It will remain very quiet here throughout July and August, but I will be back in September, and meanwhile I hope to have the time to visit all my favourite blogs,so you will see me around here and there.
Thanks for popping in today
Hugs


Monday 22 June 2015

Destination Inspiration # 3 for A Vintage Journey.

Hi everyone, thanks for dropping in! Just one photo here today, but I have a full tutorial over at A Vintage Journey, hope you will check it out...
For these Destination Inspiration posts 4 design team members take it in turn to share a project using the same "recipe". This is what we have been using this month:
Product: Any Tattered Die
Technique: Layering Stencil : Texture Paste
Colour: Walnut Stain
Substrate: Watercolour Paper

This is the project I created:

If you want to see how I put this together, all you need to do is click HERE
Thanks for dropping by like always,

Friday 19 June 2015

The next 5 ICADs

Hello lovely visitors and thank you for looking in here today.
I finally managed to complete my next 5 ICADs. It's busy days in my day job at the moment and it is hard to fit art time and blogging in right now, but here goes....
If you are wondering what ICADs are or would like to see the first ones I made, - just click HERE
On to today's cards:
Using Visible Image, Design by Ryn and Unity stamps.
Vitruvian Man by Leonardo is sadly not a stamp but was cut from a piece of very cool wrapping paper. Background stamping with the Unity stamp and a really old text stamp which reminds me of Leonardo's amazing script....
Paper Artsy stamp over painted back ground
This is my personal favourite, yet was the quickest to do, it's just a bit of Heartfelt Creations paper with some background stencilling and stamping and a couple of fussy cut butterflies. These ICADs are perfect to use up scraps of paper...
Another painted background, background stamping with Fresco Finish Snowflake paint and a La Blanche stamp.

Well that's it, short and sweet, which is all I have time for at the mo....

Thanks so much for visiting like always and have a great weekend!!!


Monday 15 June 2015

Travel Adventure for Calico Craft Parts

Hi everyone and thanks so much for stopping by here today!
I am super excited as in about 3 weeks time I will be off to Australia for 7 weeks to spend time with my grandchildren. Today I am sharing a little travel album I made for the occasion.
Here is a sneak peek:
Full details can be found on the Calico Craft Parts blog, would love to know what you think...
Thanks for visiting like always


Sunday 7 June 2015

ICAD 2015

Hi everyone and thanks for popping in!
A few years ago I hosted an ICAD swap and we had great fun with it. This year I am just making some for fun!
What is an ICAD you may wonder.... Well it is the acronym for Index Card A Day.

The lovely Daisy Yellow has for the last 4 years hosted this challenge on her blog. This year's challenge started on June 1 and will run until the end of July. The challenge basically means that you create a little 3 x 5" card (or alter an index card of roughly that size) and just enjoy the creative process and then share your creations with others on your social media sites. You can read all about it here.

I have a lot going on right now and am very busy. Creating these little cards, which really don't take long, is just a great way to relax, spend a little creative time and have some fun. Like a mini art journal really. I am not sure whether I can do all of them, or even do it every day, but there is no pressure, that's what I like about it. I used 3 x 5 cards cut from a manila folder as my substrate, as I had no index cards to hand.

So here is a quick overview of my first 5 cards:
Distress inks and various stamps. Main stamp is from Visible Image.
Background Tissue Wrap, paint and a collage from scraps on my desk.
Mix of inks, paints, stamps and an embossing folder.

Paints, stencils and a scrap from a paper napkin
My favourite technique and colour combo at the moment, just playing with stencils, some background stamps and Distress Inks.

Well, that's it for now, onto the next batch which I will post in a few days. If you are looking for a fun creative project, check out the link, - there is even a special Facebook group you can join.

Thanks for visiting like always
and I hope you will have a week full of creativity!

Saturday 6 June 2015

A Box of Affirmations for Calico Craft Parts

Hello everyone and thanks for dropping in here today.
Just a little sneak peek view only of a project I created for Calico Craft Parts.
If you want to find out more about what it is exactly and how I put it together, please hop over to the Calico Craft Parts Blog

Hope to see you there and have a great weekend!!

Friday 5 June 2015

Celebrating at A Vintage Journey

Hello everyone, thank you for dropping by here! It's the first Friday of the month and that means there's a new challenge starting at A Vintage Journey.
The lovely Sandy chose the theme of Celebrations. Usually there are so many celebrations of one kind or another in June....
As A Vintage Journey is a Tim Holtz inspired challenge blog, I decided to celebrate the great man himself.

I made a simple tag card and had great fun doing so.
I cut a piece of Manila cardstock and added some texture with one of Tim's Layering Stencils and some Ranger Texture Paste.. When it had dried I added a first layer of colour using Distress Stain Sprays, - I used Scattered Straw, Mustard Seed and Peeled paint. I spritzt with water to let the colours run and then dried with my heat gun. More colour was added with Distress Inks and another another stencil. I also did some background stamping with the Paris Text stamps from the Papillon set.
I wanted this to be a happy, jolly piece, so decided to use my favourite crazy bird. He was stamped on speciality stamping card and coloured with Distress Markers, fussy cut and adhered to by card base. I cut him a party hat from some printed text paper.
I could not fussy cut his little curls on the top of course so I drew them over the hat when both were glued down. The T stands for Tim of course.
I cut out a little banner from the same text paper and adhered the letters which I happened to have in my stash.
The sentiment is from the simple sayings set and I adhered it with a number brad. I chose the 10 because Tim gets 10 out of 10 in my book every time.

For the same reason I had to choose the Excellence Muse Token of course. I gave it a quick rub with some pewter Treasure Gold to make it blend in with the rest of the tag.


The final touch was to add some glossy accents to the eyes, this was a little trick I saw on the lovely Amanda's blog the other day.
Well there you have it, a tag to celebrate the wonderful Tim Holtz. Hope you'll hope over to A Vintage Journey to see what my teamies have created and hopefully you'll play along and celebrate with us.

All the challenge rules can be found there.

Thanks for visiting and have a great weekend with hopefully some creative time...

Wednesday 3 June 2015

Shabby Butterfly album cover

Hello everyone. Over at the Countryview Challege blog our theme this month is Shabby Chic. For my second project this month I altered a wooden butterfly album cover.
The wooden butterfly started out looking like this:
I covered it in gesso and added some stencilling with a Crafters Workshop stencil:
I also added some crackle paste in places, for the inevitable crackle that I love on projects like this:
I then added colour with various Decoart Media Fluid Acrylics until I was happy with the result. I also used some white Antiquing Cream to add to the shabby feel of it.
The flowers cluster was created on top of a Tim Holtz Mixed media die cut. I also added some cheese cloth, a little stamped butterfly, some twine and a pen nib. The flowers were coloured with the same paints and edged with a bit of gesso and some treasure gold.
The sentiment iS from the Tim Holtz Small Talk stickers and that is pretty much it.
Thank you so much for dropping in today, I always really appreciate your visits and if you like Shabby Chic, do check out our challenge and play along!

Monday 1 June 2015

Shabby fun for Mixed Media Monthly

Hello everyone and welcome to my little place in crafty blog land. Happy June to you all!!
This is my second project for today, - if you want to see the first one you can find it HERE


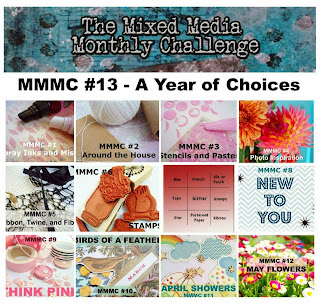
Over at Mixed Media Monthly it's celebration time this month as it's our one year anniversary. For the theme this month you can pick any of the themes from the previous year, how fun is that!


For my theme I chose the January theme (Something New To You) this is because the main product I used are from our wonderful sponsors this month, Maya Road who do the most amazing range including all sorts of wonderful embellishments, and I had never used their products before, so they were completely new to me....

 By entering our challenge you could win an awesome goodie bag of their products. You can find all the challenge details on the blog there

We have some new rules, so in order to be eligible, make sure to follow these:
1. You must use our challenge graphic in your challenge post.
2. You must comment on at least 3 design team members blogs
3. You may combine with up to 4 more challenges

As this is our celebration month, there are not only inspiration pieces from the team, but also many guest designers from the past year, so do hop over!!

On to my project: There is nothing I enjoy more than creating a mixed media project and altering a variety of embellishments to suit my colour theme and mood. So for this one I made an altered canvas. It started out looking like this:
Every single element on this canvas is from Maya Road, and as you will see along the way, I even landed up adding a few more.

After adhering all these different things to my canvas with gel medium, I added some texture with a stencil, some texture paste, sand paste and crackle paste and then covered it all with a think layer of gesso.
As you can probably see at this stage I had added some further embellishments from Maya Road including the  big flower on the top. I also added a few smaller ones from my stash and a die cut word..
The big flower started out looking like this:
And after covering it with the gesso and pastes, it looked like this:
Because the flower itself is made from fabric, it adds super textures when covered with the other media.

Here is a close up of the other embellishments. The May Road tapes, fibers, lace and wood chip embellishments all add wonderful textural additions when they are cover with gesso.

The next stage was to add colour:
I decided to keep it in two tones, soft browns and blues which I achieved with a mix of fluid media acrylic paints, Lindy Stampgang Sprays and some Treasure Gold highlights.
Here are some close ups still:
A little shadow was added with some watered down black paint and a brush, to make the word pop a bit more.
Love how the twine, lace and chipboard all work together with the paste and colour to give almost a ceramic effect.
My favourite bit is definitely the large flower..........using a heat gun while drying the pastes added some lovely little additional bubbles.

Well, there you have it. Hope you like my little altered canvas. Do hop over to the Mixed Media Monthly challenge blog to see what my team mates created, like usual there is a huge variety of styles and projects to inspire you to take out your mixed media supplies, so do come and play along!

Have a wonderful creative month and thank you for visiting like always!


Related Posts Plugin for WordPress, Blogger...

One World One Heart

Photo

FEEDJIT Live Traffic Feed

Birthday Card

Birthday Card
Just got a whole lot of new stamps from a brilliant place called the Stamp Smith. This is the image that I first saw on Docraft and really liked. I asked the friend who has used it in an ATC, where she got it. Well she borrowed it from a friend who got it from ebay as a one off. But.... it had a title. I googled the title, and hey presto found the site. They have great stamps and offer a really friendly fast service. I highly recommend them!

Gothic Arch Trifold inside

Gothic Arch Trifold inside

Back of Gothic Arch Trifold

Back of Gothic Arch Trifold

Gothic Arch Within the Heart

Gothic Arch Within the Heart

Gothic Arch, the Key

Gothic Arch, the Key