Showing posts with label Paper Artsy Fresco Finish Paints. Show all posts

Thursday, 16 November 2017

Vintage Christmas cards (further variations)


Hello friends! Well, here we are, nearly the weekend and that much closer to Christmas......
Today I have 3 further Christmas cards to share.


Below a short tutorial of how I made them:

All of them started with some textue paste and a stencil:
I then added colour with a mix of Acrylic paints in Titan Buff, White and Burnt and Raw Umber, I used different brands, Decoart Fluid Acrylics, Golden Fluid Acrylics and Paper Artsy Frescos, using both a brayer and my fingers.
On one of them I also used Distress Crayons to get a kind of patina effect.

Raised bits were also highlighted with Treasure Gold.

I then added various die cuts and vintage images as focal points, and that was pretty much it.
Below a few close ups still:

Below a short slide show to see them in close up


I am going to add one of the cards to the following challenges:
Countryview Crafts: Stencils
That's Crafty: Stencil it
Frilly and Funkie: Timeworn
Thanks for your visit like always
xxxxx


Monday, 30 January 2017

Begin journaling once more

Hello friends, hope you are all well. I have been a terrible blogger, apart from DT commitments I have hardly done anything and barely done any visiting. My apologies for that specially!
Anyway, I finally have a journal spread to share, trying to carve out a few moments just to create...
I have never had the good fortune to attend one of Seth Apter's workshops, but did manage to watch some of his periscope recordings from Creativation, and this was inspired by those.
The background was done with a mix of acrylic paints and sprays.
Strips of paper, old book pages and background stamping came next.
The focal point, one of Seth's older stamp sets that has a matching die to go with it

Some doodling and stencilling and some words from a Prima/Finnabair stamp set.
And here the facing page, using the same techniques but this time another Finnabair stamp.

Well, that's it for now. I will be back later in the week with some design team pieces, and there will soon be a few more planner freebies coming your way too :o)

Meanwhile, stay warm, cosy and I hope you will find some creative time. My day-job is pretty crazy at the moment but I hope I'll have more time to blog soon!

xxxxx


Monday, 1 February 2016

Glitter at Mixed Media Monthly

Hello all, happy February!! Here is my second project for today, a door hanger for Mixed Media Monthly, where are theme this months is "Add Some Glitter".
Glitter you say, - where's the glitter??? Well I'll come to that in a moment, but let me first tell you that our sponsor this month is The Frantic Stamper, who are sponsoring our challenge with a $25 gift voucher yay!! For those of you in the US, The Frantic Stamper is one of the few places that have a full range of Paper Artsy products, and it's their product I have mostly used in this project.
I started by painting my hanger with a mix of Squid Ink and French Roast Fresco Finish paint. When dry I added a thin layer of Paper Artsy Crackle Glaze just around the edges and then finished with a top coat of two new colours, Sour Grapes and Pixy Dust. After the crackle did its magic and I distressed the edges, it looked like you can see above.
If you are not sure how to do this exactly, Leandra (owner of Paper Artsy) has a wonderful video demonstrating the technique, you can see it HERE
Here you can see the crackle a bit better and I just love how when you distress the edges, you almost get the effect of a whole other layer.
One of the things I love about the PA paints is that they are brilliant for stamping with. Above you can see how I stamped a script back ground stamp (Hot Picks HP1501EZ) with a mix of Pixy Dust and Snowflake..
I finished my hanger by stamping this Lynne Perrella (LPC017), straight onto the background with Versafine Ink in black. I coloured her partly with the paints and partly with coloured pencils. I paper pieced the medallions and the star shape behind her head by painting to pieces of paper with Gold Fresco paint and White Fire Fresco paint. I then stamped them again in Versafine, fussy cut them and glued them in place.

The word Believe from the same Lynne Perella stamp set was stamped with Squid Ink and adhered underneath.
A wooden embellishment, coloured with the same paint and highlighted with Treasure Gold White Fire
And a flower (Prima) from my stash and left over from another project, finished it all off.

Now what about the glitter> Well, I added some Tim Holtz Distress Glitter Dust in Vintage Platinum was added to both medallions and the flower, but the days have been so dark here recently, that really it was impossible to have them clearly show up on the photos, so you'll just have to trust me, - it is there!
So here is my finished doorhanger for my studio, I think I will adopt the lady as my muse....

Thank you so much for visiting today, do make sure you hope over to the MMM blog to see the amazing projects my team mates have made, and of course you will find all the details of our challenge there too.

Have a fantastic month and stay creative and happy!!

Sunday, 10 January 2016

Finally back and some blogger news

Hello everyone and thanks so much for popping in.
I have just returned from quite a long blogging break, so it's good to get back into the swing of things.....
Like many of you I decided to join Wanderlust 2016. A year long event of art classes and exploration, and this is the project I created after watching the first video. If you don't know about Wanderlust, do check it out here.

I will not share the techniques with you in detail, as that would not be fair to Kasia, but this spread was very much inspired by her prompt and great example.
Unlike Kasia I used Paper Artsy Fresco paints for my background, and used a mini brayer, a brush and my fingers to blend my colours.
Kasia shares a great technique of scratching into the paints, using part of the Prima Distress tool and rubbing alcohol (surgical spirit). I've owned this tool for years and had never even discovered that particular part of the tool. I found the technique works really well with Fresco paints.
Here is a close up of some of the scratches, I kept them quite thin, but like the texture it creates.
Kasia suggests using chipboard pieces as focal points, - a great way to use up some of those chippies that many of us have flying around in our stash.
Below some close ups of how I coloured them after having covered them with gesso.
A mix of Fresco and Golden fluid acrylics paints and Lindy's Stampgang spray with some Treasure Gold in Pewter highlights.
I also used stencilling and background stamping to add more interest to my background.
I used a Tim Holtz stencil and Watering can Archival to stencil with.
Kasia suggests to choose just one word to express how you are feeling at the moment. I chose Explore for that's what I hope to do while following along with Wanderlust....

And then of course the challenge of using your own handwriting on your page. I always need to take a deep breath before doing that, and also found out that really I need to invest in some better pens.....
Well, that's pretty much in as far as the journal page is concerned......
Now as to the blogger news, - some of you may have heard this already, - I found out about it a couple of days ago from my lovely and talented friend Alison/Butterfly.
As Alison says:
Apparently it's in order to make life better for everybody... Don't you hate it when they "improve" things?! "New and improved" is my least favourite proclamation to see on a much-loved product.


Here's the announcement they made on Blogger Buzz:

In 2011, we announced the retirement of Google Friend Connect for all non-Blogger sites. We made an exception for Blogger to give readers an easy way to follow blogs using a variety of accounts. Yet over time, we’ve seen that most people sign into Friend Connect with a Google Account. So, in an effort to streamline, in the next few weeks we’ll be making some changes that will eventually require readers to have a Google Account to sign into Friend Connect and follow blogs.

As part of this plan, starting the week of January 11, we’ll remove the ability for people with Twitter, Yahoo, Orkut or other OpenId providers to sign in to Google Friend Connect and follow blogs. At the same time, we’ll remove non-Google Account profiles so you may see a decrease in your blog follower count.

We encourage you to tell affected readers (perhaps via a blog post), that if they use a non-Google Account to follow your blog, they need to sign up for a Google Account, and re-follow your blog. With a Google Account, they’ll get blogs added to their Reading List, making it easier for them to see the latest posts and activity of the blogs they follow.

We know how important followers are to all bloggers, but we believe this change will improve the experience for both you and your readers.

Posted by Michael Goddard, Software Engineer

There's not much we can do, other than alert everyone that if you signed up to follow Blogger blogs without a Google account, you'll need to get a Google account and re-follow with that if you would like to stay connected (and/or sign up to Follow By Email so that you get notifications in your probably already overloaded inbox).

It's hard to know what the impact will be. Many of us are Blogger bloggers, and so we have Google accounts anyway, so maybe it won't make much difference - we'll see. I lost about 30 followers in one fair sweep already a couple of weeks ago, maybe they were trying things out then already, - who knows.
In any case, to those of you who are still following, - thank you so much for being here and of course for visiting today!!

Tuesday, 13 January 2015

With thanks!

Hello everyone! So happy you decided to come and visit.

Today I am sharing a tag wallet made as a thank you for a beautiful Christmas tag I received quite unexpectedly.
This is one of my favourite projects to do. The wallet is made from a size 12 manila tag folded in three.

Here you can see it folded open, I'll show both the front and the back:


One of my plans for this year is to join more challenges. Probably one of the most popular ones in the UK is the Paper Artsy challenge. I have never taken part, but this year they are going to have a slightly different format that appealed to me much more and I loved the theme of the first one "Fragile Papers". So I will use this project for my entry to the challenge.
Here's a quick description of how I made this and what I used.
1. I covered the inside of my size 12 tag with a thin layer of gesso, then added scraps of Tim Holtz Tissue wrap and some old book pages using gel medium.
2. Next I added colour with the help of some Fresco Finish paints, I used watered down Chocolate Pudding, French Roast and a little bit of Sage, blending it all with the help of a brush, baby wipe and my fingers.
3. Next I added scraps of the the top layer of a paper serviette. This is not something Leandra mentioned in her description, but to my mind these fit totally into the fragile paper theme and I happen to love using them.
4. Some more paints were added to blend them into the background.
Here are some close ups:
I added some stenciling still, using a Tim Holtz stencil and some Geranium Archival ink. I love how the text on the tissue wrap can still be seen through the paper napkin, - one of the joys of working with translucent layers....

As this is a thank you wallet, I added the word thanks with some letter stickers. Here you can maybe just see how I also added some old book paper and more stenciling of course.

The outside was done slightly differently:
1. I covered the whole outside with Sage Fresco Finish.
2. Next I added some sprays with a mix of Tim Holtz Distress and Lindy's Stampgang Sprays.
3. Texture was added with my favourite stencil of the moment, Memorybox Lathenay.
4. More colour was added with a mix of Sage and Inky Pool paint and another scrap from a paper serviette was adhered to the middle section.

And some more close ups:
The middle section, to which I added a word sticker still
The front flap, with some ribbon and a flower plus a couple more word stickers, sorry you can't read the second one, it says inspired of course.
The wallet closes with a little magnet. I also added a little stamping, using a Prima word stamp, stamped in Sage Fresco Finish. Like usual the texture was highlighted a bit with Treasure Gold, this time I used Pewter and Indigo.

Well, that's it, - hope the recipient will like it (it will be on its way by the time this post goes life). And as I said I will be adding this to the Paper Artsy Fragile Paper Challenge. My inspiration mainly came from Leandra's introductory post and video.
I am also going to add it to the Thats Crafty challenge where the theme is "something Blue"

Sunday, 24 November 2013

Altered Frame for Nicecrane Designs

Hello everyone and so kind of you to drop by here.

Today I am sharing an altered frame I created with one of the adorable Christmas Images from Nicecrane Designs.
I'm afraid to say I got a bit carried away and started to add more and more to my piece, - I think I should take lessons from some of those wonderful "Less is More" people out there, but hey ho, I'll share it with you anyway, seeing I have done it now.

I started by making the background for the central panel. I added some texture paste through a couple of stencils and when it had dried added some colour with Distress Stains.
Next came some stamping in the background with Distress Inks and some stencilling with my new Tim Holtz shattered stencil, using mainly Iced Spruce.

Here you can see some detail. Not sure why I am showing this, because in the end I covered it all over, but at least it can serve as a reminder for myself. I now wish I had left it like that...

Right, so then I started to add several layers as a backdrop to the image and forgot to take further step by step photos, - usual story with me, I get so into the process that I totally forget about the old camera.
As you can see, I added the image (a black and white one from one of Nicecranes many wonderful Christmas Images) on top of several other layers. Here is a close up of the image
You can find all of his wonderful Christmas images HERE.

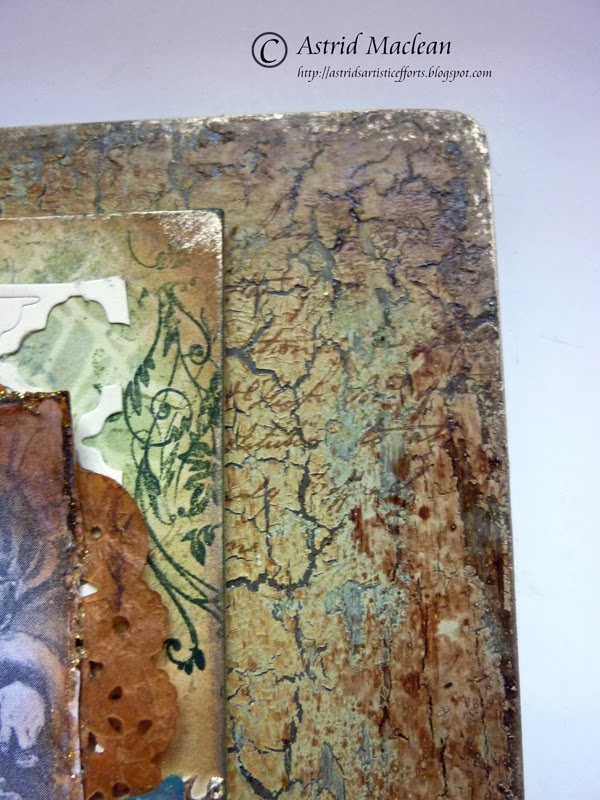
The wooden frame was altered in a very similar way: Texture added through stencils first, but this time I also wanted some crackle, so I painted it with Paper Artsy Fresco in French Roast, then added some Crackle Glaze and then did the top coat in a mixture of colours to blend with the background of my central panel.Finally the raised bits were highlighted with Treasure Gold in my all time favourite colour White Fire.

Here are some more close ups

The brown around the edges was done with some Tsukineko Walnut Stain, I also did some background stamping still. And as I was going over the top, it got a rather elaborate Flower cluster and beaded trim also still.

Well, there you have it, I am truly not sure whether I like it, but what is done is done and I will just have to live with it....

Hope you are finding some creative time and thank you for dropping in like always!

Related Posts Plugin for WordPress, Blogger...

One World One Heart

Photo

FEEDJIT Live Traffic Feed

Birthday Card

Birthday Card
Just got a whole lot of new stamps from a brilliant place called the Stamp Smith. This is the image that I first saw on Docraft and really liked. I asked the friend who has used it in an ATC, where she got it. Well she borrowed it from a friend who got it from ebay as a one off. But.... it had a title. I googled the title, and hey presto found the site. They have great stamps and offer a really friendly fast service. I highly recommend them!

Gothic Arch Trifold inside

Gothic Arch Trifold inside

Back of Gothic Arch Trifold

Back of Gothic Arch Trifold

Gothic Arch Within the Heart

Gothic Arch Within the Heart

Gothic Arch, the Key

Gothic Arch, the Key