Showing posts with label Distress Inks. Show all posts

Friday, 30 November 2018

Tag Friday at A Vintage Journey

Hello friends, welcome, can you believe it's the last day of November? Well it is and it's also the 5th Friday and that means it's Tag Friday at A Vintage Journey.

Since I am busy doing Christmas projects, I decided to do two tags, with one having been made into a card:


Both are made using the same set of stamps by Lynne Perrella by Paper Artsy LPCO16 
I'll give you a quick run down of how I put them together. Starting with the card:
I started with a large tag and stamped with Versafine Dove Grey, In inked around it with Distress Inks in Antique Linen, Stormy Sky Chipped Sapphire and Wilted Violet. I then painted over the stamped image with what I though was transparent silver Aqua Tint. Big mistake, the paint is not totally transparent and I lst most of the detail of the stamp, even though it gave me a lovely silvery shimmer.

So then I had to start the tedious task of putting some of the detail back in, using a black and white pen as well as a black and white Stabilo All pencil.. I also added some colour with a red and green pencil. (To be honest I actually quite enjoyed it, though it took a while)....

Finally I added the stars in the background using the little star layering stencil by Tim Holtz, using silver embossing paste and then sprinkling Vintage Platinum Distress Glitter while the paste was still wet.

For the tag I used the other main stamp in the set. I wanted some gold shimmer and this time thought I would add some gold Aqua tint to start with, then use my inks and stamp the image as the last step. Sadly the result was not much better, as again I lost a lot of detail which I then added in in the same way.

I added a strip with one of Tim's 3D Dresden trim dies and a little snow flake charm.
And this time finished the tag with some gold embossing paste, which like usual with anything shimmery I find almost impossible to capture on a photo.
Well, that's it for now, - if you like tags, do check out what my teamies have created for your inspiration by clicking HERE, and we would love it if you add any tags that you have made.

Thanks for your visit like always and happy crafting!
xxxxx

Tuesday, 1 May 2018

Small Notebook for the Mini Album Makers challenge

Hello friends, hope you are well and happy and Happy May!
I just recently returned from a trip to Australia and before I left I made myself a small notebook to take along and today I want to share with you how I made it:
I made the cover following various faux leather tutorials on youtube.
For those of you, who are new to this technique, this is how you go about it:
You will need:
Good quality Kraft card
A spray bottle
A bottle of Glycerine ( cheaply available from chemists)
An embossing folder
Distress Inks in brown tones (I used Vintage Photo and Ground Espresso), and if you want to add patina highlights you will also need a patina coloured art crayon (I used a Cracked Pistachio Distress Crayon).
1. start by making a mix of one part glycerine to approx 5 parts water in your spraybottle.
2. Cut your craft card to the desired size to fit around your notebook.
3. Spray your glycerine mix all over your card and then rub it in with your fingers. Do this on both sides. When it is well soaked in, crumble your card into a ball and then flatten it out again. Repeat this process about 3 times, making new creases each time and then rub over the creases with your chosen ink pad colour. It should now look something like this:

4. Fold your card in half and dry emboss each side with the help of an embossing folder. (I used a Spellbinders 3D embossing folder, but any folder will do).
5. Rub over the raised bits with your inkpad again and then spray lightly with water to make the ink run slightly.
6. If you decide to add some patina highlights, rub over some raised bits with your crayon. I chose  also to add a little metal embellishment that I also gave the patina treatment, and with that the cover was pretty much done.
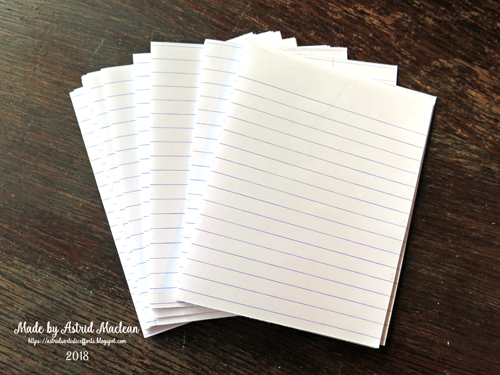
7. For my inside pages I chose to use simple note paper like this:
8. I chose the simplest, yet effective way of binding my pages together: Simply adhere the front of one folded page to the bottom of the next until you have the desired thickness.I would recomment using a glue runner or gluestick as wet glue would bubble thin papers like this too much.
9. Once you have you have your desired thickness of glued together pages, use some sports tape (again available from many chemists) to strengthen the spine of your pages and hold them all together. This is a trick I learnt from Birgit Koopsen who uses this binding method for her artjournal pages HERE is a link to a video where she shows exactly how to do it.
10. Now it's time to attach the cover to the pages: I simply folded my leather look cover around the inside pages and then glued the top page to the one side, and the bottom page to the other side. The final step was to cover those pages with some pretty design paper so that it is neat and firmly held in place..
The beauty of this way of binding a book is that there is absolutely no sewing involved and with thin writing paper like this there is no chance of the thread ripping the paper.
My little notebook is now filled with memories, notes and ideas.
Hope you like it, and if you ever want to create your own notebook, I highly recomment this method as it is really quick and easy to do.

Well, that's it for today's tutorial. We hope you will share your own books and ideas with us on the challenge blog, and meanwhile please take a peep at some of the albums my talented teamies have created and catch up on all the details of our challenge this month. Hope to see you there!
xxxxx

Friday, 10 November 2017

Back from Australia and Rubber Dance Bird album

Hello friends, welcome, specially also to all my new followers, thank you so much for being here!
Well, I have finally returned from Australia after nearly 3 months, and though I will miss my grand daughters a lot, it is also good to be back home again (and my craft space and supplies).

Today I am sharing the cover of a little book I made using the Sizzix Eileen Hull Mini Album die and some free stamps I received from Rubber Dance.
I decided to use this little album to keep photos of some of the amazing birds I saw in Australia. The stamps I used are from the Merry Magpie set, and there certainly are plenty of magpies there! Though in real life I much prefer all the other colourful birds that frequently visited the back yard where my son had built a little bird house. Anyway on to the project:
As you can see, - after cutting the actual album covers from matboard, I coloured them in various Distress Ink green tones. Next I took a  postage stamp die cut that was still flying around my craft desk and painted it with Decoart crackle paint.
Once the cracks appeared I painted it with dark brown acrylic paint and then rubbed Decoart white antiquing cream into the cracks.
I cut a piece of card coloured with blue shades of Distress inks for the background and then played with the various stamps in the set to decorate the rest of the panel.
 Apart from the sentiment that was stamped straight onto the background and then clear embossed, I stamped all of the other elements on separate bits of card, fussy cut, coloured  and then positioned them until I was happy with the composition.
These stamps are not my usual style but I had great fun playing them. All of the Rubber Dance stamps are great for all sorts of projects, be they cards, mixed media and specially also art journaling. If you don't know them yet do check them out.
Well, that's it for now, but before I leave I will just share a few of the photos I intend to keep in the album.


It's strange to jump from late Spring straight into late Autumn, here in Scotland it starts getting dark already just after 4, - that will take some getting used to again.... Anyway, thanks for visiting my little blog and I hope to be more active in blogland again and pay return visits just as much as I can.
xxxxx

Sunday, 13 August 2017

Nature Journal, the next installment

Hello friends and thanks for joining me here today. I have three more pages for my nature journal to share today:
Each of them somewhat different but all using the same materials: hotpress watercolour paper,  Distress Oxide Inks, normal Distress inks and a variety of stamps of course. On this occasion all colouring was done with Distress inks.
I'm not too fond of this one, I think it would have looked better in more monochrome colours, but with each of these pages I learn something new, and after all, that's what journaling is all about. The main sttamp is an older Stampendous one.
The bit I do like on this one, is the crackle effect. This was achieved by stamping with Antique Linen Distress Oxide ink and a crackle stamp (Indigoblu) on top of a darker background. This is the cool thing with these Doxides, because of the more opaque pigment ink in it, you can stamp light over dark!
The next one uses mostly normal Distress inks only, I was just playing around with different colours that I normally don't use very often, jsy to see the effect.
This is a rarely used stamp I have had in my stash for ages. I am not sure who made it.
Some twine and a few die cuts to add a bit more interest
For theis last one I used a Gabrielle Pollaco stencil and texture paste to add a bit mor interest to the background. The stamping of the flowers was done with different colours of Archival inks, Library Green and Plum. I added the white splats to lighten it all up a bit.
The patina effect highlights were done with Distress crayons, carefully putting the stencil back over the raised texture paste. I used Ranger texture paste, as it absorbs colour so well.

Well that's it for now. Each of the pages will be adhered to my nature journal Kraftcard insert, - you can see earlier posts of this journal here, here and here.

Thank you for your visit like always
xxxxx
Astrid

Monday, 24 July 2017

Nature Journal, installment 2

Hello friends, thanks for coming by.
Today I am sharing the first few pages of my new nature journal. If you missed the first installment, you can find it here.
The insert was made from kraftcard, the actual pages were all done on 180grm hotpress watercolour paper.
All of the pages were done  using two differnt stamps by Penny Black's new Poetic collection and were inspired by the work of two of their designers, Jill Foster and Micheline Jourdain, also known as Mimi. You can find their amazing work on Youtube HERE

I used a mix of watercolour paints, Distress Inks and watercolour brushmarker and pencils.
Here another version, using the same stamp. My plan had been to create some light summery creataions, but the weather here in Edinburgh where I live, has been so grey and gloomy, that all of them have turned out rather autumnal......


For the next two pages I added some more background stamping and subtle stenciling.
And below, the final one, probably the most autumnal of all.......


The background stamp on the top left here is a Michelle Ward stamp that I have had for years, I am so glad I rediscovered it, you can expect to see more of it in the future, - I always love it when I come across some old and forgotten stamps......

Anyway, that's it for today, thanks for your visit, and have a good week!
xxxxx

Thursday, 6 July 2017

three simple cards

Hello friends, thanks for dropping in! I don't make cards very often these days, but when I do they tend to be multi layered mixed media ones, which are not always suitable to give to more traditional friends. So today I am sharing three more "traditional" cards, needed for some up coming occasions:
I used my Tombow Markers and the Misty stamp tool for the flowers and Distress Inks for the backgrounds of all three of them.
For this one I used a Chocolate Baroque stamp I have had in my stash for ages.
The next one uses a rose stamp, and I can't remember who made it....

The last one uses a couple of Paper Artsy stamps and the butterfly is from a Tim Holtz set.

Not my usual style at all, but I had fun making them, digging out some rarely used stamps, and may well make more in the days to come.

Thanks for your visit like always and I hope the sun shines for you!!
xxxxx


Related Posts Plugin for WordPress, Blogger...

One World One Heart

Photo

FEEDJIT Live Traffic Feed

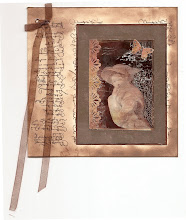
Birthday Card

Birthday Card
Just got a whole lot of new stamps from a brilliant place called the Stamp Smith. This is the image that I first saw on Docraft and really liked. I asked the friend who has used it in an ATC, where she got it. Well she borrowed it from a friend who got it from ebay as a one off. But.... it had a title. I googled the title, and hey presto found the site. They have great stamps and offer a really friendly fast service. I highly recommend them!

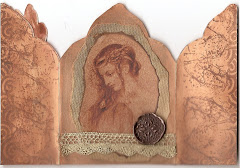
Gothic Arch Trifold inside

Gothic Arch Trifold inside

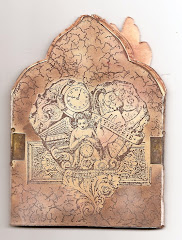
Back of Gothic Arch Trifold

Back of Gothic Arch Trifold

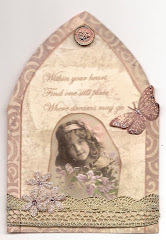
Gothic Arch Within the Heart

Gothic Arch Within the Heart

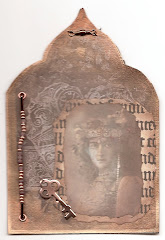
Gothic Arch, the Key

Gothic Arch, the Key