Friday 29 June 2018

Tag Friday at A Vintage Journey

Hello friends, it's a 5th Friday of the month and that means the team at A Vintage Journey are sharing tags they have made just for fun.
Here is mine:
I am heavily into junk journaling at the moment, so I created a tag that could be incorporated into my journal.

I'll give you a brief run down how I went about making my tag and then I'll show you how it fits into my journal.

So I started with a cast off tag after a session playing with my geli plate. I added some distress oxides using mostly blue tones and then did a few sprays with Distress Spray in Ground Espresso.
It was a bit too dark for my liking so I stamped a text background stamp in embossing ink and then embossed with Wow Opaque White EP.
I added some collage elements until I was happy with the way it looked, using some tea-dyed paper, ephemera scraps, washi tape a paper doll etc.
Below a few close ups, I think this style works best if you layers several layers of paper and tape over each other.
 I also rolled up some scraps of ephemera for the gypsy lady to sit on, I propped her up on the back with some bits of waste board.
I finished the back off also, as the tag will be fitted into my journal with washi, so both sides can be used and seen.
And here you can see how the tag fits into my Midori size journal. I call it my everyday journal, as I journal in it on most days.
Here you can see the front of the tag
The journal itself was decorated with more washi. Oh and if you are wondering, I always put a layer of clear gesso over my washi tapes, that way you can both stamp and stencil over it, and write on it easier too.
Here is the back with the right side page of the journal.
Alright, that's it for today, Thanks for dropping by and if you have not been yet, do check out the tags my teamies have created, plenty of inspiration there. All you need to do is CLICK HERE.
Have a great weekend
xxxxx

Wednesday 27 June 2018

Some tags and a bit of a ramble...

Hello friends, thanks for taking the time to drop in here! Today I am finally sharing the tags I made for my altered file folder that you can see in detail HERE
I actually made some more tags still, but I thought sharing just these 4 with a little detail was probably enough for one post......

As each of these tags has an image of a child on them, I want to dedicate them to the issue that has been on my mind almost constantly these last two weeks or so. The issue I am referring to is the one of what is happening in the United States around the separation of asylum seeking parents from their children. Of course I know that Trump reversed his policy and promised that the children would be returned to their parents. Well that was over a week ago and there are still more than 2000 children separated from their parents and no clear plans of how and when they will be returned. Thinking of these poor children and their parents makes me feel sick to the stomach, - I just feel so helpless in the face of this. If only I could give them all wings, like I did with some of the kids on these tags, so that they can fly back to their parents. Oh and by the way, all of these were created well before the horror of this tragedy broke in the news...

Anyway, sorry for the ramble and on to the tags....
This one is a size 8 tag that I ran through one of Tim Holtz's 3D folders. Next I coloured it with a mix of Distress Oxides and normal distress inks and to give it a bit more definition I then added just one spritz of Distress Spray in Ground Espresso.

I then took one of the paper dolls, paper pieced a hat and some wings on him and collaged him onto the tag in addition to some strips of washi tape. The final step was to add some shadow around him with a Stabilo All pencil.
The background to tag number two was created with the help of Distress paint, gesso, background stamping and stencilling with archival ink in Hickory Smoke.
The girl is a Paper Whimsy image that again I gave some wings and collaged onto the tag together with some fussy cut roses from one of the Prima collections plus some more washi tapes etc.
Tag number 3 again was run through a Tim 3D embossing folder, coloured with Antique  Linen and Vintage Photo Distress ink and some Distress Spray spritzt through a stencil. The little girl is of course another paper doll and the other collage elements were either stamped or cut from Tim Holtz paper collections.

The final tag is a size 10 tag. I started by stencilling with some Decoart Crackle paint. When it had crackled I added colour with Antique Linen Distress Paint, some Vintage Photo Distress Spray, some Decoart Antiquing Cream and some Ground Espresso Distress Crayon. I did some stamping around the edges and then finished it off with yet another paper doll and a couple of Tim die cuts plus some other bits and pieces from my collage box.

I love the effect of the crackle paste through the stencil. The darker shadows around the boy were created with the help of a brush dipped into the Ground Espresso spray bottle.

Well, that's it for today. I hope I have not upset anyone with my political ramble, I know I have quite a few American visitors and I firmly believe everyone should be allowed to their own opinion, so if some of you feel that what Trump did was right, I won't hold it against you.

Thank you for your visit and continued support
xxxxx

Saturday 23 June 2018

some good blogger news

Hello friends, this will be a very short post only. First of all, thank you to all those of you who commented on my last post, I promise I will keep posting here occasionally and it was good to hear others are also no fans of facebook....

I am still creating further decorated mail to go out to pen pals
All done in a very similar way. But the real reason I am posting here is because I have found a solution to the problem of not receiving comments left on your blog in your email.

My good friend, the wonderful Anne Redfern,  shared this with some of us who are on design teams with her. She has since also posted it on her blog, so I think many of you will have seen it already, but just in case you have not, this is what she wrote:
 If you have been having problems getting your Blogger comments via email, there is a solution which is working for me and many others too!  My dear friend Darnell posted the solution on her blog and I am sharing it here:

* Go to your dashboard
* Click on Settings
* Click on Email
* Delete your email address and click on 'Save Settings' in upper right
* Re-enter your email address and click on 'Save Settings' again
* You will then receive an email in your inbox from Blogger confirming that you want to subscribe
* Click on the underlined word 'Subscribe' in the email

Please share if you have other friends/Design Teams where this issue has been a problem.

Well, that's it from me, have a good weekend
xxxxx

Wednesday 20 June 2018

You've Got Mail...

Hi all
Hope life is treating you well! It's been rather quiet here, for two reasons, - one I've been busy with other things as you will see in a moment, but also, I have become rather tired of blogger and blogging to be honest. It really annoys me they have still not fixed the issue with comments no longer getting into our inbox, but also, writing a blog post takes so long... I much rather spent my time creating. And for sharing creations and getting inspiration from others? Well I thoroughly dislike Facebook even more, but I have recently grown to LOVE Instagram, which was the starting point really of today's post.

I have been hugely inspired by some of the amazing Instagram accounts with wonderful examples of mail art, pen-pal creations, travel journals etc etc. 

So recently I posted this photo on Instagram:
And asked whether anyone would like to receive one of these envelopes for their own journaling, swapping or pen-palling. Well, I got quite a number of requests, so set about creating all these envelopes:
Using washi tapes (a new addiction), vintage book pages, home made and purchased stickers, stamping, stencilling etc. It was so much fun:
Below a few more details and close ups:
Each envelope had a piece of tea dyed and hand stamped paper.
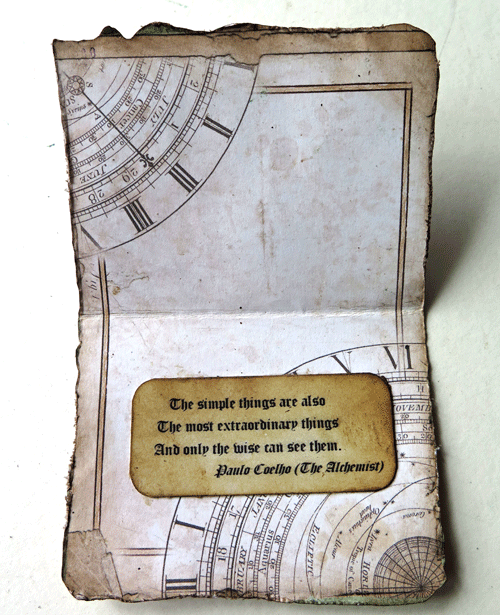
A little booklet like this, with two little pockets inside to hold some washi tapes.

A little bag, either  from clear Glasine or Kraft Glasine paper (the stuff Tim Holtz brought out years ago and was hiding in my stash).


Each little bag was filled with a collection of home made stickers, real and home made postage stamps, little tags and some wax seals, another new passion of mine.....(making them that is).
I printed the flower and rose papers and then fussy-cut them. I also printed some on tissue paper and then made the little stamps (using the Tim Holtz stacked postage stamp dies)
And finally a little blank greeting card with a home made stamp of sorts they can use either as a keepsake or send on to others.

Well it was a lot of work but I had lots of fun. I have decided to added this project to two different challenges:
Art Journal Journey, where the theme this month is Inspired by, and this whole project was inspired by Instagram
And Frilly and Funkie, where the theme is By Airmail. The theme was just so perfect for this and a lot of these envies actually went by airmail!

Well, that's it for now, thank you for taking the time to visit, have a great week and I would love to know your thoughts on the different social media platforms such as blogger, Facebook and Instagram.
Happy Creating
xxxxx

Friday 15 June 2018

Extensive file folder tutorial

Hello lovely visitors, thanks for dropping in.
This is just a very quick post to let you know that today I have a full tutorial on the Vintage Journey Blog, walking you through in detail how to create file folder booklets like some of the ones I have been showing here over the last few weeks. The one I am showing is the one I made for the challenge on the 1st of June:
If you want to get all the details, just click here
xxxxx

Monday 11 June 2018

Alchemy

Hello friends and thanks for taking the time to drop in! Today I have a project to share using one of my all time favourite paper collections, Alchemy, from Stamperia.
It's yet another altered file folder, I love making these. This one is meant for a friend I am going to see later today, so fingers crossed she will like it.
The front is decorated using some stencils, some dry embossed bits, a cut out from the paper collection and a little metal charm.
I think the stencil is from Kaisercraft, I stencilled with texture paste and then sprinkle Seth Apter's Patina Oxide powder into the wet paste and then heat set it. I then highlighted it all a bit with a Cracked Pistachio Distress Crayon.
The words were stencilled just with the Distress Crayon and all the other elements were highlighted with Treasure Gold in Copper.
Here is the first double page and pockets, almost entirely decorated with fussy cut elements from the collection.
There are two double pages in this booklet, so this is the second one.

I created different elements to go into the pockets:
The first pocket holds this little booklet that has another pocket inside
Inside that pocket is a little folded card that has one of several quotes I added to the booklet.
All the quotes are from Paulo Coelho's book The Alchemist, one of my favourite books of all time.
The next pocket holds a slightly larger folded card with another quote inside.
The next  pocket holds a larger card with a quote on the back side of it.
And finally the last pocket has a bookmark again with an inspirational quote printed on the back:
I kept the back of the booklet really simple, just using the same paper as the front and adding one of the lovely cut apart images from the collection:
I embossed the edge of it with a mix of the Patina Oxide and Rust Baked Texture powders, just to make it stand out a bit.
The booklet closes with the simplest of closures, just a little clip to which I attached a couple of charms, and that was pretty much it.

Hope you are all having a good week, and thank you so much for dropping in,
xxxxx

Related Posts Plugin for WordPress, Blogger...

One World One Heart

Photo

FEEDJIT Live Traffic Feed

Birthday Card

Birthday Card
Just got a whole lot of new stamps from a brilliant place called the Stamp Smith. This is the image that I first saw on Docraft and really liked. I asked the friend who has used it in an ATC, where she got it. Well she borrowed it from a friend who got it from ebay as a one off. But.... it had a title. I googled the title, and hey presto found the site. They have great stamps and offer a really friendly fast service. I highly recommend them!

Gothic Arch Trifold inside

Gothic Arch Trifold inside

Back of Gothic Arch Trifold

Back of Gothic Arch Trifold

Gothic Arch Within the Heart

Gothic Arch Within the Heart

Gothic Arch, the Key

Gothic Arch, the Key