Showing posts with label Shabby Chic. Show all posts

Tuesday, 9 February 2016

3 different cards for 3 different friends...

Hello everyone and lovely to see you here.
Three of my friends have not been very well lately, so I thought it was high time to send them a card and let them know I am thinking of them....
I set myself the challenge to use similar stamps and colours, yet make 3 very different cards.
I'll take you through them briefly one by one.
This one is very much a mixed media card. The background was card, cover with gesso, strips of book paper and tissue tape, stencilling using one of Seth Apters super cool stencils and when everything was dry another thin layer of watered down gesso and then coloured with a mix of sprays and Distress inks and a bit of gelatos. As you can see I also added some background stamping with the Tim Holtz ledger stamp
The focal image (La Blanche) was stamped on tissue paper and when dry I sprinkled on some embossing powder, which when melted added some further subtle textures.

I finished it all with some hearts and sentiments etc.
The hearts and words are from a Finnabair set, stamped, fussy-cut and coloured with Distress Inks in Antique Linen, Scattered Straw and gelatos.
For card number 2 I created a background panel, stamped with Picket Fence Distress paint and the Tim Holz Distress Damask stamp and then inked with Antique Linen, Vintage Photo and Ground Espresso. Cut it into 3 strips and then mounted on white card.

The centre frame is a Sue Wilson die and matching stamp set (the background bit). The bee is another La Blanche stamp cut with one of the Sue Wilson dies in the set and then I added a crackle effect with an Indigo Blu crackle stamp.
To give it more of a shabby chic feel I added some flowers and leaves from my stash, coloured in matching colours and high lighted with Treasure Gold.
Finally a somewhat simpler textured card. The background was created in a similar way as card number 1, obviously using a different stencil. The focal image is the same too.

Well, that's it for today, thanks for your visit like always, happy crafting!

Monday, 23 November 2015

Shabby chic Christmas

Hello all and thanks for dropping in! Today it is my turn to show a project over at the Countryview Challenge blog. I have made another Christmas card, this time more shabby chic in style.

I had actually planned to just make a tag, so this card started with a size 10 manilla tag.
I stencilled three snow flakes using the Tim Holtz snowflake layering stencil using texture paste. Once the paste had dried I coloured the tag with Shaded Lilac and Blueprint Sketch Distress Inks.
I deepened the colour with some Chipped Sapphire Distress Stain Spray and inked around the edges with Ground Espresso DI then did some background stamping with a text stamp.
At this point I decided I was going to turn the tag into a card, so I took a piece of scrapbook paper, cut it somewhat larger than the tag, inked around the edges with Blueprint Sketch and then adhered my tag. I also glued two bit of lace along the side.

Next I selected some flowers, leaves and berries from my stash and gave them a coat of gesso. When the gesso had dried I used a hot glue gun to create a cluster and arranged it over the lace
I also adhered a little resin bird over the hole in my tag and added a little red berry sprig for a patch of colour.
Here is a close up of the flower cluster.

I added a little sentiment by stamping and fussy cutting a ticket from the Tim Holtz Odds and Ends set, then all I needed to do was mat and layer my card and it was done.

Well, it's only just over a month until the big day, so I am glad I can tick another card of my list.
Thanks so much for visiting today, and don't forget, there are still a few days left to enter our challenge at Countryview Crafts!

Wednesday, 3 June 2015

Shabby Butterfly album cover

Hello everyone. Over at the Countryview Challege blog our theme this month is Shabby Chic. For my second project this month I altered a wooden butterfly album cover.
The wooden butterfly started out looking like this:
I covered it in gesso and added some stencilling with a Crafters Workshop stencil:
I also added some crackle paste in places, for the inevitable crackle that I love on projects like this:
I then added colour with various Decoart Media Fluid Acrylics until I was happy with the result. I also used some white Antiquing Cream to add to the shabby feel of it.
The flowers cluster was created on top of a Tim Holtz Mixed media die cut. I also added some cheese cloth, a little stamped butterfly, some twine and a pen nib. The flowers were coloured with the same paints and edged with a bit of gesso and some treasure gold.
The sentiment iS from the Tim Holtz Small Talk stickers and that is pretty much it.
Thank you so much for dropping in today, I always really appreciate your visits and if you like Shabby Chic, do check out our challenge and play along!

Monday, 1 June 2015

Shabby Chic for Countryview Crafts

Hello everyone and thanks for dropping in! Yay, it's June, the month summer is supposed to start, the month of light and warmth (we all hope) and often the month of weddings!
Over at the Countryview Crafts Challenge blog the theme is Shabby Chic and for my first project I created a Shabby Chic card that could be used as a wedding card:
The base of the card is a deckle edge card blank. I then added several layers of stamped and stencilled card, distressed at the edges.
Here you can see just a bit of it, I used the Tim Holtz Lattice Work stencil, still one of my favourites.
I stamped a little postcard, a ticket and a butterfly and distressed them to make them look old. I also used one of the Tim Holtz Mixed Media die cuts underneath my flower cluster.
The flowers themselves were made with the Heartfelt Creations Ariana Blooms flower dies. The word Blessings was one of the Tim Holtz larger size Chit Chat stickers, I just snipped into it to make it look like a little banner.
Well, that is it, happy June to you all and I hope you'll take the time to hop over to the Countryview Crafts Challenge blog, to see all the beautiful Shabby makes my team mates have created and hopefully you'll feel inspired to play along.

Thank you for visiting right now and I will be back later in the day with another project. This time for Mixed Media Monthly.
Have a good week and a good month!!
xxx


Tuesday, 13 August 2013

Enjoy the Journey Shabby Chic Style

Hello everyone and happy Tuesday!
Today it's my turn for another project over at the Artistic Stamper Creative Team blog
I made a Wall Plaque Shabby Chic Style
For details on how I put it all together, please click HERE  and if you like it I would love it if you left me a comment there.
Happy Crafting and thanks for your visit like always!


Related Posts Plugin for WordPress, Blogger...

One World One Heart

Photo

FEEDJIT Live Traffic Feed

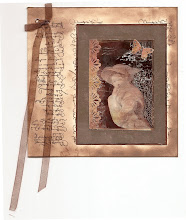
Birthday Card

Birthday Card
Just got a whole lot of new stamps from a brilliant place called the Stamp Smith. This is the image that I first saw on Docraft and really liked. I asked the friend who has used it in an ATC, where she got it. Well she borrowed it from a friend who got it from ebay as a one off. But.... it had a title. I googled the title, and hey presto found the site. They have great stamps and offer a really friendly fast service. I highly recommend them!

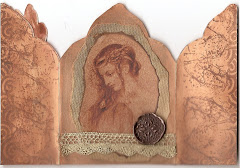
Gothic Arch Trifold inside

Gothic Arch Trifold inside

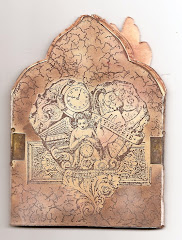
Back of Gothic Arch Trifold

Back of Gothic Arch Trifold

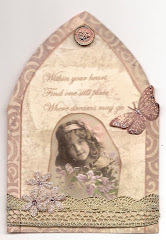
Gothic Arch Within the Heart

Gothic Arch Within the Heart

Gothic Arch, the Key

Gothic Arch, the Key