Showing posts with label Mini Album Makers challenge. Show all posts

Sunday, 1 July 2018

For the love of snail mail

Hello friends and happy July! It's the first of the month and that means we have a new challenge starting over at the Mini Album Makers Challenge blog.
Like always you can add any type of book or album to the challenge and our sponsor this month is Lindy's Stampgang.

My project this month is a correspondence folder:

I have fallen in love with sending letters by snail mail, but this particular project is actually meant for a friend.

It all started with a modest old manilla file folder. Regulars will know that I have used these a lot lately, but I just love how these folders are so versatile and can be used in so many ways.

Here is a view of the inside, so you can see where it is going:


I'll give you a brief run down of how I put it together:
I started by cutting off the tabs and then cut off a piece as you can see on the photo. The bit on the right side will be folded up to create a pocket.
I will also add a vertical pocket on the left. Above you can see the hinges I cut from the left overs of the folder to make the pockets deeper.

I decided to cover the outside of the folder in calico fabric and used mat medium to do so.
I also added a bit of lace over the spine and coloured the fabric with Vintage Linen Distress Spray.
I made sure to cut the fabric large enough so it would fold over the edges, and as you can see, the inside at this stage still looks terrible, but that will soon be remedied with some pretty  paper. The pocket on the right at this point has not yet been attached. That will happen when the rest of the inside will be covered with design paper. The paper I chose was from 49andMarket.
Here you can see what it now looks like from the inside. I adhered the paper using strong double sided tape as that stops the paper from bubbling or warping. I had these to metal tab things in my stash so decided to use them as decoration, though they have little pull handles, they really serve no purpose....
In this photo you can hopefully see how the hinges I showed above are used to add depth to the pockets.

Alright, now for the contents. As this is a correspondence folder it obviously needed some writing paper and envelopes.
My latest passion is using wax seal stamps, so I held the paper and envelopes together with some ribbon and a wax seal, like you sometimes see in posh wedding stationery.
Here you can see how the paper and envelopes fit neatly into the pockets.
One of the things I like about altering these file folders is that they have multiple scores on their spine, which gives them enough depth the create hinged pockets that will hold things like envelopes.
The front of the folder was further decorated with some rice paper scraps and another wax seal and that was pretty much it.

Don't forget to go over to our challenge blog and see the amazing albums my team mates have created and if you love making books, journals or minis please share them with us over there.

Thank you for your visit like always and have a fantastic month of July!
xxxxx

Friday, 1 June 2018

One stamp and hidden bookrings, a mini for the MAM challenge

Hello friends and welcome to another post for MAM or the Mini Album Makers challenge blog.
It's the first of the month, so that means a new challenge is starting and like always we would love you to share your albums or handmade books of any kind. Our sponsor is no other than Stencilgirl with a fab prize to win, so do come and check it all out!
The idea for this album came when I noticed that the old Sizzix Vintage Cabinet Card Bigz die, was just a little larger than the new stacked thinlets dies of the same shape. So that meant I could cut the covers from mount board using the Bigz die and then the inner pages using the largest of the stacked thinlets.
The next idea I had was to just use one stamp (I chose the Glorious Bouquet by Tim Holtz). It is very large, so I could use different corners and colour in different ways. I also decided to use book rings to make it possible to add pages to the album over time if I want to.


Here you can see the front and the back. As I don't particularly like the look of large bookrings sticking out of the spine, I was delighted to find a video showing how you can construct a book where the bookrings are hidden. I adapted the way I made mine, but if you are interested, HERE is a link to the original video I saw. And below a short desciption of what I did:
Line up your cover with the spine in the middle as shown. As you can see I had cut holes in my covers already before deciding on the different binding, but as they are going to be covered with design papers anyway, that did not matter.
I used small 20 mm book rings, make sure your holes are just over half the distance apart (so in my case 10 mm), for the rings to fit through easily.

Here you can see the rings in place just to show you, before I attached the covers with the help of double stick tape and design tape as shown in the video.
the outside once covered with paper and tape

the inside


I used papers from the Memoranda paper stash by Tim and cut the papers using the same Bigz die obviously.
Now to the inside pages, they don't need much description, I stamped different corners of the stamp in different coloured Archival Inks etc and then coloured the flowers mostly with my Prisma coloured pencils and then used distress oxides and normal distress inks, plus some background stamps and stencils for the backgrounds. I'll let the photos tell the story...


And here a double page in situ, - there is a bit of a seasonal theme going on here, which was not necessarily planned, but the stamp is so versatile and can be used in so many different ways. I have more pages pre stamped, but I thought this was plenty to show you for this time.

Now for the spine: To cover the rings, I simply added some additional design tape and lace over the rings on the outside, made a couple of little charms to add and that was pretty much it.

Well, that's it for today, - hope you will have a wonderful month of June with lots of sunshine in it anad do head over to our challenge blog to see the amazing books my teamies have created and get all the details of our challenge!

Tuesday, 1 May 2018

Small Notebook for the Mini Album Makers challenge

Hello friends, hope you are well and happy and Happy May!
I just recently returned from a trip to Australia and before I left I made myself a small notebook to take along and today I want to share with you how I made it:
I made the cover following various faux leather tutorials on youtube.
For those of you, who are new to this technique, this is how you go about it:
You will need:
Good quality Kraft card
A spray bottle
A bottle of Glycerine ( cheaply available from chemists)
An embossing folder
Distress Inks in brown tones (I used Vintage Photo and Ground Espresso), and if you want to add patina highlights you will also need a patina coloured art crayon (I used a Cracked Pistachio Distress Crayon).
1. start by making a mix of one part glycerine to approx 5 parts water in your spraybottle.
2. Cut your craft card to the desired size to fit around your notebook.
3. Spray your glycerine mix all over your card and then rub it in with your fingers. Do this on both sides. When it is well soaked in, crumble your card into a ball and then flatten it out again. Repeat this process about 3 times, making new creases each time and then rub over the creases with your chosen ink pad colour. It should now look something like this:

4. Fold your card in half and dry emboss each side with the help of an embossing folder. (I used a Spellbinders 3D embossing folder, but any folder will do).
5. Rub over the raised bits with your inkpad again and then spray lightly with water to make the ink run slightly.
6. If you decide to add some patina highlights, rub over some raised bits with your crayon. I chose  also to add a little metal embellishment that I also gave the patina treatment, and with that the cover was pretty much done.
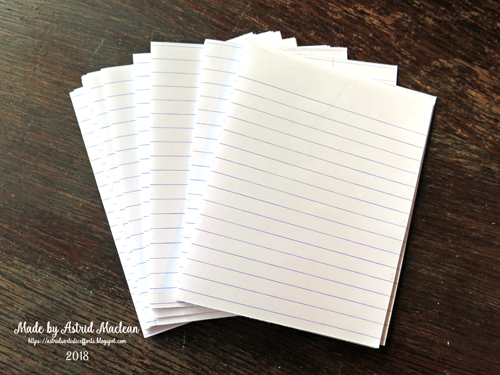
7. For my inside pages I chose to use simple note paper like this:
8. I chose the simplest, yet effective way of binding my pages together: Simply adhere the front of one folded page to the bottom of the next until you have the desired thickness.I would recomment using a glue runner or gluestick as wet glue would bubble thin papers like this too much.
9. Once you have you have your desired thickness of glued together pages, use some sports tape (again available from many chemists) to strengthen the spine of your pages and hold them all together. This is a trick I learnt from Birgit Koopsen who uses this binding method for her artjournal pages HERE is a link to a video where she shows exactly how to do it.
10. Now it's time to attach the cover to the pages: I simply folded my leather look cover around the inside pages and then glued the top page to the one side, and the bottom page to the other side. The final step was to cover those pages with some pretty design paper so that it is neat and firmly held in place..
The beauty of this way of binding a book is that there is absolutely no sewing involved and with thin writing paper like this there is no chance of the thread ripping the paper.
My little notebook is now filled with memories, notes and ideas.
Hope you like it, and if you ever want to create your own notebook, I highly recomment this method as it is really quick and easy to do.

Well, that's it for today's tutorial. We hope you will share your own books and ideas with us on the challenge blog, and meanwhile please take a peep at some of the albums my talented teamies have created and catch up on all the details of our challenge this month. Hope to see you there!
xxxxx

Sunday, 1 April 2018

Tag wallet for Minialum Makers

Hello friends and happy April and as it is Easter today, also Happy Easter to those of you who celebrate it!
I have been spending quite a bit of time playing with my Geli Plate and for this months challenge decided to create a tag wallet where I can keep  all my samples. I shall show those at the end of this post, but first let me try and explain how I made it:
For the basic structure of your wallet you will need two tags for the front and the back (I used the small size 8, but you can of course use any size).
You will also need two strips of card folded accordian style as you can see in the photo above.They need to be about half the height of your tags, and the length can be as long as you choose, depending in the number of folds you want, and how wide apart you make your folds. Mine are 1/2 inch apart,and as I have 10 slots the width was 12" to leave me some space on either side to glue to my tags, I hope the photo below makes clear how to do that.
This is the first strip, the second one goes on the other side so you land up with it looking like the photo below.
As you can see there is a gap at the end, so you should make a spine to fold around that.
My spine looks like this, but you can of course make it as wide or narrow as you want, depending on how fat you want your folder to be.
Here you can see that the gap at the bottom is now covered, - it's a good idea to keep it in place while your glue is drying with some little clips. Below you can see what it will look like from the side:
So this is the basic structure of your album. I now took two more tags and decorated them to make the front and the back. I used texture paste, stencils, inks and sprays and decorated them with flowers etc.
Here is the front:
And here the back
I used a bit of seam binding ribbon to close my wallet.

Alright, now to the little tags that fit inside:
I had great fun playing with different colour combinations and stencils put on the geli plate.
Here is a close up of a couple of them:
After I had done the basics with the help of the geli plate, I decided to work on them further with more stencils, inks and doodling, so this is what they look like now:
Most of the stamps are older Tim Holtz ones. I even took out my old sewing machine and did some messy stitching around most of them. Finally a few close ups of some of my favourites:


Alright, that's it, - thank you for staying with me through this very long post! We hope many of you will join us for our challenge again this month, all you need to do is create an album, mini or handmade book in any style. Our sponsors this month are Gypsy Soul lazercuts and you could win a fabulous prize pack! Just click HERE for all the details and to see the wonderful labums my teamies have created.
Have a wonderful month!
xxxxx

Related Posts Plugin for WordPress, Blogger...

One World One Heart

Photo

FEEDJIT Live Traffic Feed

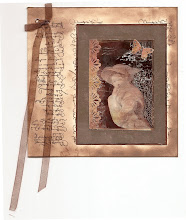
Birthday Card

Birthday Card
Just got a whole lot of new stamps from a brilliant place called the Stamp Smith. This is the image that I first saw on Docraft and really liked. I asked the friend who has used it in an ATC, where she got it. Well she borrowed it from a friend who got it from ebay as a one off. But.... it had a title. I googled the title, and hey presto found the site. They have great stamps and offer a really friendly fast service. I highly recommend them!

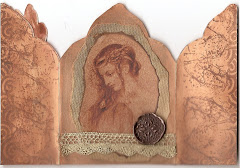
Gothic Arch Trifold inside

Gothic Arch Trifold inside

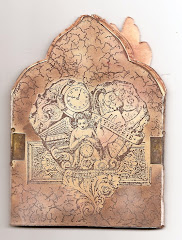
Back of Gothic Arch Trifold

Back of Gothic Arch Trifold

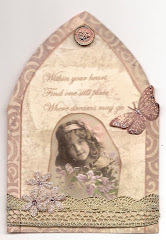
Gothic Arch Within the Heart

Gothic Arch Within the Heart

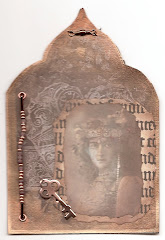
Gothic Arch, the Key

Gothic Arch, the Key