Showing posts with label Tim Holtz.. Show all posts

Tuesday, 1 May 2018

Small Notebook for the Mini Album Makers challenge

Hello friends, hope you are well and happy and Happy May!
I just recently returned from a trip to Australia and before I left I made myself a small notebook to take along and today I want to share with you how I made it:
I made the cover following various faux leather tutorials on youtube.
For those of you, who are new to this technique, this is how you go about it:
You will need:
Good quality Kraft card
A spray bottle
A bottle of Glycerine ( cheaply available from chemists)
An embossing folder
Distress Inks in brown tones (I used Vintage Photo and Ground Espresso), and if you want to add patina highlights you will also need a patina coloured art crayon (I used a Cracked Pistachio Distress Crayon).
1. start by making a mix of one part glycerine to approx 5 parts water in your spraybottle.
2. Cut your craft card to the desired size to fit around your notebook.
3. Spray your glycerine mix all over your card and then rub it in with your fingers. Do this on both sides. When it is well soaked in, crumble your card into a ball and then flatten it out again. Repeat this process about 3 times, making new creases each time and then rub over the creases with your chosen ink pad colour. It should now look something like this:

4. Fold your card in half and dry emboss each side with the help of an embossing folder. (I used a Spellbinders 3D embossing folder, but any folder will do).
5. Rub over the raised bits with your inkpad again and then spray lightly with water to make the ink run slightly.
6. If you decide to add some patina highlights, rub over some raised bits with your crayon. I chose  also to add a little metal embellishment that I also gave the patina treatment, and with that the cover was pretty much done.
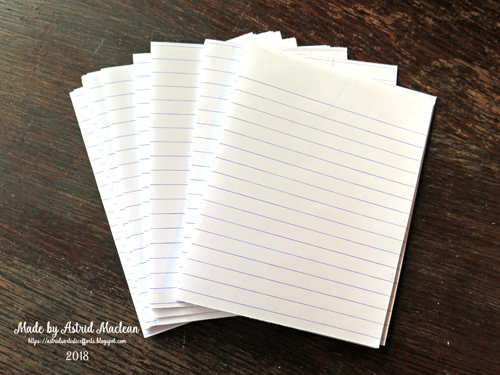
7. For my inside pages I chose to use simple note paper like this:
8. I chose the simplest, yet effective way of binding my pages together: Simply adhere the front of one folded page to the bottom of the next until you have the desired thickness.I would recomment using a glue runner or gluestick as wet glue would bubble thin papers like this too much.
9. Once you have you have your desired thickness of glued together pages, use some sports tape (again available from many chemists) to strengthen the spine of your pages and hold them all together. This is a trick I learnt from Birgit Koopsen who uses this binding method for her artjournal pages HERE is a link to a video where she shows exactly how to do it.
10. Now it's time to attach the cover to the pages: I simply folded my leather look cover around the inside pages and then glued the top page to the one side, and the bottom page to the other side. The final step was to cover those pages with some pretty design paper so that it is neat and firmly held in place..
The beauty of this way of binding a book is that there is absolutely no sewing involved and with thin writing paper like this there is no chance of the thread ripping the paper.
My little notebook is now filled with memories, notes and ideas.
Hope you like it, and if you ever want to create your own notebook, I highly recomment this method as it is really quick and easy to do.

Well, that's it for today's tutorial. We hope you will share your own books and ideas with us on the challenge blog, and meanwhile please take a peep at some of the albums my talented teamies have created and catch up on all the details of our challenge this month. Hope to see you there!
xxxxx

Wednesday, 1 April 2015

Colour your world for Our Creative Corner

Hello everyone and thanks for dropping in. Happy April and happy April Fool's Day to you.
This is my second project for today, the first one can be seen HERE.

As it so happens, this will be my last project for OCC, as I have decided it is time for me to move on. But if you visit the blog there, you will see there are many amazing design team members, old and new left!

Well, there you are, - April already, and for us in the Northern Hemisphere that means Spring should be well and truly on it's way.

The lovely Laurie is our host at Our Creative Corner, and this is what she had to say about her challenge:
Here in the United States we are coming into spring - the season when nature comes forth with new life.
Soft green grasses grow in the fields and the trees bloom in glorious colors with the promise of fruit.
Tulips and daffodils emerge from the soil after a long winters nap.
The colors of spring, the sights and sounds of nature at this time of the year renews my soul.
In the spring time the colors of nature are different around the world.
For my challenge this month I want you to

Color Your World

For this challenge create a project with the colors of spring time where you live.

Show us what colors renew your soul
Well, for me the colours I associate with Spring are green and yellow with possibly a hint of blue and purple, and I decided to make colour the main focus of my project:
It's a large card for my best friend, whose birthday is on the 7th of April.
The background was created with a piece of watercolour paper and Tim Holtz Distress Stain Sprays, some Aquatint Gold and I used the clingfilm technique, a favourite of the moment.
The focal images are created with a scrap of a paper serviette, adhered with matte gel medium,
 and one of the two butterflies from Tim's new Butterfly Duo that come with their own embossing folder.
It too was cut from water colour paper treated with the same technique and then I darkened it a bit with Decoart Quin. Gold fluid acrylic paint.
What I like about the cling film technique is that it often creates leaf like patterns, and no two pieces are ever the same.


The sentiment was stamped on a scrap of scrapbook paper with the help of the new Ken Oliver peg stamps. These are so clever as they click together, making it much easier to get the spacing right.
Here in Scotland, April often only gives us promises of Spring to come, so it seemed like an apt sentiment.

Well, that's it for now, but I will be back later in the day with my third project. These firsts of the month are always busy with so many new challenges starting.....

Hope you will have a great month, and thank you for visiting!!

Friday, 28 March 2014

Tim Tower ATB

Hello everyone and thank you for dropping by here.
Today I want to share a set of Artist Trading Blocks (ATBs) which I made with the help of the wonderful die designed by Eileen Hull for Sizzix.
These are so easy and quick to put together once you have the die, and of course with each cube having 6 sides, there is lots of fun in creating the different sides. I cut mine from grey chipboard, though I have since found the die even cuts mount board really easily. I put them together with strong score tape and then painted the edges black with a black paint dabber. After some trial and error, I found out these dies are designed to cut thick material like chip board. I tried it first with Kraft card, but you don't get the fold lines then, as it is too thin. I know some of you have been wondering about whether you need a crease pad, and no, you don't for this die.

4 main sides of the largest cube


I mainly used Tim Holtz papers, stamps, paints and inks etc to decorate my different cubes. But I also used a few bits from the Papermania Madame Payraud's paper line. I think they combine perfectly with the Tim papers, as in many ways they are similar in style.

Second largest cube, as you can see I also used chit chat stickers and tissue tape.

And the smallest cube. The Tim Holtz mini stamps are the perfect size for these.

These dies are so versatile and of course you can make them in any style you like of course. If you leave one side open, they also could make super little boxes.
I left the top and bottom of each cube pretty plain, just covering them with some paper and inking around the edges, but I made this little heart with the help of a mold for the very top. I made the actual heart out of a mix of Uteeh and various colours of Frantage and then coloured it with Distress Paints (Broken China and Frayed Burlap) and highlighted with a bit of Treasure Gold in Renaissance gold.
Sorry about this blurry picture, but here you get a bit more of an idea about the size of the different cubes in relation to one another.The largest of the cubes is 3" by 3". 

I have some more cut out and am definitely going to make more, they are so much fun.

Thank you for visiting and I really, really appreciate all the lovely comments you always leave me!

Related Posts Plugin for WordPress, Blogger...

One World One Heart

Photo

FEEDJIT Live Traffic Feed

Birthday Card

Birthday Card
Just got a whole lot of new stamps from a brilliant place called the Stamp Smith. This is the image that I first saw on Docraft and really liked. I asked the friend who has used it in an ATC, where she got it. Well she borrowed it from a friend who got it from ebay as a one off. But.... it had a title. I googled the title, and hey presto found the site. They have great stamps and offer a really friendly fast service. I highly recommend them!

Gothic Arch Trifold inside

Gothic Arch Trifold inside

Back of Gothic Arch Trifold

Back of Gothic Arch Trifold

Gothic Arch Within the Heart

Gothic Arch Within the Heart

Gothic Arch, the Key

Gothic Arch, the Key