Showing posts with label Geli Plate. Show all posts

Sunday, 1 April 2018

Happy Easter for Mixed Media Monthly

Hello friends, Happy Easter, hope you will have a fanatastic day if you celebrate this festival and in any case happy April!
I have created a super large (# 12) tag for the challenge and to wish you all a happy Easter! Our challenge theme this month is a colour challenge, and here is the graphic:
As you can see it is a complementary colour challenge and I decided to go with yellow and purple.
The initial background to my tag was a geli print. I then added further colours, some background stamping and I distressed the edges with a dark brown gelato.
The sentiment was computer generated, here you can also just see a little more of the original geli background. (I used a mix of Paperartsy and Decoart luid Acrylic paints, plus some stencils).
The focal thistle stamp is by Art Journey, I have had it on my wishlist forever and finally ordered it all the way from Holland. 
The rest of the tag was embellished with one of Tim Holtz's Botanical ephemera and some bits and pieces from the Prima Lavender collection.
Well, that's pretty much it, - I hope you will decide to play in our challenge and show us your colourful mixed media pieces and meanwhile check out what my teamies have made by clicking HERE, and remember if you decide to play do add our graphic to your post.
Happy creating and thanks for your visit
xxxxx

Tag wallet for Minialum Makers

Hello friends and happy April and as it is Easter today, also Happy Easter to those of you who celebrate it!
I have been spending quite a bit of time playing with my Geli Plate and for this months challenge decided to create a tag wallet where I can keep  all my samples. I shall show those at the end of this post, but first let me try and explain how I made it:
For the basic structure of your wallet you will need two tags for the front and the back (I used the small size 8, but you can of course use any size).
You will also need two strips of card folded accordian style as you can see in the photo above.They need to be about half the height of your tags, and the length can be as long as you choose, depending in the number of folds you want, and how wide apart you make your folds. Mine are 1/2 inch apart,and as I have 10 slots the width was 12" to leave me some space on either side to glue to my tags, I hope the photo below makes clear how to do that.
This is the first strip, the second one goes on the other side so you land up with it looking like the photo below.
As you can see there is a gap at the end, so you should make a spine to fold around that.
My spine looks like this, but you can of course make it as wide or narrow as you want, depending on how fat you want your folder to be.
Here you can see that the gap at the bottom is now covered, - it's a good idea to keep it in place while your glue is drying with some little clips. Below you can see what it will look like from the side:
So this is the basic structure of your album. I now took two more tags and decorated them to make the front and the back. I used texture paste, stencils, inks and sprays and decorated them with flowers etc.
Here is the front:
And here the back
I used a bit of seam binding ribbon to close my wallet.

Alright, now to the little tags that fit inside:
I had great fun playing with different colour combinations and stencils put on the geli plate.
Here is a close up of a couple of them:
After I had done the basics with the help of the geli plate, I decided to work on them further with more stencils, inks and doodling, so this is what they look like now:
Most of the stamps are older Tim Holtz ones. I even took out my old sewing machine and did some messy stitching around most of them. Finally a few close ups of some of my favourites:


Alright, that's it, - thank you for staying with me through this very long post! We hope many of you will join us for our challenge again this month, all you need to do is create an album, mini or handmade book in any style. Our sponsors this month are Gypsy Soul lazercuts and you could win a fabulous prize pack! Just click HERE for all the details and to see the wonderful labums my teamies have created.
Have a wonderful month!
xxxxx

Thursday, 8 March 2018

Geliplate fun

Hello lovely visitors. After watching some videos on youtube I decided to dig out my geli plate and have some fun making backgrounds. I had a couple sessions and landed up with a bunch of prints, but then, what to do with them all?

Well another video by Kate Crane gave me some ideas and here are the results:
I used Paper Artsy and Decoart Media paints, stencils and stamps, and with one of my prints created these 3 cards. There will no doubt be many more projects to follow, so stay tuned...
I added some more stamping (the heart is a Finnabair stamp which I fussycut), some messy stitching, some washi tape and some words computer generated. The cards are tiny only 3 x 3 and then double matted on manila crd stock to make the fiished cards 4 x 4".
Here basically exactly the same idea, some further stencilling and stamping scraping with a credit card and just having some messy fun.

And here finally a third one. These little cards will be handy for quick gifts and will also be easy to send through the post, always a good thing. While I was at it, I made some matching envelopes. As I had used some of the Prima Lavender collection to embellish my cards, I used some more of those papers to make the envies.


Well, that's it for now, - hope you are all having a good week, and thanks for your visit like always!
xxxxx

Friday, 2 February 2018

Melt it! A Valentine's project for A Vintage Journey #62

Hello friends, - busy days here at the moment....
Today I am sharing a project for A Vintage Journey where the challenge theme this month is "Melt It".
I created a Valentine's card, - it is February afteral...
This month the lovely Julia is our host, and this is what she had to say about the challenge:

This month we're asking everyone to MELT IT! Get out the UTEE (ultra thick embossing enamel), beeswax, encaustic wax, embossing powders or good old wax crayons and a heat tool and get melting to create something in a vintage; shabby; mixed media; art journalling; industrial, timeworn or steampunk style!

Well, Let's start with the heart:


 I took out my long neglected UTEE and created the heart which holds the central place on my card. So I'll start by explaining how I did that:
I traced a heart shape on some scrap chipboard, painted it dark brown and when dry covered it in 3 layers of UTEE. While the final layer was still molten I pressed a text stamp into it, leaving it in until the UTEE had cooled a little. That way the UTEE won't stick to you stamp and does not damge it in any way. The final step to the heart was to blend some Treasure Gold in Rose Quartz and Wild Fire over the heart, to show the ridges up more.
The background to my card was created using a geli print. I used a mix of Paper Artsy Fresco and Decoart Media paints, as well as my all time favourite Golden Fluid Payne's Grey.
I also did some additional stenciling and added some further colour using both paints and Doxide Inks. The sentiment was obviously stencilled too.
I added some strips of washi tapes and book pages (always a favourite) and this sweet couple from the paper dolls by Tim Holtz. Adding some subtle shading always helps to integrate them into the page/background.

A little flower cluster to tie it all together
And then matting and layering onto some dark blue and and a grey gold 7" folded card and that was it.

If you haven't been yet, do check out the challenge blog to get inspiration from my talented teamies, and please join us in our challenge, we would love to see what you create!!
Happy weekend everyone
xxxxx

Related Posts Plugin for WordPress, Blogger...

One World One Heart

Photo

FEEDJIT Live Traffic Feed

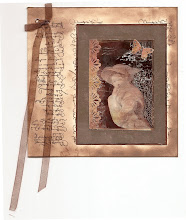
Birthday Card

Birthday Card
Just got a whole lot of new stamps from a brilliant place called the Stamp Smith. This is the image that I first saw on Docraft and really liked. I asked the friend who has used it in an ATC, where she got it. Well she borrowed it from a friend who got it from ebay as a one off. But.... it had a title. I googled the title, and hey presto found the site. They have great stamps and offer a really friendly fast service. I highly recommend them!

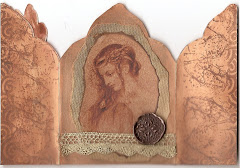
Gothic Arch Trifold inside

Gothic Arch Trifold inside

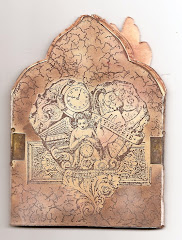
Back of Gothic Arch Trifold

Back of Gothic Arch Trifold

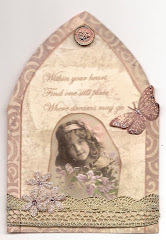
Gothic Arch Within the Heart

Gothic Arch Within the Heart

Gothic Arch, the Key

Gothic Arch, the Key