Showing posts with label Decoart Media Line. Show all posts

Tuesday, 10 January 2017

Some grungy fun....

Hello friends and visitors, hope the new year is going well for you so far!
My mojo has been pretty low recently, so I thought it was time for just some play time and this was the result:
This started with a manila tag. My lovely blog friend Donna gifted me loads of these (thank you Donna)!!
It was a mop up tag and had some colour on it already. I added some random strips of book paper.
Covered it with a mix of gesso and crackle paste. As I was working on another tag at the same time, some splats of ink landed on it too....
While doing the final stages of the drying process with my heatgun, lovely bubbles started to appear, - all good for this type of project.
A mix of Decoart Media paints and various sprays added colour, the art stones and threads that are all the rage at the moment added more texture.
The sentiment is also a 7 Dots Studio label.
The vintage image is from a 7 Dots Studios Cold Country collection. I edged it with Stampendous Aged Silver EP.
The sentiment is also from the 7Dots studio Cold Country collection
I trimmed the top of the tag, mounted it onto a mini canvas and that was pretty much it.


Friday, 1 May 2015

Stamper Anonymous at Mixed Media Monthly

Hello everyone and welcome to my third post today....
At the Mixed Media Monthly blog the theme for the month of May is "Flowers".
Our wonderful Sponsors are Stamper Anonymous, and you could win two Dina Wakely stamps and stencils if you decide to play!!!

Here is a picture of the prize, you don't want to miss this right?

Here is my Design Team piece:

My substrate is a Calico Craft Parts Mixed Media Greyboard, 8 x 8 in size. The list of Stampers Anonymous stamps I used is as follows:
Perspectives (background and sentiment)
Papillon (Background)
Classics 14
Oddities

I started with a piece of Prima paper, inked around the edges with Walnut Stain Distress Ink, did some stenciling in the background and stamped the letter D from the Classics 14 set in white acrylic paint. I know that my colours are not very Spring like, but after having posted one bright and colourful piece today already, I felt like doing something in more muted tones.
More stenciling and stamping was added for interest and I over stamped the D in Black archival to create a kind of shadow effect. Here are some close ups:


Next came a panel, this time from a scrap of paper from the Ken Oliver Studio 6 x 6 papers, and you guessed it, - more background stamping and stenciling.
A beautiful large flourish came next. I altered it with the help of Decoart sand paste, Decoart Crackle Glaze, Media Line Fluid Acrylic in Burnt Umber and Antiquing Cream to match my background.
And finally a flower cluster to go with the theme of the challenge. The large flowers were created with the help of the Tim Holtz Tattered Pinecone die and coloured with a mix of sprays, inks, crackle and embossing powders.

Well, that's it, of course I adhered my piece to the substrate, I used Matte Medium for that.
The final step was to add the sentiment, also by Stampers Anonymous and part of the Perspectives set by Tim Holtz.
Hope you like my wall plaque. Do hop over to the challenge blog. You'll find all the details of our challenge there and of course there are fantastic inspiration pieces from my team mates. Hope you'll play along too!

Now just before I finish this post, I just wanted to let you know that the Calico Craftparts blog has now gone live. To check it out and see some projects, old and new, just click HERE. There will be many more new projects appearing over the next few days.

Thanks for visiting like always and I hope the sun shines for you during this merry month of May!

Sunday, 19 April 2015

A Box for my Craft Parts

Hello dear blogfriends, thanks for dropping by here.
Today I am super exited to share not just a new project with you but also to announce the starting of a new and exciting venture.

Some of you may have heard this already, but I am just so happy to tell you that after the sad destruction by fire of the wonderful Calico Crafts shop, they have now re-started under a new name and are concentrating on making their wonderful Calico Craft Parts. There are new and exciting designs appearing almost every day, you can check them out HERE

I was lucky enough to be invited back on their Design Team, and here is my first project, showing some of these fantastic new designs (and using some old ones too):
With so many new designs, of course I needed a place to keep them, so decided to alter a box for my first project to keep them all in.
The parts I used in this project were: Ornate Keys (set of two) and the Fleur de Lis Decorative Woodshapes. I also used the frame in which the adorable little hearts come. Of course I used the hearts themselves too, but those will be shown in a future project.

Now I'll give you a quick step by step on how I altered my box and rusted up the craft parts:
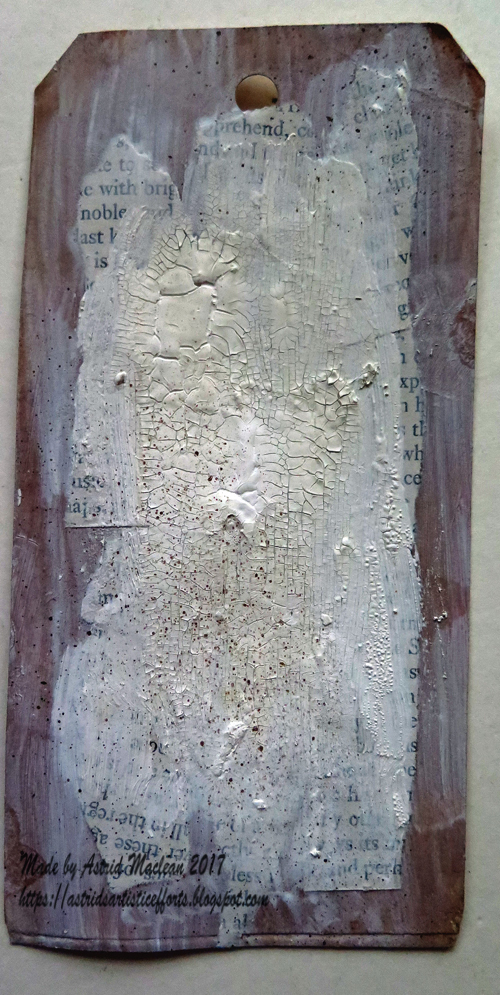
I started with a plain paper mache book box and covered it with strips of tissue paper for texture:
Next I added a layer of Gesso, added some Decoart Crackle paint and then coated everything with a coat of Decoart Chalky Finish Paint in the colour Serene (light blue).
.
The spine of my box had some strips added already, but I decided to add some more decorative elements to them, so I added some hessian ribbon:
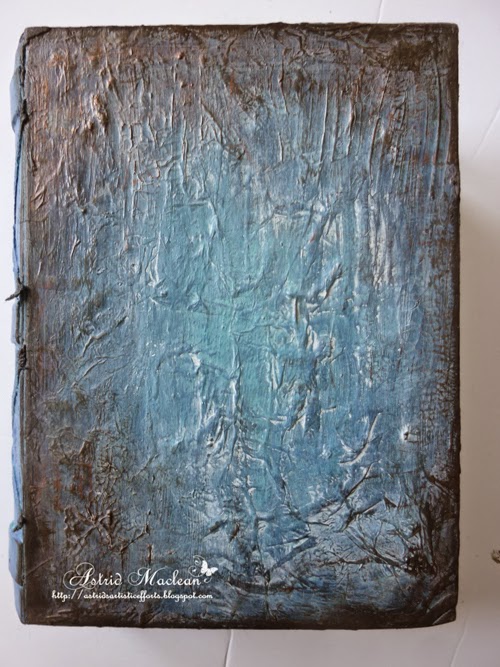
Then the aging process began. First some different colours of Blue Decoart Media fluid acrylics
Then some Burnt Umber and Paines Grey Media fluid acrylics
And finally several layers of Antiquing Creams, both in white and Verdigris. I also highlighted the raised bits with Treasure Gold in the colour Onyxite, which looks great in real life, but was impossible to capture properly in my photos.
Here is what the spine looks like now:
Now to the Craft Part. They come looking like this:
Pretty gorgeous already, I love the burnt edges, and of course could have left them like this. But I wanted a rust effect for this project. So I first coated them with Decoart Media Texture Sand Paste, followed by Quin. Gold and Quin Burnt Orange applied in patches.
.

Next they were darkened with Burnt Umber and then Antiques with Antiquing Cream in Verdigris:
Here is a close up of one of the keys:
The heart backing and the little hearts were all given the same treatment and then adhered to the box:
I fastened the keys to their backing with a bit of rusty wire:
The back and inside were all done in a similar way also, but as this post is long enough as it is already, I'll leave it with that.
For the moment Calico Craft Parts does not have a blog yet, so the DT are showing projects on their own blogs, but you may want to check out their Facebook page  and Pinterest Boards, to see many inspiring examples of how these Craft Parts can be used.
Thank you for visiting like always and have a wonderful week!!

Thursday, 16 April 2015

Altered File folder final 2 tags

Hi everyone, just a very quick post from me today, just to share the final two tags for my altered file folder.

Like with the first two tags the backgrounds were done with paints, inks, stencils and diecuts plus some background stamping.
The focal image is a scrap of a paper serviette again, worked into some water colour paper with the help of paints and inks.
The metal embellishment was altered with some alcohol inks and paints.
The final tag, done in a similar way, just using slightly warmer colours. The paints throughout this projects were a mix of Distress Paints, Decoart Media Fluid Acrylics and one or two Golden Fluid acrylics. All these paints have very similar properties and work beautifully together.

The embellishment this time is a stamped butterfly from the Tim Holtz Water Colour set. I covered it with Decoart Liquid Glass (a very similar product to Glossy Accents), to give it more dimension.
And here finally you can see the two tags fitted in their pockets of the second page in the folder.

Thank you to all of you who have given ideas as to where to find these in the UK. sadly all the ones I found that are really the same or very similar, come from the US and are so expensive, specially as you have to buy a box of 100. I am considering ordering a box though, and would be willing to sell some folders to whoever is interested. If you would be, let me know. If there are enough people, I will be in touch

Meanwhile thank you for visiting like always and I hope you are having a great week!

Wednesday, 1 April 2015

April Showers for Mixed Media Monthly

Hello everyone and once again, - happy April. Busy days here right now, as this is my third project today, but hey, that's what happens when it's the first of the month.....
The theme at Mixed Media Monthly is "April Showers".

I decided to go with a journal spread for this one:
Our generous Sponsors are Decoart for this month, so I used mainly Decoart products to put these pages together.
They are so generous and sent so much stuff that we will be able to have not just one, not two but 3 winners this month. So make sure to play along in our challenge, because, - you could be the lucky winner of this:

I'll show a quick step by step below, showing how I used some of these wonderful products!:

I started with a double page in my Moleskine journal. Added some strips of old book paper, some stencilling through a couple of Andy Skinner stencils, using Decoart texture paste and I also added some crackle paste here and there.
Here you can see a close up of the cool crackle effect when you spread the paste on randomly with a palette knife. Apologies, I just noticed I forgot to turn the picture round, but I'm sure you get the idea...)
I added a first layer of colour with some of the Decoart Media line of Acrylic Paints, blending them with a baby wipe. I love how translucent these paints are.

My focal image of the little girl with an umbrella was printed first on tissue paper and then again on thin card. I added more textures also by gluing down some strips of fabric and netting blending it all into the background with further paints.
Here is a close up of the girl. The tissue paper included some of the background of the original painting (found on Pinterest). I then printed her again on thin card and cut out just the girl to add more depth and clarity of the image. I also started to add some white rain drops with a  gel pen and some background stamping, just to blend everything together a bit more. I also added some embossing powder over the fibres, for yet more texture.

My sentiment was computer generated and then printed on tissue paper again and blended into the background with paints.
A tiny bit more doodling around the girl to add further highlights and that pretty much completed my page.

Do check out the wonderful projects my Design Team sisters have created and check out all the details of this challenge and what you can win. All you need to do is click HERE

If you love to use mixed media techniques we all hope you will play along this month, this is a very popular challenge blog and we love to see your beautiful creations!

Just for fun I am adding this page to the AJJ blog, where the theme this month is Favourite Quote.
Thanks so much for visiting today and have a fantastic month!
xxx

Related Posts Plugin for WordPress, Blogger...

One World One Heart

Photo

FEEDJIT Live Traffic Feed

Birthday Card

Birthday Card
Just got a whole lot of new stamps from a brilliant place called the Stamp Smith. This is the image that I first saw on Docraft and really liked. I asked the friend who has used it in an ATC, where she got it. Well she borrowed it from a friend who got it from ebay as a one off. But.... it had a title. I googled the title, and hey presto found the site. They have great stamps and offer a really friendly fast service. I highly recommend them!

Gothic Arch Trifold inside

Gothic Arch Trifold inside

Back of Gothic Arch Trifold

Back of Gothic Arch Trifold

Gothic Arch Within the Heart

Gothic Arch Within the Heart

Gothic Arch, the Key

Gothic Arch, the Key