Showing posts with label 7 Dots Studio. Show all posts

Friday, 1 December 2017

Vintage Christmas mini album

Hello friends and welcome! This is my second post on this busy first of December. So many new challenges starting on this day, and this particular one is for the Mini Album Makers December challenge.
Eileen Hull is our wonderful sponsor this month and so I created a Christmas themed album using one of her fantastic dies, the Mini Album one.

Below a quick tutorial of how I put this together:
I cut the cover for the album from matboard and then cut the angel with the Tim Holtz Movers and Shapes Cherub die. I embossed the bottom half with a little embossing folder, first the front and then the back cover  and finally coloured and stamped the outside with Distress inks in Stormy Sky and Chipped Sapphire.
Next I added some pearl glimmer mist for a bit of sparkle (sorry, hard to see on the photo)
My next step was to make a little panel to glue behind the Cherub cut out. I took a bit of scrapbook paper in dark blue and brown tones, added Decorart Crackle glaze, let it dry naturally and when the cracks appeared and the piece was dry rubbed white Decoart Antiquing cream into the cracks and then adhered it behind the angel.
Here is a close up, where you can see the cracks a little better.
Next I started work on the inside pages. I used scraps of two different collections for my inside pages, 7 Dots Studio North Country collection and the newest Maja Design Christmas Collection, Joyous Wintertimes, as it has similar blue tones and I thought they would work together. I used the die to cut the inside pages.  Eileen shows exactly how to do this in a video HERE
I used elastic cord to slip in my pages, below a couple of photos:


What I love about this method is that you can add more and more pages as you need them. I have created 5 pages so far. For those of you who would like to see them, I have added a video slideshow at the end of this post.
I added some charms to the spine and the album closes with a simple sheer ribbon.
There are many pockets and tuckspot on my pages and I created little tags to fit inside, but of course you can also add photos or whatever you like. Below a quick flip though video:


Well, that's it for now, thank you so much for staying with me. I do hope you will check out the wonderful albums my teamies have created, all you need to do is click HERE, and of course we would love it if you play along with us and create an album yourself to share with us there.
Happy creating!
xxxxx

Tuesday, 10 January 2017

Some grungy fun....

Hello friends and visitors, hope the new year is going well for you so far!
My mojo has been pretty low recently, so I thought it was time for just some play time and this was the result:
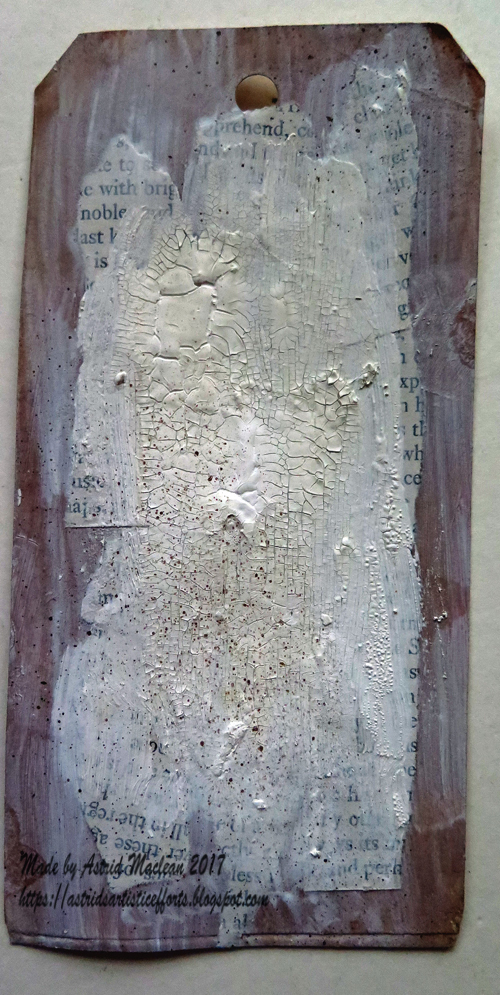
This started with a manila tag. My lovely blog friend Donna gifted me loads of these (thank you Donna)!!
It was a mop up tag and had some colour on it already. I added some random strips of book paper.
Covered it with a mix of gesso and crackle paste. As I was working on another tag at the same time, some splats of ink landed on it too....
While doing the final stages of the drying process with my heatgun, lovely bubbles started to appear, - all good for this type of project.
A mix of Decoart Media paints and various sprays added colour, the art stones and threads that are all the rage at the moment added more texture.
The sentiment is also a 7 Dots Studio label.
The vintage image is from a 7 Dots Studios Cold Country collection. I edged it with Stampendous Aged Silver EP.
The sentiment is also from the 7Dots studio Cold Country collection
I trimmed the top of the tag, mounted it onto a mini canvas and that was pretty much it.


Related Posts Plugin for WordPress, Blogger...

One World One Heart

Photo

FEEDJIT Live Traffic Feed

Birthday Card

Birthday Card
Just got a whole lot of new stamps from a brilliant place called the Stamp Smith. This is the image that I first saw on Docraft and really liked. I asked the friend who has used it in an ATC, where she got it. Well she borrowed it from a friend who got it from ebay as a one off. But.... it had a title. I googled the title, and hey presto found the site. They have great stamps and offer a really friendly fast service. I highly recommend them!

Gothic Arch Trifold inside

Gothic Arch Trifold inside

Back of Gothic Arch Trifold

Back of Gothic Arch Trifold

Gothic Arch Within the Heart

Gothic Arch Within the Heart

Gothic Arch, the Key

Gothic Arch, the Key