Showing posts with label Decoart Media Fluid Acrylics. Show all posts

Thursday, 8 March 2018

Geliplate fun

Hello lovely visitors. After watching some videos on youtube I decided to dig out my geli plate and have some fun making backgrounds. I had a couple sessions and landed up with a bunch of prints, but then, what to do with them all?

Well another video by Kate Crane gave me some ideas and here are the results:
I used Paper Artsy and Decoart Media paints, stencils and stamps, and with one of my prints created these 3 cards. There will no doubt be many more projects to follow, so stay tuned...
I added some more stamping (the heart is a Finnabair stamp which I fussycut), some messy stitching, some washi tape and some words computer generated. The cards are tiny only 3 x 3 and then double matted on manila crd stock to make the fiished cards 4 x 4".
Here basically exactly the same idea, some further stencilling and stamping scraping with a credit card and just having some messy fun.

And here finally a third one. These little cards will be handy for quick gifts and will also be easy to send through the post, always a good thing. While I was at it, I made some matching envelopes. As I had used some of the Prima Lavender collection to embellish my cards, I used some more of those papers to make the envies.


Well, that's it for now, - hope you are all having a good week, and thanks for your visit like always!
xxxxx

Friday, 29 December 2017

Tag Friday at A Vintage Journey

Hello friends, - well here we are at the other end of the big day, - hope you survived all the festivities and had a good and hopefully peaceful time!
It's the 5th Friday of the month and that means Tag Friday at A Vintage Journey, when creative guides share tags they have made just for fun and hopefully some inspiration.
I decided to alter one of Tim Holtz's Etc tags, this is the small size, but it is still huge!
I added some texure with Grunge Paste through a couple of stencils and when that was dry gave everything a layer of gesso. While the gesso was still wet I added some strips of old book paper which adhered perfectly without any further medium. I also added some Distress Platinum glitter for some extra wintry sparkle (I'm obviously still in a bit of a Christmassy mood)
Time to add some colour, - I used Golden Paynes Grey (which actually is a wonderful blue tone) and mixed it here and there with some Decoart Media Titanium White.
My next step was to dry brush some further white back in, specially over the snowflakes at the bottom right.
Now for the embellishing, - as I wanted this to be a wintry tag I used the Tim Holtz large snowflake with matching embossing folder and high lighted the raised bits with some Treasure Gold in Pewter.
Time to put it all together
And finally adding some embellishments. After having kept all my Christmas cards flat for posting, I had great fun doing this!
At the top some little pine cones, metal twigs and leaves, given a coat of gesso and lots more glitter.
And at the bottom, die cuts and berries.
And finally finishing it all off with one of Tim's chipboard sentiments, as a little New Year's resolution to myself and anyone who may eventually receive this tag :o)
Well, that's it for now. Wishing you all some very happy last days of 2017 and see you in the new year! Thanks for your visit and all your support!
xxxxx

Monday, 18 December 2017

A Christmas Lantern for A Vintage Journey

Hello friends, - how is life treating you in the run up to the big day?
 I am hanging in there and today am sharing a Destination Inspiration tutorial over on A Vintage Journey.

If you want to see how this little lantern came together, all you need to do is CLICK HERE
Meanwhile, thanks for dropping in here
xxxxx

Friday, 11 March 2016

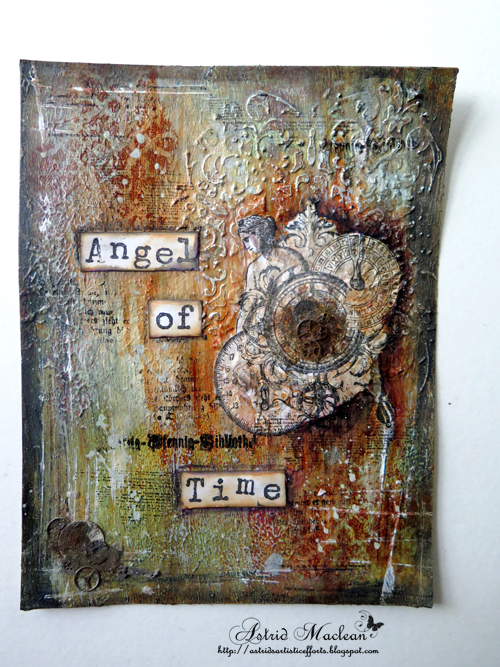
Angel of Time

Hello all and thanks for dropping by. I don't know about you, but recently I have really struggled with time and balancing life between day job, crafting, blogging and social media....
This page came about while struggling with issues like that, - trying to carve out some time to create art, without feeling guilty I should actually be visiting blogs and leaving comments etc. I am really sorry I have been a bad blogger recently, I know I am missing posts from many of you and I do want to apologize!!

This page started on a loose piece of watercolour paper that was covered with a thick layer of gesso and texture paste and then coloured with various Decoart Media paints. I added many layers with subtle background stamping in between.

Further textures were also created with dabbing my finger into the still wet gesso and then dry brushing with lighter paint colours. The little gears above are actually old clock parts I purchased on ebay a long time ago (I found them when doing a massive clear out recently). I rusted them up a bit with rusting powder and vinegar.
The sentiment was created with the help of a set of little letter stamps on A4 paper and then cut into words.
Here you can see some of the background stamping and splats and scrapes created with the help of a small paint brush and an old credit card.
This main stamp is from La Blanche. I named her Angel of Time and stamped her on tissue paper and then blended her into the page. I added a few more clock parts to the center of the clock in the stamp.

Well that's it pretty much. Thanks for your visit today like always and I hope I shall find the time to come and visit you in return. Maybe my angel of time will help me.

Have a wonderful weekend with hopefully some creativity within it.
xxx

Tuesday, 22 December 2015

Last of the Christmas cards

Hello all, welcome and I hope you are surviving this busy time of year.
This will be my last post before the big day as I am taking a blogging break while spending time with my grandchildren and other family.
I thought I would share my final Christmas cards with you today. These were made a while back and are now safely on their way to their recipients.


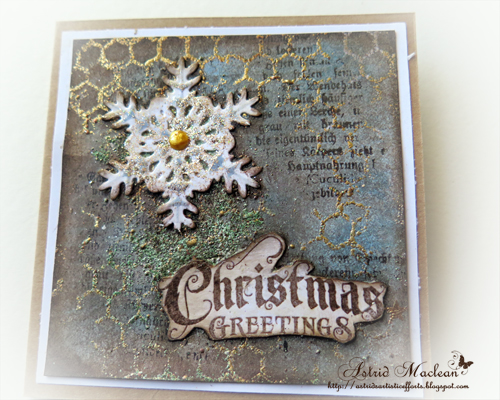
I have been having great fun experimenting with different kinds of backgrounds this year. These ones were made with the help of foil, using sticky embossing powder, and a mix of Distress Paints and Decoart, both the Media Fluid Acrylics and the Antiquing Creams.

Each one is similar but subtly different and they are all only 4 x 4" in size.

The colours are not traditionally Christmassy, but I have been attracted to Blues Greens and Browns this year for my cards. Unfortunately the weather has been so dark here, it's been impossible to get decent pictures, and of course the gold shimmer of the foil has totally disappeared....
This one uses pretty much the same techniques, just different die cuts and background stamps. Here you can see the additional texture achieved with some Decoart Snow Tex a bit better.
This one is almost the same as number one, just using a different stamp for the background with the Sticky Embossing powder.
For this one finally, I used some of Tim Holtz's Gilded Holidays remnant rubs. Beware, you need to apply these before doing anything else to your background or they are likely to get lost. Tim has a great video of how to use them here.
Below is a close up, I love these rubs, and will definitely use them again!

Well, that's it for today, thank you so much for all your support and your lovely comments, they are always very much appreciated !!!

Thanks for your visit like always and I hope you will have a peaceful, joyful and blessed season!!

Saturday, 17 October 2015

Textured heart canvas for Countryview Crafts.

Hello everyone, welcome to friends and followers alike, today I am sharing a project created for Countryview Crafts where the challenge theme this month is "Add Some Texture"

I love an open kind of theme like that, there are so many possibilities to add texture. For my second project this month I decided to alter this little canvas. I'll show you some step by step photos below:
I started with a gessoed canvas and added texture paste through a variety of stencils. The heart was created with a home made heart mask with a stencil layered over the top.
Next I added some random bits of book paper to add more texture to the background.
Time to add colour, I used a variety of paints, both Distress and Decoart Media Fluid Acrylics in warm autumnal colours. I also used some burnt umber brown paint to create some splats around the heart to emphasise it more (not sure that was such a brilliant idea, but hey ho, once it's on it too late).
Here is a close up of the heart, I spent quite some time getting the colour in the recessed bits, (I mixed a variety of red and brown paints to get the shade I was after) and applied it with a small brush. I then dry brushed the raised bits with white paint to bring them out a bit more.
Some random background stamping and strips of tissue tape added another layer of texture, or if not texture then at least some further interest, I also added some white splatters to lighten it all up a bit.
Some words created with the help of Tim Holtz chit chat and small talk stickers and a few doodles with a white pen finished it all off.
I'll leave you with a few close ups:
Adding shadows always helps to create more depth, I used a Stabilo All pencil for this
Some of my favourite words coming straight from the heart :o)
Some rather messy highlights with a white pen around the numbers, just to bring them out a bit more.
The finished piece all done. Hope you like it.

There is still plenty of time to play along with our challenge, so if you have not done so yet, I hope you'll decide to play along. Apart from having fun with playing with texture, you could also win a £20 voucher from our generous sponsor Countryview Crafts.
Hope to see you there!
Have a great weekend
xxxxx


Thursday, 1 October 2015

Texture with a gelli plate....

Hello all and welcome! Can you believe it's October already? Well I actually can, as there are coloured leaves all around and there is definitely an autumnal feel to the air.
I am sharing 2 cards today, both created for our new October challenge over at Countryview Crafts. Our theme this month is Add Some Texture, chosen by the lovely Jennie.
Now when thinking of texture, my guess is most people think of texture paste, or other textural stuff, but of course there is much more than that. Texture can also be created through multiple layers, and I decided to make some cards with that in mind.
My background was started with the help of a gelli plate:

Now, no two backgrounds from a gelli are ever the same, so I won't do a full step by step, just to say, this was probably a second print after I had added a stencil for a first print and then removed it for this one.
Here is a further step, after more paint was added to the plate, including some golden paint and then I added further stencilling with the same folder, some dark brown paint and  using a make up sponge to stencil.
Here is a close up where you can see the effect of the gold paint a bit better.
Here finally the finished card, adding some tissue tape, a Tim Holtz embossed butterfly from the Butterfly Duo die and matching embossing folder and a stamped sentiment, stamped on book paper.
I added some glitter and background stamping still for more interest.
The crackle was achieved with a crackle stamp. stamped in white paint and then I blended some Archival Ink in Orange Blossom over it to tone the white down a bit.
The second card was done in a very similar way, but using a different stencil and some Autumnal dies. A Tim Holtz Ideaology wordband and some tissue tape finish it all off.
The pumpkin and the leaf were both coloured with Distress Markers and then I added some Distress Clear Rock Candy crackle paint for some additional texture.
Well, that's it, hope you like my cards, and if you have a moment check out the other projects that my team mates have created, you won't be disappointed. All you need to do is click HERE
Most of the products used for this project are available from Countryview Crafts, and if you decide to play in our challenge, you could even win a £20 voucher to the shop!
Thanks for visiting like always and happy October!!
Related Posts Plugin for WordPress, Blogger...

One World One Heart

Photo

FEEDJIT Live Traffic Feed

Birthday Card

Birthday Card
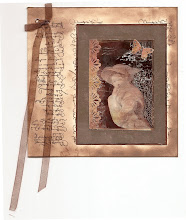
Just got a whole lot of new stamps from a brilliant place called the Stamp Smith. This is the image that I first saw on Docraft and really liked. I asked the friend who has used it in an ATC, where she got it. Well she borrowed it from a friend who got it from ebay as a one off. But.... it had a title. I googled the title, and hey presto found the site. They have great stamps and offer a really friendly fast service. I highly recommend them!

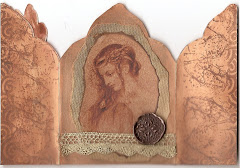
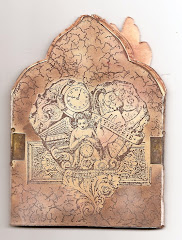
Gothic Arch Trifold inside

Gothic Arch Trifold inside

Back of Gothic Arch Trifold

Back of Gothic Arch Trifold

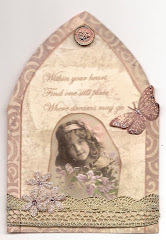
Gothic Arch Within the Heart

Gothic Arch Within the Heart

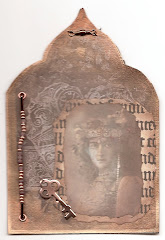
Gothic Arch, the Key

Gothic Arch, the Key