Saturday, 13 September 2014

Something a little different

Hi everyone, a big welcome to you all, specially also to several new followers, I am so happy you decided to join me on my crafty journey.

Today I am sharing something a little different. As some of you know I have two little grand daughters, who sadly live at the other end of the world for me, namely in Australia. I went to visit them in July and had the most wonderful time. The oldest, who will turn 2 very soon, had a favourite game that we played together endlessly, -  having a tea party for her dollies. Her mum had the great idea that it would be wonderful to have some toy tea bags to go with the little cups and teapot she has (mum and dad love to drink tea). So for her birthday I made her 10 little play teabags and a little box to keep them in.
Here you can see the little bags in their box. I found several examples on Pinterest and then kind of made up my own thing.
 The box was made from Kraft card and then covered with some bits of paper from the Prima Fairy Rhyme collection. I've been sitting on them for ages, I knew they would come in useful at some point...
 Love how the little flower fairy was just the right size for the box...

I made two different kinds of bags, some of thinner fabric, they look a bit more genuine as you can actually see the "tea" (it's quinoa, again idea from Pinterest). The others are made from slightly more durable calico fabric, I am guessing they may well get wet at some point (she loves playing with water), so should last a bit longer.

Anyway, enough of the doting granny talk... It's also my turn to share a project on the
The Artistic Stamper blog today. Here is the usual sneak peek:
I used a great technique which the wonderful Ingrid Kristina shared recently. If you want to find out more, all you need to do is click HERE

Thanks so much for dropping by here today and have a great weekend!

Sunday, 7 September 2014

Playing with backgrounds

Hello everyone, thanks for dropping in.

Today I am sharing a bit of an experiment with you. I found this video by Sheena Douglas on youtube, and I loved the technique so much, I just had to give it a try, here is the result:
The background technique is a combination of Alcohol based pens (I used ancient Spectrum Noirs, but I am sure it would work with other Alcohol pens such as Promarkers or Copics too) and Archival Ink. The combination of the alcohol on a smooth surface like acetate, metal or glass and the Archival ink, gives the bleach look effect you can see here.

By sheer fluke Richele Christensen shared a technique based on the same chemistry on the Vintage Journey blog a week ago. This one is very feminine, hers was on metal with alcohol inks, I will definitely give that one a try too.

I am not going to do a full step by step but just talk you through a few details:
I used one of the Tim Holtz classics stamps onto the blue and purple coloured acetate, I just love the effect!

Heartfelt Creations Adriana Blooms collection flower and leaves. The lace is a die by Cheery Lynn.

Butterfly and label are both Spellbinder dies, though the label and stamp is by Just Rite, but made by Spellbinders.

Well, something a little different, but great fun to do, make sure to check out the techniques, they rock!
Have a great week ahead!

Friday, 5 September 2014

With a Flourish for A Vintage Journey

Hello everyone and thanks for taking the time to drop in here. Today it's a new challenge at A Vintage Journey, the lovely Jennie is the challenge host and the theme she chose is "With a Flourish"
Flourishes always feel very feminine to me, so I made a soft and feminine card, trying very hard to still keep it "Tim Holtz style".
It was pretty quick and easy to put together, as most of the bits and pieces were in my box of scraps already, so here is how I went about it:
I created a background panel on a piece of manila card stock. I inked it with Weather Wood, Frayed Burlap and Walnut Stain Distress inks, stamped some flourishes around the edges using Coffee Archival ink ( this is a La Blanche stamp), and then added a piece of trellis from my scrap box.
Next I added some other bits and pieces: a butterfly from the French Flight Framelets set, a piece of paper from the Wallflower Paperstash, a ticket, stamped with a stamp from the Odds and Ends stamp set, a couple of little flourish die cuts and a rose made with the Pinecone Sizzix die. Below you can see some detail of how I layered it all up:

I tucked the ticket in between one of the flourish dies
The butterfly sits on top of one of the Tattered Curvy Banners to which I have added some Remnant Rub words.

Well, that's about it. I matted it on some white and then 7 x 7" Kraftcard the card was complete. A fun to do quick project and another card ready to send to someone.

Hope you'll play along in this latest challenge, - do check out all the other DT samples. Trust me they are amazing!!! Like always, our challenge is sponsored by Countryview Crafts where most of the products I used are available.

Have a fantastic weekend and thank you for visiting today!!

Thursday, 4 September 2014

Travel mini out of one piece of 12 x 12

Hello everyone, just a sneak peek today, as it's my turn to post over on the Calico Crafts blog.
I am showing you how to put a mini together out of 1 piece of 12 by 12 and then how I decorated it with the help of some fab Kaisercraft papers. Calico is one of the few places where you can buy these papers by the sheet. That way you don't land up with some of those inevitable papers in a collection that you don't like.

Anyway, for all the details, just click HERE. Some of you have told me that when you do so you can't see my post. Trust me it will be there, all you need to do is refresh your page.

Anyway, thanks so much for your time like always!!! Weekend is nearly here, so enjoy!!

Monday, 1 September 2014

My Wish for You Nautical challenge for Countryview Crafts

Hello everyone and for those of you who are here for the second time, hello again.
It being the first of September, several new challenges are starting and at Countryview Crafts the theme, chosen by the lovely Jennie, is "Nautical".
I created a box canvas for my first piece for this challenge:
Now I have to confess, I really struggled with this theme, as really I have no nautical supplies, as it is not a theme that is particularly close to me. I found I did not even have some shells, well other than the rather clumpy one I added in the end.....

So where to start? I rummaged about in my stash and found this little anchor, I also had the little metal embellishment and then I had the netting, a lovely gift from my friend Annie.

Well, I started by adding some random texture using grunge paste to my canvas and when it had dried, painted it with various Paper Artsy Fresco Finish Paints.
I used Ice Blue, Baltic Blue, Mud Splat and a bit of French Roast

After I had the main design set up, it looked very stark so I added Distress Inks in similar colours and did some background stamping to blend it all much more together. I got so caught up in the process that I forgot to take a picture....

I found a lighthouse picture online, printed and then fussy cut it and adhered it to the hill.
Then I arranged my embellishments along the bottom adhering them with gel medium.
I found this lovely quote and generated it on my computer, cut it apart, inked and distressed it and then arranged it in the middle of the canvas.
Now when creating a box canvas, it always is important to cary on the design around the edges too. So I adhered some more netting, some Tissue Tape and did some more background stamping.

I can't say I am totally happy with the final result, I wish I'd had some little shells to add, but time was running short, the weather pretty bad, and sadly there was no time to go to the beach.

Well, there you have it, hope you'll decide to play along with the challenge, all details can be found on the Countryview Challenge Blog, where you can also see the truly stunning pieces my teamies have created.
I decided to dedicate this lovely quote to you, my lovely blogfriends, who always take the time to visit and leave me comments. Thank you for doing so and this is my wish for you!


Autumn Colours

Hello everyone and happy September to you all! Where has the summer gone? It seems to have flown by...
It being the first of the month means I will have two projects to share with you and this is the first:
It's a size 6 tag created for the new challenge at The Artistic Stamper, where as the title of my post suggests, the theme is Autumn Colours.
I love Autumn and this was a great chance to take out those wonderful Distress Colours like Ripe Permission, Rusty Hinge and Scattered Straw. There is some Barn Door and Aged Mahogany in there as well, - but I run ahead of my self.

I started with a Crafters Workshop stencil and stencilled the flower using Wendy Vecchi past.
When dry I put the stencil in place again and coloured the flower with a mix of Distress markers, Archival Inks and some Distress. I rubbed a little bit of treasure gold onto the actual flower too.
Next I ran the bottom of the tag through an Autumnal Sizzix embossingfolder (should have done that first probably) and then did some background stamping with Picket Fence Distress Paint.
Next I used some Tim Holtz layering stencils and the above mentioned colours of Distress Inks to create the rest of my background.
I used a Katie Leitch semtiment stamp from the leaf set, stamped it in Black Archival and clear embossed it. I then cut it into text lines so I could spread my text out a bit.
I stamped two of the leaves from the same set, fussy-cut them and used them as embellishments together with a little rusty key from my stash.
One of Tim's Simple Sayings and a hand dyed ribbon and rusty leave at the top, finish it all off.
Hope you'll decide to play along with the challenge, just click here to see all the details and the fab projects from my teamies.

I'll be back later with a project for Countryview Crafts challenges.
Thank you for visiting and hope you will have a good month of September!!

Thursday, 28 August 2014

Destination Inspiration tag

Hello everyone
A few days ago I showed an extensive step by step over on the A Vintage Journey blog. Part of that project was a tag, but because the post over there was getting so long, I promised I would show how I put the tag together here on my own blog, so here goes:
The techniques here can of course be used for all sorts of different projects.
I started by covering a size 8 tag with Tim Holtz Tissue Wrap.
I crumpled it in places on purpose to add more texture. Next I added further textures by pushing Wendy Vecchi's texture paste through one of Tim's layering stencils and then added colour, using Distress Paints:
The colours I used were Antique Linen, Weathered Wood and Brushed Corduroy.. Please note, the Tissue Wrap resist Distress Inks quite a bit, so use something like paint or Archival inks. Once the paint is laid down, you can deepen the colours with Distress Inks and or Archival inks, that is what I did next:
Because the tag is part of a larger project, I wanted it just for adding a sentiment. I decided to add interest by using different fonts. I put my sentiment together by cutting words from a stamp from the Stuff to Say and Way with Words set. I love how different fonts can work together like that.
The word begins was put together with little letter tiles from a Prima paper. Courage was spelled out with the little letter labels.
I added a vocal point to the tag with the little die cut heart and the word courage from the chit chat stickers. More depth was created with the help of some shadow, added with the Black Soot Distress marker, both around the heart and the words.
Here you can see how the heart fits inside the pocket that is part of the main project. If you have not seen it yet, you can find it HERE.

Thanks for visiting like always and don't forget to have courage to let your imagination take you to great places, creative or otherwise.

Related Posts Plugin for WordPress, Blogger...

One World One Heart

Photo

FEEDJIT Live Traffic Feed

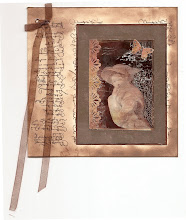
Birthday Card

Birthday Card
Just got a whole lot of new stamps from a brilliant place called the Stamp Smith. This is the image that I first saw on Docraft and really liked. I asked the friend who has used it in an ATC, where she got it. Well she borrowed it from a friend who got it from ebay as a one off. But.... it had a title. I googled the title, and hey presto found the site. They have great stamps and offer a really friendly fast service. I highly recommend them!

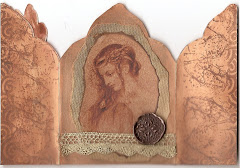
Gothic Arch Trifold inside

Gothic Arch Trifold inside

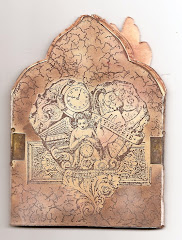
Back of Gothic Arch Trifold

Back of Gothic Arch Trifold

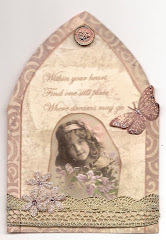
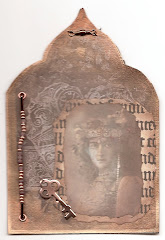
Gothic Arch Within the Heart

Gothic Arch Within the Heart

Gothic Arch, the Key

Gothic Arch, the Key