Showing posts with label Autumn. Show all posts

Saturday, 12 September 2020

Autumnal Envelope booklet (Tutorial and a freebie)

 Hello friends, hope you are all well and happy.

Here the weather has turned decidedly autumnal and with that I was inspired to create a booklet/folder thingy in an autumnal mood. I used my latest Etsy collection which you can find HERE. I also used some of the freebies which you will find at the end of this post.

So here goes:

It's made in a very similar way as the booklet you can see in my previous post. The cover is made by simply sliding two envelopes into each other as you can see on the picture below.

The next step is to cover both the out and the inside with bits of your chosen papers, carefully cut to size. For the outside of my cover I chose to sew around it,  and add a dry embossed spine and some lace. I then decorated further with some elements from the freebies.

On the inside cover I made a little pocket with a flap. The closure is a punched out shape, I think it's called fishtail or something, sadly no longer available, but you can of course use any kind of punch, you just need to make sure you only glue down the bottom half, so the flap can slip under the top half. On the right side of the picture above you can see the cover of the little booklet I sewed inside.

Here you can see some of the journal cards that come with the collection and that fit inside the pocket. I just rounded the corners and inked around the edges.

Here is the inside of the booklet, I did some subtle stenciling on the inside of the covers, but left the inside coffee dyed pages blank for notes or journaling.


And here is the back cover. I made a belly band and made two little envelopes (one of them you will fiind in the freebie, the other is part of the collection), and filled them with some further journaling cards and tags.

And here is a selection of the journaling cards. The larger ones fit inside the large pockets of the envelope covers. The one on the left is a piece of one of the papers that I folded in half to make into a note card.

And here finally is the freebie. Like usual, just pop me an email if you want the high resolution one for printing.

Well, that's it for today. Hope you enjoyed this little tutorial and perhaps it gave you some new ideas. Happy crafting and thanks for your visit!

xxxxx


Tuesday, 28 August 2018

Inspired by the Autumn Season

Hello friends, welcome. Today I have a card to share which I made just for fun and also to play in a couple of challenges.
A few days ago I spent some time creating some flowers and also some leaves. I used Tim Holtz's Funky Florals dies, his Foliage dies and also some leaf stamps that came as freebies with a magazine.

Recently I was very much inspired by a project from the wonderful Jenny Marples, you can see it here . She made it as her DT piece for the Frilly and Funkie challenge which is Back to Nature, and as I wanted to play in the challenge I let myself have a play, like I said taking my inspiration from her, as well as from nature itself.

I started by creating a background panel, using some design paper (Blue Fern Studios), added some colour with Distress Paints and Gesso, some texture using Grunge Paste from Paper Artsy and a bit of Distress ink and a bit of background stamping..I also did some messy stitching as you can see.
Next I added some strips of card, coloured with Oxide Inks and embossed with Tim's 3D wood grain folder.
I then gathered some embellishments, - some of the flowers and leaves I had made plus some little pinecones and a metal embellishment.
For the leaves I made an alcohol ink background, used the leaves stamps and alcohol lift ink and then stamped those stamps on some card. I then added more alcohol inks and when the panel had dried, die cut the leaves.
The Funkie Florals flowers and branches were cut from white card,, inked a bit and then I added some Distress glitter and a little Diamond Stickles.
Now all I had to do was put it all together using some white glue and a hot glue gun. A Tim word band finished it all off.


I adhered the panel to a Kraft Card card blank and that was pretty much it.

I am going to add this card to the Frilly and Funkie challenge Back to Nature

Well that's it for today, and like always, thank you for your visit and happy crafting and creating!
xxxxx

Tuesday, 12 September 2017

Autumnal tag


Hello friends and thanks for dropping in. Today I am sharing an autumnal tag.

Below I will take you through a quick step by step:

I started with a Ranger size 10 Manilla tag and scraped on a thick layer of rather old gesso, I mention this because it is a bit dried out and very thick, just right for what I wanted it for on this occasion:


I scraped it on with a palette knife and while it was still wet pressed down some old book pages, which I then peeled off again, just leaving some tiny scraps behind, I also pressed a Tim Holtz layering stencil (the crackle one) right into the gesso, using it like a kind of impression plate, this gave me some additional texture. Below is a close up:


I was after a sort of stucco wall effect. Looks kind of all right, but now watch what happened after I brought out some of my sprays, that's when the magic starts to happen....


All I did was give it some quick sprays of a dark brown Ground Espresso Distress spray, I love how it almost looks like birch bark. Here's a close up:


Next I wanted to deepen the colour a bit in the center, so I gave it some further spritzes, dabbing off some of the excess with a bit of paper towel.


On to the embellishing, - I die cut a couple of leaves from thick white card and started to play with some autumnal coloured paints.


I then edged the leaves with a bit of dark brown Distress Ink (Ground Espresso)
Now all I had to do was add a few bits and bobs from my stash to create a kind of autumnal cluster, a sentiment, and I was done.


The wreath thing was a Dusty Attic chippy that I gave a few spritzes of dark brown spray


I added some wired raffia twine, curled around a thin paintbrush to give it all a bit of a rustic look.


The sentiment is just a sticker from the 7 Dots Studio Dreamer collection by Finnabair, I chose it because the colours just matched my project to perfection.


A few bits of ribbon and twine at the top, to carry on the rustic theme, and that was pretty much it....


Even though it is Spring here in Australia, the weather has been pretty cold and wet, and often feels more Autumnal than Springlike so far, fingers crossed the sun will come through before too long.
Many thanks for your visit like always
xxxxx

Saturday, 9 September 2017

Second Look - an Autumnal Journal page

Hello friends, thanks for dropping by. While I am away from home and unable to do many new crafting projects, I thought I would share some of my older Shimmerz projects that have never been shown here.
I started this spread by covering the pages with a layer of extra thick gesso uisng a credit card

Here you can see a close up of the texture, - dried with a heat gun to add some additional bubbles and raised bits.
Next I adhered two of Tim Holtz's Layered Leaves, embossed with the matching folder and then painted with some Decoart crackle paint.
Here you can see more clearly what happens when you heat the gesso with the heatgun. I love the additional textures you get.
Next I set to work with sprays in autumnal colours of browns and greens

I added some background stamping and some random strips of tissue tape to add a bit more interest to the background.
I added some darker coloured spray with a paintbrush, to add a little more depth. 
And finally a word die to finish it all off.

Well that's it for today, thank you for your visit like always and happy weekend, with hopefully some crafting and creating!
xxxxx

Sunday, 16 October 2016

Autumnal Splendour for Shimmerz

Hello all, busy days here, but today is just a quick preview...
If you want to see more, I'm afraid you'll have to head over to the Shimmerz Blog. All you need to do is click HERE. Oh and by the way Shimmerz are having a design team call, you can check the details out by clicking HERE

Sunday, 18 September 2016

Mixed Media Canvas for Shimmerz

Hello all and happy Sunday. Today it is a preview day here on my blog. To see the full project, please head over to Shimmerz
I love the colours of Autumn which are just starting here in the UK, - if you want to see more, just click HERE
Have a good week and thanks for dropping in!
xxx

Sunday, 27 September 2015

Autumnal splendour

Hello everyone and thanks for dropping in today.
My poor old blog has been rather neglected these last few days as my day job has kept me otherwise occupied, but today I have a card to show you:
It's my daughter's birthday in a few days time, so I just had to make a card.
I basically used whatever was flying around on my desk.
The background was made with Brushos, a number of different sprays and some stamping.

The leaves were die cut  with some Spellbinder leaf dies, I used one of my gelli plate prints.
I then added some ribbon, twine and a little metal leaf, mounted it on black and a piece of scrapbook paper and that was pretty much it....
I added some gilding flakes from Indigo Blu around the edges.
The sentiment was stamped with Flitterglu and gilded with the same flakes. As it was getting a bit lost against the background, I added some shadows around the letters.
Here's a final close up of the whole card. Of course I was messy in my usual way and some of the gilding flakes landed up where they were not meant to be, but I quite liked the effect so decided not to worry...

Well, there you have it. Thanks for visiting like always and I hope you will have a creative week.

Related Posts Plugin for WordPress, Blogger...

One World One Heart

Photo

FEEDJIT Live Traffic Feed

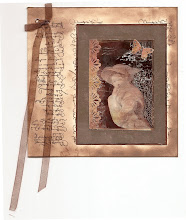
Birthday Card

Birthday Card
Just got a whole lot of new stamps from a brilliant place called the Stamp Smith. This is the image that I first saw on Docraft and really liked. I asked the friend who has used it in an ATC, where she got it. Well she borrowed it from a friend who got it from ebay as a one off. But.... it had a title. I googled the title, and hey presto found the site. They have great stamps and offer a really friendly fast service. I highly recommend them!

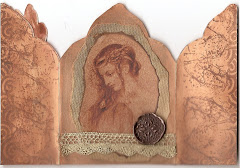
Gothic Arch Trifold inside

Gothic Arch Trifold inside

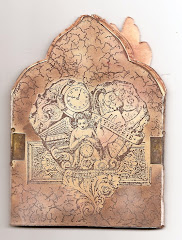
Back of Gothic Arch Trifold

Back of Gothic Arch Trifold

Gothic Arch Within the Heart

Gothic Arch Within the Heart

Gothic Arch, the Key

Gothic Arch, the Key