Showing posts with label Tim Holtz Distress Inks. Show all posts

Friday, 1 May 2015

Something Scenic

Hi everyone and happy first of May, yay, a month without an r in it, should mean warmer weather here in the Northern Hemisphere....
It's the start of a new challenge over at the Countryview Challenge blog and our theme this month is "Something Scenic".
Loved this theme as it gave me a change to ink up some of my scenic stamps, that so often get forgotten about.
The stamps I used are from Darkroom Door and I used some simple masking techniques to create it.
I cut a piece of smooth stamping card and then made a mask using some masking material and die cut a rectangular aperture.
I inked through the aperture with 3 colours of Distress Inks: Weather Wood, Stormy Sky and Vintage photo. I then punch a circular mask, adhered it and darkened the colours around it, to create a moon. The picture above shows it with the circular mask in place and the one below with it removed.
The fact that the moon has a little colour stops it from looking too stark.

Next I stamped my chosen image with the main aperture mask still in place, and then two further images from the same set with the mask removed.
I stamped the main image in Watering can archival. I made a bit of a mess of it, so stamped an extra tree and hand drew some little birds, to cover up my mess. Embrace imperfection like usual.....

The two additional images were stamped in black archival. I coloured the box with some red Distress inks (Festive Berries and Aged Mahogany) and added a bit of extra light around the lamp post with water brush.
Then all I did was mat and layer it, and voila, all done.....

Here are a couple of details still:


A little bit of shading helps to add a bit of extra depth.

Hope you'll decide to play along with our challenge, but whatever you do, make sure to check out the wonderful different interpretations from the design team here and I am sure you'll feel inspired!

Hope you'll have a creative month of May! I'll be back later in the day with my project for Mixed Media Monthly, so hopefully see you then.
Thanks for visiting like always


Tuesday, 25 March 2014

Home made faux leather notebook

Hello everyone and wonderful to have you visiting. Hope you are having a good week. Today I am sharing another faux leather notebook with you. I created this for Spellbinders Paperarts as one of their International Blog Ambassadors.
This notebook, unlike my last one, for which I just made the cover, was made completely from scratch. I plan to make quite a few of these to give away to friends.

Instructions on how to make something similar, can be found HERE.  Info on how to make the inside pages can be found HERE.
For my version, these were the products I used:
 Valiant Honour die set
Persian Splendor 3D M-Bossabilities folder

I also used a piece of Kraft card, Glycerin, some white card, Cartridge paper, some charms and a piece of fabric, plus some basic craft items, like Mod Podge, Glue and Seal (glossy), Distress Inks Vintage Photo and Walnut Stain, a needle and strong thread, some gilding wax (I used Treasure Gold White Fire) a heat tool etc.

I started by cutting a piece of Kraft card to 5 x 7", prepared it in the way described in the video, by spraying with water mixed with Glycerin a few times, crumpling it, spraying again and crumpling once more. I then dried it with my heat tool and then embossed it with the Persian Splendor embossing folder.

Next I  swiped Vintage Photo Distress Ink all over it and spritzed some water to make it run a bit. This was followed by inking it further with an ink blending tool.. Below you can see the difference between the first and the second step of inking.
Starting to look a bit like leather already. Now to add some more interest I cut these pieces with the Valiant Honor die set.
As you can see, the pieces on the left were treated with the same faux leather technique after they were cut.

Time to put the notebook together. I folded the cover in half, cut 9 pieces of Cartridge paper to 6 x 4 3/8" to create 3 signatures. Then I covered the inside of the cover with a piece of fabric. I used Mod Podge to glue it to the cover and trimmed and rounded the edges:
Here you can see the fabric all glued on.
And here is the faux leather side, after I had covered it with Glue and Seal to give it that shiny leather look.
Next I pierced the holes for the binding as described in the video. Obviously there are many different binding techniques, so there are many ways you could do this.

Being me I pretty much eyeballed it, - I am not the neatest worker as you can see, but to be honest, this was my very first attempt at book binding, - so,embrace imperfection (yet again....)

Here it is, with the signatures all stitched in
And this is what the spine now looked like from the outside:
And closed up
And with the inside of the cover showing:

Alright, now for the decoration: I used the two extra brown bits to become like straps and glued them around the spine. I stamped and coloured a little butterfly and placed it on the label. Some of the raised bits were high lighted with some gilding wax first.
I added some charms to the spine still and that was it.


Hope you like my little notebook, thank you so much for visiting and I hope you will have some time to be creative yourself!

Wednesday, 9 October 2013

Halloween is on its way...

Hello everyone, lovely to see you here and thank you for dropping by.
Today is my turn to post on the Sin City Stamp Blog.
This time I am showing you just a little sneak peek here:
To see the full project and a description of how to make it, just click HERE
I would love it of course if you leave me a comment there, but in order to do so, you will have to click on the title of my post there first.

Thank you for dropping by here and have a fabulous creative day!!

Monday, 7 October 2013

!2 Christmas Tags Funkie Junkie Style!!!

Hello everyone, so happy you decided to come and visit.


Some of you may remember that Linda from the Funkie Junkie hosted a challenge which she named the 12 tags of Christmas Funkie Junkie Style.
I had great fun playing last year, and of course when I saw that she was doing it again, I had to join.
In case you don't know already, here are the challenge rules in Linda's own words:
Here are the challenge requirements, which must be adhered to in order to be eligible for a prize at the end. 
  • This is an inspiration challenge. Each week, I will post my tag and you will use it to be inspired to make something. You can enter any sort of craft.  It can be a tag, a card, a home decor project, a scrapbook layout - your choice but please make it winter/holiday related. 
  • You must take inspiration from something on my tag and tell us in your post what inspired you. You don't have to use my style, my layout, my colors, my theme or anything except be inspired by something on my sample. Your make can be shabby, it can be grungy or it can be clean and simple. I don't mind if you CASE my work, but if you do, please give me credit. 
  • We will have 12 weekly challenges beginning today, Monday, September 23rd.  You can link your project using the linky provided. If you don't have a blog, you can use another hosting site such as SplitCoast Stampers, but you must provide all required links and information in your posting.
  • To be eligible for the drawing at the end of the 12 weeks, you must: 1) enter all 12 challenges, 2) provide a link back to this challenge and mention that it is sponsored by my store The Funkie Junkie Boutique, with a link to the boutique. 
  • You do have to have a blog (or some other way to provide the required links and inspiration information).
  • All 12 challenges will remain open until December 22nd.  You can play any of the 12 challenges up through that date. To be eligible to win, you must have submitted an entry into all 12 of these challenges by midnight Eastern Time December 22nd.
  • On December 23rd, from the pool of players who participated in every single challenge and provided a link to the challenge and a link to my store on their post, I will draw three winners. There will be one $50 grand prize gift certificate to The Funkie Junkie Boutique given out plus two runner up prizes of $25 gift certificates. 
  • Additionally, everyone who participated in all the challenges and met the requirements will receive a 10% off coupon good for their entire order at The Funkie Junkie Boutique during the month of January 2014.
Ok, so I am running nearly two weeks behind already, but as there is time until the 22nd of December, there will be plenty of time to catch up. If you don't know the Funkie Junkie Boutique, check it out, you will not be disappointed, great products, great prices and best of all fantastic personal service!

Now, onto for my tag... I loosely followed Linda's lay out, but totally changed the colours, though I stuck with the chalkboard style sentiment, albeit using a totally different one as I don't own those stamps. I used a Kaisercraft clear stamp (seen here on a few projects lately, as I so love it) and stamped and embossed it with Wow Vanilla White embossing powder.

I added a rusty heart and some textural bits as embellishments.
The word Noel was stamped on little scraps of paper with tiny letter stamps and then mounted on black card and rather than adding the words to a die cut like Linda did, I had used embossing paste along the side and adhered the letters to that.
Swirls, cut with a Marianne die and some punched snow flakes finished it all off. I stamped on top of the snow flakes, added some Ranger Sticky Embossing Powder and then some Rock Candy  clear glitter for a bit of Christmassy sparkle.
Well, there you have it, - tag number one... Linda has posted number two and three already and it looks super, so I can't wait to start on those ones, though I know already I'll have to adapt them quite a bit as I don't own many of the things she has used.

Hope you will decide to play too, it is great fun and Linda provides lots of inspiration, - never too early to start those Christmas projects lol!

Related Posts Plugin for WordPress, Blogger...

One World One Heart

Photo

FEEDJIT Live Traffic Feed

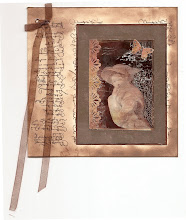
Birthday Card

Birthday Card
Just got a whole lot of new stamps from a brilliant place called the Stamp Smith. This is the image that I first saw on Docraft and really liked. I asked the friend who has used it in an ATC, where she got it. Well she borrowed it from a friend who got it from ebay as a one off. But.... it had a title. I googled the title, and hey presto found the site. They have great stamps and offer a really friendly fast service. I highly recommend them!

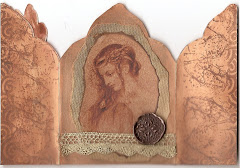
Gothic Arch Trifold inside

Gothic Arch Trifold inside

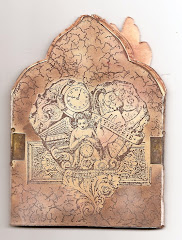
Back of Gothic Arch Trifold

Back of Gothic Arch Trifold

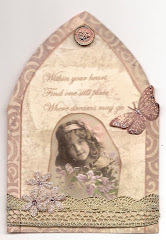
Gothic Arch Within the Heart

Gothic Arch Within the Heart

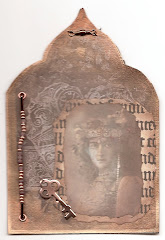
Gothic Arch, the Key

Gothic Arch, the Key