Friday, 17 October 2014

Halloween- to die for

Hello everyone and thanks for dropping in! It's time for challenge 17 (can you believe it?) over at A Vintage Journey. The lovely Red Anne has chosen the theme HALLOWEEN TO DIE FOR.
Well, I decided to play with both aspects of the theme. This is what Anne had to say about it:
Halloween is one of my favourite times of year, I love when the children come to the door, in their costumes, to 'trick or treat'. You do not have to make anything scary (but it would be fun if you did!) but you must use at least one die on your creation and it must be strongly influenced by Tim Holtz. It can be a tag, card, canvas or mixed media piece.
And this is what I came up with:
Now, though like Anne I love Halloween, I don't actually own any Halloween themed dies apart from the little Movers and Shakers pumpkin and acorn, and in the end I did not even use that particular pumpkin, so I decided to make my own Halloween themed embellishments, using the dies I had at hand.
But, let's start from the beginning:

I wanted to use a Triptych blank that I have had in my stash like forever.
I coloured it with my new Distress Sprays (love them!!!!), I used Wild Honey and Rusty Hinge and a tiny bit of Vintage Photo, then added a first layer of stenciling using the Halloween Words Layering stencil and Walnut Stain DI.
As the card blank was not very good quality card, it soaked up the colour big time, so it needed more depth and also more stenciling for interest. I used the Shatter stencil and Walnut Stain and Black Soot DI.
Alright, now for to use some dies....
I cut three ovals with one of my Spellbinder dies. 

Ovals? Why you may wonder, - this is Halloween, not Easter. Well all shall be revealed:
Tadah!!
Home made pumpkins!! I had this idea in my head, and I think it actually worked lol. As you can see I cut a further 3 ovals, slightly smaller, so I could make a smaller pumpkin too. I layered them up as shown in the picture, one in the middle and two on either side, glued and then coloured them with the same sprays and added Rock candy Crackle paint. Once the crackles had appeared I gave a quick spritz with the Walnut Stain spray, wiped off the excess and that was it for the basic pumpkins. I then added some bits of greenery from the garden Greenery die, hand drew and cut some little stalks and added some curled raffia covered wire, - all done!

Next came some bottles: I have the Movers and Shapers mini apothecary bottles, and they of course always come in handy for Halloween projects. I cut both bottles, once from plastic packaging and once from card.
The plastic packaging ones were coloured with alcohol inks: Terra Cotta, Butterscotch and a tiny bit of Espresso. I then covered them first with Glossy Accents and then Rock Candy Crackle. When it had dried I added some depth and shadows with a Faber Castell Big Brush pen. The card one was coloured with Pumice Stone and Vintage Photo DI. I then glued the packaging one on top of the card one, to keep the glass effect, but have more depth of colour (forgot to take a photo of that, but you can see it on the project of course). I did the second bottle in exactly the same way. 
Next I had more spritzing fun with various colours of Distress Spray and some thinned gold paint and when dried cut a whole number of leaves with various leave dies that I am lucky to have collected over the years:
Alright, onto the three panels now:
I cut 3 of the large Vintage Cabinet Cards in Black card and three of the small in white.
I had to slightly trim down the sides of the black ones, so they would fit onto my Triptych.

I'll talk you through what I did with the white ones, one by one:
I stamped the witch from the Mini Halloween 4 set by Tim in Black Archival, masked her with Pebeo masking fluid and then stamped with a mix of stamps (Darkroom Door London and Clarity Trees) around the edges. I then inked with Seedless Preserves, Dusty Concord, Faded Jeans and Stormy Sky DI. I used the faux bleach technique (just using a wet brush and blotting with kitchen paper) on the moon and the light around the street lamp. I then removed the masking fluid from the witch and coloured her and the pumpkin with Distress markers.The little stars were added with a gel pen.
On this one the Skeleton from the Mini Halloween 4 was white embossed, the spider from the same set was stamped in a corner and then I did some more stenciling and inking with the same sort of colours.
The last one, which is probably my favourite, uses the same Darkroom Door stamp and the little owl is from Sin City stamps. I used the faux bleach again for the light and shadow effects.

Well, that is pretty much it. I layered it all up, added a few acorns etc still  from the Autumn Gatherings strip die and that was it.


Here you can hopefully see how the bottles turned out. I added some little labels still which were computer generated, as I don't have any of the stamps that include the cool labels.
Well, hope you like my project and sorry for yet another mammoth post, but I think particularly beginners in crafting and blogging like to have some of the detail.

The Day of the Dead sentiment was computer generated and mounted on a piece of black card.

Make sure to check out this latest challenge, my teamies, including two new ones, have made an amazing collection of projects to inspire you, so celebrate Halloween with us and play along!

Almost all product in this project are available from Countryview Crafts, our wonderful sponsors.

Now before I finish, I want to just share a couple of photos with lovely blog friends I met up with this last week. On Saturday The lovely Julie and I, (she  is one of our two newest Creative Guides at a Vintage Journey) met up for a coffee and a chat here in Edinburgh. And just yesterday the wonderful Kath Stewart and I met for a great chat at the Papeterie in Aberdeen. I am always amazed how time seems to fly when meeting with crafting buddies, so much to laugh and chat about. Loved meeting you both!!!
Julie and I outside in our street
Kath and I in front of all the Tim Holtz goodies (of course)
I have decided to add this project to the That's Crafty Challenge, where the theme is Spooky

Thank you for visiting like always

Tuesday, 14 October 2014

Holiday Knits in different ways
Hello everyone and thanks so much for coming to visit today.
It is no secret, - I love Tim Holtz and all the wonderful products he brings to us, again and again. I had great fun making several Christmas cards,  using the wonderful Tim Holtz Holiday Knit stamp set and matching Layering Stencil. Here is the first one:
I have this wonderful mitten and ribbon die and I knew this stamp set would just be perfect for it.

I stamped one of the two stamps in the set on strong white card in Adirondack Cranberry ink, die cut the mitten and inked a bit around the edges, both with Vintage Linen Distress Ink and with a bit of the Cranberry ink.

Here you can see the other bits I prepared for my card:
 A bit of 5.75 by 5.75 Kraft card run through a snowflake embossing folder and inked with various colours of green distress ink: Peeled Paint, Pine Needles and Forest Moss. I then highlighted the raised bit with treasure gold to give some sparkle.
The white ribbon, is actually die cut card, sparkled up with Rockcandy Dry Glitter. A piece of the Tim Holtz red and cream trimmings and a stamp from the new Tim Holtz Christmas Nostalgia set.
Here is a close up of the ribbon, I also added a little flower, the only slightly more bulky embellishment, as I want to try and keep my Christmas Cards as flat as possible for easier posting.
I added a sentiment, stamped in Potting Soil Archival and then die cut with the Spellbinders Labels 4 die.
Finally I mounted it all on a  7 x 7 Kraftcard blank, and that was it.
The other two cards use  the layering stencil, but a different stamp set, the Nostalgic Christmas set. These cards were inspired by The Funkie Junkie's 12 tags of Christmas challenge. Linda is on tag 3 already, and I have only managed number one, but I did two different versions of it at least.
This one is all in brown tones, totally different from Linda's original, which was all in reds, but it using the same background technique and similar elements on the lay out. I decided to not make my challenge pieces in to tags but cards this year, at least it forces me to get some Christmas cards done.
Here is the second one, very similar, but this time in blue tones.

All the rules of the challenge and Linda's original can be found HERE.
Sadly I know already that I won't be able to finish all 12 tags this year, as I will be away without craft supplies by the time Linda posts her last example,but I'll do as many as I can and at least it will provide an incentive to do my cards....Well, that's it for now

Thank you for visiting today and I hope you are having a good week!


Friday, 10 October 2014

Believe in the magic

Hello everyone, thanks for dropping in....
Here is another journal page, using the new Aqua Tints I have posted about on several occasions now. I love these gorgeous bottles of concentrated water colour.

This page was just all about playing with the tints and some stamps (plus a few die cuts).
Whereas the last page was more monochrome, this one is more colourful, - child like, as really I was playing with ideas for a birthday card for my grand daughter, whose second birthday was last week. The stamps used are from one of the Sheena Douglass A Littlebit Magical sets, and no, this is not a DT piece, I just love the stamps and was having fun with them.
The background was gessoed with a pallet knife, leaving some textures and patterns for the tints to pool around in. The pumpkin is a Tim Holtz die, the mushrooms are from the stamp set, stamped on card, fussy cut and coloured with Derwent Inktense pencils.
Here you can see the magic of the tints ontop of the Gesso, their colour is just so intense. Oh the sentiment was just computer generated by the way.
The magical door way, stamped on tissue and then blended into the background. This is actually two separate stamps. I masked the doorway and then stamped the brick wall, turning the stamp the other way for the second side. Once you remove the mask, it looks as if the brick wall is behind the doorway.
When I did the birthday card I actually cut a slit in the door so it can open and put a fairy behind it, but in my haste to get it to Australia in time, I totally forgot to photograph it, so can't show you, but apparently she loved it....

Anyway, not your usual journal page, but good fun to do.
I am linking this to Art Journal Journey "deep in the forest".

Hope you will have some creative time, thank you for visiting and have a great weekend when it comes!

Tuesday, 7 October 2014

Some very sad news

Hello dear friends and followers.
Many of you will have heard already through Facebook and other blogs, about the sad news that the lovely Calico Craft shop went up in flames and all stock was lost just last week. HERE is a link to the official announcement.

My project was due to appear on the Calico blog on the day after the fire destroyed everything and the online shop and blog were taken down, so it was never shown. Therefore I thought I would show it here now.

I created a hanger using some of their wonderful paints and mediums, as well as their beer mats and paper serviettes. They stocked so many unusual things that were hard to come by else where, so I for one will miss them so much.

I'll do a quick step by step of how I created my project:
I started my background with a piece of mount board, covered it with Gesso using a pallet knife, while it was still wet I added some old book pages, left them to dry for a couple of minutes and then ripped them off. Here is a link to a video that shows you how to do this, even though in the video it lands up being a very different project..

Next I created some sprays using a dark brown Acrylic paint mixed with water. I love making sprays like that, because once they are dry they are water proof. Here's a close up of how the paints puddled around the gesso, leaving some great texture:
Next, I took three beer mats, coated them in Gesso and added the same colour of acrylic paint around the edges, blending with a baby wipe and my fingers.
In the case of the central tile/panel, I used a pinkish colour instead, to blend with the scrap of serviette I was going to use for that one.
Below you can see what it looked like after I had adhered the paper serviette scraps with Modge Podge.
Once everything had totally dried I sanded the edges and then sealed them with Decoart Traditions multi surface sealer. When that had dried I added Decoart One Step Crackle.
More of my own made acrylic spray was sprayed on the tiles when the crackle glaze had dried, to seep into the cracks and make them more visible. Below is a close up. I wiped the excess spray away with a baby wipe as soon as it had gone into the cracks. This is essential, as of course this kind of spray, unlike Dylusions or any of the others, is permanent!!
Here you can see how I put a chain at the top so I can hang this piece:
Because on this tile I had applied the crackle glaze somewhat too thick, the cracks became rather too big, - you live and learn....

The one good thing about this tragedy is, that at least no one got hurt, and I for one desperately hope that in time to come they will perhaps start trading again in one form or another. I have loved designing for them and want to thank both Helen and Steve for all the trust they had in us their team and for their generosity. I loved all their wonderful products, including the latest addition to their business, the beautiful Calico Craft parts.


Thank you for visiting and see you next time

Related Posts Plugin for WordPress, Blogger...

One World One Heart

Photo

FEEDJIT Live Traffic Feed

Birthday Card

Birthday Card
Just got a whole lot of new stamps from a brilliant place called the Stamp Smith. This is the image that I first saw on Docraft and really liked. I asked the friend who has used it in an ATC, where she got it. Well she borrowed it from a friend who got it from ebay as a one off. But.... it had a title. I googled the title, and hey presto found the site. They have great stamps and offer a really friendly fast service. I highly recommend them!

Gothic Arch Trifold inside

Gothic Arch Trifold inside

Back of Gothic Arch Trifold

Back of Gothic Arch Trifold

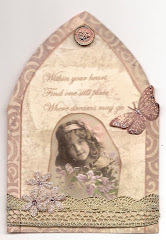
Gothic Arch Within the Heart

Gothic Arch Within the Heart

Gothic Arch, the Key

Gothic Arch, the Key