Sunday, 24 November 2013

Altered Frame for Nicecrane Designs

Hello everyone and so kind of you to drop by here.

Today I am sharing an altered frame I created with one of the adorable Christmas Images from Nicecrane Designs.
I'm afraid to say I got a bit carried away and started to add more and more to my piece, - I think I should take lessons from some of those wonderful "Less is More" people out there, but hey ho, I'll share it with you anyway, seeing I have done it now.

I started by making the background for the central panel. I added some texture paste through a couple of stencils and when it had dried added some colour with Distress Stains.
Next came some stamping in the background with Distress Inks and some stencilling with my new Tim Holtz shattered stencil, using mainly Iced Spruce.

Here you can see some detail. Not sure why I am showing this, because in the end I covered it all over, but at least it can serve as a reminder for myself. I now wish I had left it like that...

Right, so then I started to add several layers as a backdrop to the image and forgot to take further step by step photos, - usual story with me, I get so into the process that I totally forget about the old camera.
As you can see, I added the image (a black and white one from one of Nicecranes many wonderful Christmas Images) on top of several other layers. Here is a close up of the image
You can find all of his wonderful Christmas images HERE.

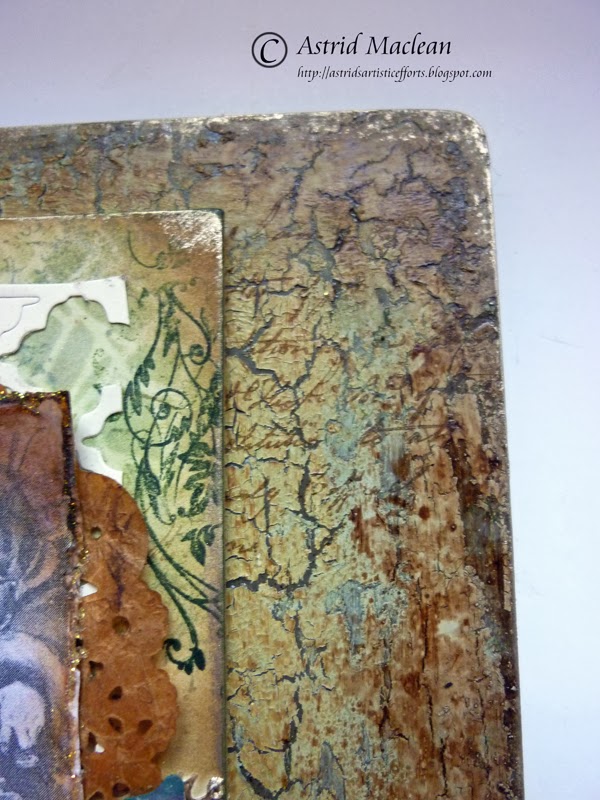
The wooden frame was altered in a very similar way: Texture added through stencils first, but this time I also wanted some crackle, so I painted it with Paper Artsy Fresco in French Roast, then added some Crackle Glaze and then did the top coat in a mixture of colours to blend with the background of my central panel.Finally the raised bits were highlighted with Treasure Gold in my all time favourite colour White Fire.

Here are some more close ups

The brown around the edges was done with some Tsukineko Walnut Stain, I also did some background stamping still. And as I was going over the top, it got a rather elaborate Flower cluster and beaded trim also still.

Well, there you have it, I am truly not sure whether I like it, but what is done is done and I will just have to live with it....

Hope you are finding some creative time and thank you for dropping in like always!
Thursday, 21 November 2013

Playing with Pastels

Hi everyone and thank for for looking in here today.
Well, I am in full swing with my Christmas cards at the moment, but today wanted to play with something a little different.
A while back I discovered a new way of using pastels, you can read about it HERE if you are interested. Well, I decided to use the same technique for my cards and here is the result:
The background was created with the pastels and stamping with embossing ink. These are not pan pastels by the way, but ordinary art pastels. Love how the colours blend and bring out the stamped design. Here is a close up of the background:
For my vocal image I decided to use the Tim Holtz Layered Wing die. I painted them with Fresco in French Roast, then added Crackle Glaze and when that was dry added Snowflake mixed with a little Vanilla and then let the crackle do its magic. Once everything was dry I rubbed some pastel crayon around the edges.

The sentiment was done in the same way, but this time I stamped with Coffee archival which I then clear embossed, The star was covered with sticky embossing powder by ranger and then I added some Rock Candy Distress Glitter
Here is the finished card


While my pastels were out I decided to do a second card, this time the vocal image was a stamp:

The side of the card was run through an embossing folder and then the raised bits were highlighted with Treasure Gold in White Fire.
Here you can see a bit of the background again. The pastel became very intense so I toned it down a bit with watered down Picket Fence Distress Paint.

The vocal image was stamped first and then masked, before adding the background stamping.
I high lighted the branches of his crown a bit with a white pen and added some holly berries with Twinkling H2Os.
I couldn't help myself and just had to add a few embellishments. This time the sentiment was created just with the pastels over the embossing ink.
Well, there you are, two more to tick off my list, - onto the next ones I guess......

Hope you are all keeping creative and getting on with your own preparations, I have seen some amazing cards around and I have to say, I do love this time of year and am determined not to get stressed out.......

Thanks for visiting

Tuesday, 19 November 2013

12 tags of Christmas FJ style #8

Hello everyone, thanks for dropping in!
Well I am in full Christmas Card making mode and decided to use Linda's tag 8 as my inspiration for this card, though you'll be pushed to recognize that, but I will explain in a moment. Here is the card:
Linda's original can be found HERE, very different indeed!!

Still there were some bits I took inspiration from, foremost the way she did the background. Linda links to a brilliant tutorial by Tammy Tuterow that she followed, and I did the same, only using different stamps and colours, but following exactly the same steps and I have to say I love it.
Here is a picture of mine, before I did anything else:
The other bit of inspiration was the stamp set she used for her vocal image, - I used the same set, only a different stamp. I also used another Tim Holtz set, the Holiday Joy Framelits die set. I just love the trees in this set and I stamped them in Iced Spruce DI. Because of the embossed background you get a sort of mottled effect when you stamp over it, which I quite like for this particular look.
It's like a kind of snowy effect.

I stamped my vocal stamp in Cobalt Archival and clear embossed it, I just love this stamp and dream of one day doing a sledge ride in a sledge pulled by horses like this.
I used some pastel pencils to add shadows and make it appear as if the sledge was going past a frozen lake, hope you can see it from the photo.
The sentiment is from the same set.
The only added embellishement was a stamped snowflake with a button, for this card I decided I wanted the stamps to do most of the talking....
Well, hope Linda will accept it as still being inspired by her tag. All the details of the challenge can be found HERE. There is still a bit of time to play and if you decide to tag along, you are in with a chance for a fabulous price sponsored by the Funkie Junkie Boutique

Thanks for all you kind comments on my last card, here's hoping you will like this one too!

Sunday, 17 November 2013

Funkie Junkie challenge # 7

Hi everyone and lovely to see you.
Don't know about you but the Christmas season is definitely closing in on me and I am trying very hard not to panic.
One of the reasons why I like playing in Linda's tag challenge is that it gets me down to making some Christmas projects. Here is my make for Linda's tag 7
Like some others I have been making my tags into cards, but I was getting tired of the tag onto card format and so this time round I made mine into a card straight away. My version looks very different now from Linda's tag 7 which you can see HERE. However, there were definitely several things that inspired me: adding some texture to the background, using the word Joy and the poinsettia flower with some text added to it.
Here are some details:
I made my poinsettia with the help of a Spellbinders die as I don't own the Tim Holtz one Linda used, as you can see I added a stamped ticket for a bit more interest.

The word joy stamped with a very old Tapestry stamp and a filigree ornament altered with some gilding paste to give it a bit of a patina look.

The vocal stamp is a Katzelcraft one, love this green-man style Santa stamp.
 All the details of the challenge can be found HERE
And as you may know, there are some fabulous prizes up for grabs all sponsored by THE FUNKIE JUNKIE BOUTIQUE

Well, that's it, another card completed, - onto the next one!
Have a creative day everyone and thank you for visiting!

Friday, 15 November 2013

Steampunk for Our Creative Corner

I was more than a little excited when I was invited to become part of the Our Creative Corner design team, and today is the day I will share my first project. Just click on the link to see the amazing projects my teamies have created also.
As you may know Claudia chose the theme of Steampunk Tic Tac Toe and I decided to go with the top line, wing, gears and wire. I made a wall plague out of mount board and started by making my background using Tim Holtz's Eroded Metallic technique as explained in Creative Chemistry 102.
Though I was pretty pleased with how it came out I added some Wow Blended Verdigris for some extra texture as well as some rusting powder to the corners.

Next I ran a piece of card through a Spellbinders Cogs and Gears embossing folder, layered a piece of 7 Gypsies printed tissue paper over the top and darkened the raised bits with Walnut Stain Distress Inks,
The next layer was some corrugated card, painted with Antique Linen, Weathered Wood and Walnut Stain Distress paints and then rusted with a thick layer of rusting powder.
Time for some stamping: these are both La Blanche stamps, stamped in Jet Black Archival onto smooth stamping card and then fussy cut and inked a bit with Vintage Photo DI.

Some rusty cogs (love that rusting powder, two of these are metal the other wood yet with the powder all beautifully rusted they look just the same).

A little plaque created with a metal filigree charm, treated with a bit of verdigris gilders paste, a piece of dry embossed metal and a word created with a Spellbinders die.
Ok, now for some wings..... a butterfly image with a rusted pen nib came to the rescue.

And of course no Steampunk piece is quite complete without the Victorian inventor, a vintage freebie I had in my stash.
Finally a piece of rusty wire to attach the charm to the plaque
Well, there you have it. I am not usually a steampunk sort of girl, so this was a bit of a challenge for me, but I greatly enjoyed it. Hope you like it.....
There is still plenty of time to play, so I hope you will come and join us. Click HERE to find all the details of the challenge, hope to see you there!!

Wednesday, 13 November 2013

A Card for All Seasons

Hello everyone and thank you for dropping by, either for the first or the second time today. Yes it is busy here right now, as I had two DT pieces both due on the same day. This one is for Sin City Stamps.
Here is a sneak-peek of my project:
If you want to see more, please click HERE
If you like the project and would like to leave a comment, you will have to click on the title of my post, for that is the way the blog is set up there for some reason....
Thanks so much for dropping by  and have a wonderful day. look after yourselves!

A Little Bit of Altering...

Hi everyone and thanks for dropping around here.
Today it's my turn to post on the Artistic Stamper Creative Team blog.
Here is a sneak-peek of my project
If you want to see more, all you need to do is click HERE
Thanks for dropping by and I will be back later with another sneak-peek for Sin City Stamps, - it's busy here today...
Hope you are having a creative time and thanks for visiting!

Monday, 11 November 2013

Chunky Fun

Hello everyone, long time no see (well kind of), but thanks for calling by, I really appreciate it.

The other day I woke up with the idea that I really wanted to make a chunky ATC.
My lovely crafty friend Annie gave me these wonderful wood chunkies when I visited her the other day and I just had to have a go at one, so here is the result.

I covered the edges of the wood in black Gesso, cut pieces of smooth card to the right size for all the different sides and then had great fun with texture paste, Distress Stains, Inks and Collage. It took me right back to my long forgotten ATC swapping days, and it certainly took me to my happy creating place without any pressure. So thank you for that Annie!!
Here are some more photos:


 This is a little Paper Whimsey image, inside a bottle cap.


As you can see, most items are from Tim Holtz, it was so much fun, digging out some of these long hoarded treasures from my stash...

Hope everyone is having a good week and thank you for visiting!

Related Posts Plugin for WordPress, Blogger...

One World One Heart

Photo

FEEDJIT Live Traffic Feed

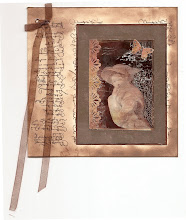
Birthday Card

Birthday Card
Just got a whole lot of new stamps from a brilliant place called the Stamp Smith. This is the image that I first saw on Docraft and really liked. I asked the friend who has used it in an ATC, where she got it. Well she borrowed it from a friend who got it from ebay as a one off. But.... it had a title. I googled the title, and hey presto found the site. They have great stamps and offer a really friendly fast service. I highly recommend them!

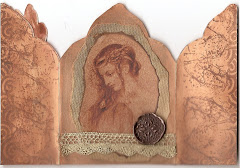
Gothic Arch Trifold inside

Gothic Arch Trifold inside

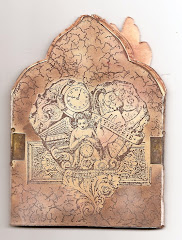
Back of Gothic Arch Trifold

Back of Gothic Arch Trifold

Gothic Arch Within the Heart

Gothic Arch Within the Heart

Gothic Arch, the Key

Gothic Arch, the Key