Hello everyone, thank you for dropping by!
It's been rather quiet here this week but I have been busy elsewhere, both at work and with DT projects coming your way in the next two weeks or so.....
Anyway, yesterday evening I had a little play time for myself, so made this little tag book, full of forgotten things as a) I wanted to ink up some stamps that had not seen the light of day (or ink for that matter) for ages, and b) I wanted to play in the Our Creative Corner Forgotten Things Challenge.
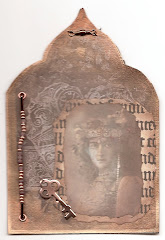
I started by gluing two tags together (Prima Mixed Media tags, I had quite forgotten I had a pack of 48 of these) They are quite thick and gluing two together made for a sturdy book cover. I created the outside with the help of all sorts of sprays, inks and paints and then used a number of forgotten stamps (including the little Craft Stamper one that I stamped on tissue paper). As you can see I also embossed a corner with a Tim Holtz/Sizzix Texture Fade folder.
The little crown embellishment I picked up during the summer while visiting a fab little scrapbook shop in the Netherlands called Scrap Delight They make their own resin embellishments very much like the Melissa Francis or Prima ones but at a fraction of the price and I got quite a few of them, and then of course promptly forgot I had them lol...
The inside pages were made by cutting a strip of the Tim Holtz French Industrial pad, inking it with various Distress Inks and then decorating it with all sorts of old and forgotten stamps. I am sorry but as I have had these for years and before I joined design teams never took much note of the companies that made them, I really can't tell you who made them.... So here are the inside pages:
I know the pens on the left are from Indigo Blue.
The photo here is from the Tim Holtz paper collection. The Eifel Tower might be Oxfort Expressions, the ephemera bits are Tim Holtz and G45.
Here I have no idea about the vocal stamps, the clock on the right hand page is Indigo Blue.
The words are Tim Holtz chit chat stickers. There is of course a little story behind the images, it's of a dapper gentleman travelling to Paris, meeting the love of his life and after many years they produced a pair of twins whose favourite past time was to sit together on a swing.... I leave you to imagine the rest.
Before gluing the inside pages to the cover, I tucked some hand died seam binding behind the back page and looped another bit through the front cover so the booklet can be tied shut. Like I said I am putting this for the Forgotten Things Challenge at Our Creative Corner
Hope you like it and thank you for visiting like always!
Hope you'll all have a good weekend when it comes
Thursday, 19 September 2013
Monday, 16 September 2013
Tag Play time
Hello everyone, welcome and I hope your week has gone well so far.
I just had a bit of play time today between other projects and made a quick tag, tags are still pretty much my favourite projects and they always come in handy.
I started by running a large tag through a Spellbinders 3D M bossabilities folder, this one is the Persian Splendour one. I inked it with Antique Linen, Victorian Velvet and Brushed Corduroy Distress Inks.
I then stamped images from the Darkroom Door For Correspondence set, cut them out and arranged them on the tag.
I just had a bit of play time today between other projects and made a quick tag, tags are still pretty much my favourite projects and they always come in handy.
I started by running a large tag through a Spellbinders 3D M bossabilities folder, this one is the Persian Splendour one. I inked it with Antique Linen, Victorian Velvet and Brushed Corduroy Distress Inks.
I then stamped images from the Darkroom Door For Correspondence set, cut them out and arranged them on the tag.
The little panel at the top is made from Paperclay. I stamped into it with black Pigment ink and then dried it for about half an hour in the oven at a very low setting. (If you are patient, which I am not, this stuff will air dry in about a day, it is very light weight, so perfect for embellishments).
A couple of chit chat stickers and some flowers, some bit of chip board and a brad finished it all off.
The final bit was to add a bit of lace at the top and the tag was done.
I have just heard that there are a few places available still for the Finnabair Workshops at DAMSELFLY So if you have been considering this, now is your chance!!
Well, that's it from me for now, thanks for visiting and have a good week!!
Labels:
Altered Tag,
Creative Paperclay,
Darkroom Door,
Distress Inks
Sunday, 15 September 2013
Oh no..... first of the Christmas cards
Yep, the time has arrived, I have decided I simply must start with my Christmas cards... But first of all, welcome, thank you for being here and a special welcome to new visitors and followers, I feel honoured you have decided to follow/visit.
All right so above is the first one. I have challenged myself to a) start in good time to avoid panic later, and b) to use up old Christmas papers, embellishments and stamps rather than get new ones. I have a ton of papers, and never seem to use up a whole collection, so this one here is from a Kaisercraft collection from last year and all the other bits and pieces were from my old Christmas box as well.
And here is number two, using scraps from the same collection of papers.
As you can see I used a couple of Tim Holtz/Sizzix dies for this one too, Tattered Banners and Tattered Doily
So, short and sweet today, and I feel happy that at least I have started........
Thank you for visiting and have a lovely Sunday still and creative week ahead!!
Labels:
Kaisercraft Christmas Cards 2013,
Sizzix,
Tim Holtz
Friday, 13 September 2013
Journal Spread Finnabair Style
Good morning everyone. Today is my turn to post on the Artistic Stamper Creative team blog and I decided to show a Finnabair style journal spread but using Artistic Stamper stamps. Here's a sneak peek:
To see the full project and a detailed step by step, please click HERE
Hope to see you there and until next time....
To see the full project and a detailed step by step, please click HERE
Hope to see you there and until next time....
Wednesday, 11 September 2013
On this sad day....
Hello everyone, so glad you dropped by today. Yes, as everyone knows, today is the sad day we commemorate the terrible events of 9/11. Did you realize it is now 12 years ago? I remember it as if it happened yesterday, - the world will never be the same again.
On a happier note, I have a card to share with you today which I created for Sin City Stamps.
Below I will give you a quick step by step. I used two stamp sets:
Art Journaling with Terri Sproul and
Love of Butterflies
I also used:
A Size 12 tag
Ranger Archival inks in Cobalt Blue and Coffee
Distress Paints in Antique Linen, Weathered Wood, and Picket Fence
Distress Inks in Stormy Sky, Chipped Sapphire and Gathered Twigs
Clear Embossing Powder
Manilla Card Stock
Spellbinders Dies: Les Papillions and Stately Circles
Tim Holtz Stencils
Texture Paste
Viva Pearl Pen in black
Various embellishments, some crinkled seam binding
1. I started by folding an extra large tag in half
2. I then added some texture paste through some stencils and let it dry over night
3. I blended Distress Paints in Antique Linen, Weathered Wood and Picket Fence over the opened up tag until I was happy with the result. I used a pouncing motion with the paints and a baby wipe for extra texture.
4. Next I inked up some stamps from my chosen sets in Archival Cobalt Blue ink and stamped randomly over the background. I also added some further stamping with Archival Coffee. Who says that journaling stamps can only be used for journaling? I love these stamps and they make for great backgrounds for cards too. The two dark blue butterflies were stamped in Cobalt Archival and then heat embossed with clear powder to make them pop a bit more.
5. Now for some vocal points: I cut out a couple of butterflies from scraps of paper from my stash
6. I glued one on top of the other, bending the top one to add some dimension. I then stamped the word Art from the jouraling set on some inked card with blue Archival and embossed with clear embossing powder again. I then layered it all up with some embellishments from my stash as you can see from the photos.
7. Now for the inside: I cut two pieces of manilla card stock slightly smaller than the insides of the tag card. I created a pocket for one of the sides with one of my circle dies:
Here you can hopefully see how I made the pocket. On photo 2 you can see how I put the card on the die cut, drew around the corners and then I cut those bits away. I then glued it onto the card, just around the edges to create a circular corner pocket. I then did the backgrounds in exactly the same way as the outside of the tag card.
I created a tag for the pocket by stamping one of the journaling stamp, again in Cobalt Archival on some previously inked manilla card and cut it out. I then stamped a little sentiment from the Tim Holtz "way with Words set.
Here is the tag inside the pocket:
I added another stamped butterfly for a bit more interest.
Here you can see the other side, background as before with another butterfly and some more Tim Holtz sentiments
Here finally are the two inside panels glued in place:
The final touch was to add a bit of crinkled seam binding dyed with a mix of Stormy Sky and Chipped Sapphire Distress Inks.
Hope you like my card and thank you so much for visiting!
On a happier note, I have a card to share with you today which I created for Sin City Stamps.
Below I will give you a quick step by step. I used two stamp sets:
Art Journaling with Terri Sproul and
Love of Butterflies
I also used:
A Size 12 tag
Ranger Archival inks in Cobalt Blue and Coffee
Distress Paints in Antique Linen, Weathered Wood, and Picket Fence
Distress Inks in Stormy Sky, Chipped Sapphire and Gathered Twigs
Clear Embossing Powder
Manilla Card Stock
Spellbinders Dies: Les Papillions and Stately Circles
Tim Holtz Stencils
Texture Paste
Viva Pearl Pen in black
Various embellishments, some crinkled seam binding
1. I started by folding an extra large tag in half
2. I then added some texture paste through some stencils and let it dry over night
3. I blended Distress Paints in Antique Linen, Weathered Wood and Picket Fence over the opened up tag until I was happy with the result. I used a pouncing motion with the paints and a baby wipe for extra texture.
4. Next I inked up some stamps from my chosen sets in Archival Cobalt Blue ink and stamped randomly over the background. I also added some further stamping with Archival Coffee. Who says that journaling stamps can only be used for journaling? I love these stamps and they make for great backgrounds for cards too. The two dark blue butterflies were stamped in Cobalt Archival and then heat embossed with clear powder to make them pop a bit more.
5. Now for some vocal points: I cut out a couple of butterflies from scraps of paper from my stash
6. I glued one on top of the other, bending the top one to add some dimension. I then stamped the word Art from the jouraling set on some inked card with blue Archival and embossed with clear embossing powder again. I then layered it all up with some embellishments from my stash as you can see from the photos.
7. Now for the inside: I cut two pieces of manilla card stock slightly smaller than the insides of the tag card. I created a pocket for one of the sides with one of my circle dies:
Here you can hopefully see how I made the pocket. On photo 2 you can see how I put the card on the die cut, drew around the corners and then I cut those bits away. I then glued it onto the card, just around the edges to create a circular corner pocket. I then did the backgrounds in exactly the same way as the outside of the tag card.
I created a tag for the pocket by stamping one of the journaling stamp, again in Cobalt Archival on some previously inked manilla card and cut it out. I then stamped a little sentiment from the Tim Holtz "way with Words set.
Here is the tag inside the pocket:
I added another stamped butterfly for a bit more interest.
Here you can see the other side, background as before with another butterfly and some more Tim Holtz sentiments
Here finally are the two inside panels glued in place:
The final touch was to add a bit of crinkled seam binding dyed with a mix of Stormy Sky and Chipped Sapphire Distress Inks.
Hope you like my card and thank you so much for visiting!
Labels:
Art Journaling,
Butterfly Love,
Sin City Stamps,
Tag card
Tuesday, 10 September 2013
Autumnal Birthday
Hello everyone, thanking you for popping in here today and a very warm welcome also to new followers. It is lovely to have you here.
A quick post from me today, it's my daughter's birthday soon, so of course I made her a card:
I used one of the wonderful images from Nicecrane Designs, this is one of the Alphonse Mucha collection, you can find it HERE.
I embossed a large tag with a Tim Holtz embossing folder and then inked it with a mix of Distress Inks, Tea dye, Rusty Hinge, Wild Honey, Peeled Paint and even a bit of Dusty Concord round the edges. I spritzed and flicked a bit and then stamped with various Prima stamps from the Vintage Vanity collection by Finnabair. I mounted the Mucha image on a bit of Kraft card, adhered it to the tag and then embellished with some die cut leaves I still had left over from another project. The gorgeous butterfly was a gift from a friend.
Here are a few close ups still:
The butterfly was originally just gold coloured, I rubbed some patina coloured gilding paste over it and a bit of Treasure Gold.
The little heart shaped button I made from shrink plastic. I punched out a heart from black shrink plastic, punched two small holes, stamped with gold ink and then shrunk it with my heat gun.
I mounted the tag on a piece of Kraft card to turn it into a card.
Well hope you like it and thank you for visiting today and also for all the wonderful comments you always leave me, it is much appreciated and I will do my best to visit you back if I can.
I am entering this for the Simon Says Stamp Monday challenge where the theme is embossing.
A quick post from me today, it's my daughter's birthday soon, so of course I made her a card:
I used one of the wonderful images from Nicecrane Designs, this is one of the Alphonse Mucha collection, you can find it HERE.
I embossed a large tag with a Tim Holtz embossing folder and then inked it with a mix of Distress Inks, Tea dye, Rusty Hinge, Wild Honey, Peeled Paint and even a bit of Dusty Concord round the edges. I spritzed and flicked a bit and then stamped with various Prima stamps from the Vintage Vanity collection by Finnabair. I mounted the Mucha image on a bit of Kraft card, adhered it to the tag and then embellished with some die cut leaves I still had left over from another project. The gorgeous butterfly was a gift from a friend.
Here are a few close ups still:
The butterfly was originally just gold coloured, I rubbed some patina coloured gilding paste over it and a bit of Treasure Gold.
The little heart shaped button I made from shrink plastic. I punched out a heart from black shrink plastic, punched two small holes, stamped with gold ink and then shrunk it with my heat gun.
I mounted the tag on a piece of Kraft card to turn it into a card.
Well hope you like it and thank you for visiting today and also for all the wonderful comments you always leave me, it is much appreciated and I will do my best to visit you back if I can.
I am entering this for the Simon Says Stamp Monday challenge where the theme is embossing.
Labels:
Alphonse Mucha.,
Birthday Card,
Nicecrane Design
Sunday, 8 September 2013
How lucky am I?
Hello lovely visitors and happy Sunday to you all.
Some of you may remember that a while ago I organised a swap for so called ICAD cards, - 3 x 5" cards, also known as skinnies. To my amazement 23 lovely people signed up for it and we have been having great fun making and receiving these lovely cards from each other. Each participant had two partners, so made and received two cards. I will show the ones I made some time after they have been received (my last one is going out tomorrow). But last week I received my returns and it is these I will share today.
The two people I was lucky enough to receive cards from were Sue Carrington (Stamping Sue Style) and Sarah Hemphill (Vintage Figments)
So here they are, I received both a holder and a card:
Here you can see them, side by side, each so different and each so very beautiful. This is what I love about swaps of this nature, you get to see another artist's work IRL, and there always so many fabulous new ideas.
Here are close ups of Sue's creations, first the holder and then the card.
I love how Sue layers her wonderful stamps and makes them into a fantastic composition.
Here are Sarah's
The holder closes with a bit of velcro, the string and beads are just for decoration, such a fab idea.
And here is Sarah's card, full of wonderful vintage gorgeousness, don't you just love those tiny beads on the dyed cheese cloth?
Thank you ladies, first of all for playing in my swap and then for sending me these wonderful creations!!!!
Have a great creative week ahead everyone and thank you for visiting today!!
Some of you may remember that a while ago I organised a swap for so called ICAD cards, - 3 x 5" cards, also known as skinnies. To my amazement 23 lovely people signed up for it and we have been having great fun making and receiving these lovely cards from each other. Each participant had two partners, so made and received two cards. I will show the ones I made some time after they have been received (my last one is going out tomorrow). But last week I received my returns and it is these I will share today.
The two people I was lucky enough to receive cards from were Sue Carrington (Stamping Sue Style) and Sarah Hemphill (Vintage Figments)
So here they are, I received both a holder and a card:
Here you can see them, side by side, each so different and each so very beautiful. This is what I love about swaps of this nature, you get to see another artist's work IRL, and there always so many fabulous new ideas.
Here are close ups of Sue's creations, first the holder and then the card.
I love how Sue layers her wonderful stamps and makes them into a fantastic composition.
Here are Sarah's
The holder closes with a bit of velcro, the string and beads are just for decoration, such a fab idea.
And here is Sarah's card, full of wonderful vintage gorgeousness, don't you just love those tiny beads on the dyed cheese cloth?
Thank you ladies, first of all for playing in my swap and then for sending me these wonderful creations!!!!
Have a great creative week ahead everyone and thank you for visiting today!!
Subscribe to:
Posts (Atom)
FEEDJIT Live Traffic Feed
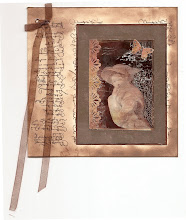
Birthday Card
Just got a whole lot of new stamps from a brilliant place called the Stamp Smith. This is the image that I first saw on Docraft and really liked. I asked the friend who has used it in an ATC, where she got it. Well she borrowed it from a friend who got it from ebay as a one off. But.... it had a title. I googled the title, and hey presto found the site. They have great stamps and offer a really friendly fast service. I highly recommend them!
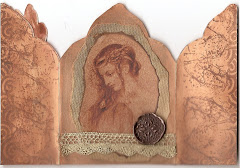
Gothic Arch Trifold inside
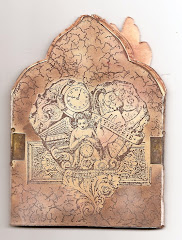
Back of Gothic Arch Trifold
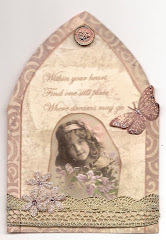
Gothic Arch Within the Heart
Gothic Arch, the Key