Showing posts with label Tag booklet. Show all posts

Friday, 23 January 2015

For the Love of Tim

Hello all and thanks so much for dropping by here! Today it is my turn to host the latest challenge at A Vintage Journey.

As it's not that long until Valentine's day, this is the description of the challenge:
It being nearly the end of January, it's not long until Valentines day.
A flower cannot blossom without sunshine,
And man cannot live without love.
So the saying goes. For this challenge please share what moves your heart with us, be it a Valentine's card for a loved one, a heart themed project, or something else that expresses what true love means to you. Just make sure that Tim's style is evident in what you make.

Well, in the end I decided not to go the traditional Valentines route, instead I created a project expressing my love for all things Tim....
As you know of course, love can come in many different ways, - there is the passionate "being in love" or the steady enduring love between long standing partners, - there's the love of a parent or grand parent for their off spring, or the platonic love between true friends. Did you know that in Ancient Greek, there were actually 3 different words for love? ἔρως érōs, φιλία philía and ἀγάπη agápē, the latter means spiritual love. Anyway, my love for Tim Holtz and the wonderful inspiration he provides for crafters all around the world, possibly holds aspects of all three.....

But enough philosophy lol, and onto my project.
This year I decided to do my 12 tags on Ranger #8s, - I wanted to design a mini with 12 pockets that could hold them all, so here it is and how I made it.

You will need 4 bits of card that are large enough to be cut to 13" by 10.5"
Score each one at 6.5 along the 13" side and at 3.5 and 7 along the 10.5 side. Cut as shown in the picture below:
Next fold each piece according to Tim's W book. I have shown how to do this many times, as most of my booklets are made according to this principle, I just vary the sizes.. Here is a description.
Once you have folded your card it will look like this:
By adhering the top or the bottom of the pages together (for this one it is best to use something like tissue or washi tape), each piece of card will have 3 pockets. Simply glue your 4 pieces together and you will have created a booklet with 12 pockets just the right size for a size 8 tag.
This is what it will look like from the front and below you can see what it looks like from the top:
As I had to use different types of tissue tape because I ran out and also because it all looked rather messy, I decided to edge everything with black gesso.
For that reason I decided to make the cover and spine  with 3 bits of black card, this is the size you need:
2 pieces of 3.75" by 6.75 " for the covers and 1 piece of 3" by 3.75" for the spine. If you score this piece at 1 1/8" each end along the 3" side it will wrap neatly around the outside of your tag book. But before adding the spine, create something to cover the plain black first.

I used a piece of Manila card for this, cut to 6 1/4 by 3 3/8". I used inks, sprays, texture paste and gesso to create my background. I then rubbed it with Dorland's Wax Medium and then crumpled it up to give it a leather like appearance.
I embellished it with various Ideaology pieces, some letter stickers and two stamped sentiments. The stamps are from the Mercantile set. I then ran the spine piece of card through a little embossing folder and highlighted the embossed bit with Pewter Treasure Gold.
Here are a few close ups still:
Here you can see the spine of the book.
The numbers are from an Industrious Stickers sheet. The laurel wreath is an Ideaology piece, I aged it a bit with some Decoart Antiquing Creams.
The one sentiment is of course Tim's favourite saying, the other is one of my favourite love quotes..

Now one of the fun things with creating a booklet like this, is that you also have the inside pages to decorate. I plan to do that on a monthly basis, really picking up the qualities and colours of the month and the season. So here is my January page:
You can just see my January tag stick out of the back. If you missed it, you can see it here, based on Tim's tag of course.

Well, hope you like my tag book. If you would like to make your own and I have not made things clear, please feel free to email me and I'll be happy to answer any questions.

Almost all of the products I have used are available from Countryview Crafts. And do check out the amazing projects my team mates have created. All you need to do is click HERE

Of course we all hope you will play along in our challenge, so hopefully see you there!!


Thursday, 19 September 2013

A little book full of forgotten things....

Hello everyone, thank you for dropping by!
It's been rather quiet here this week but I have been busy elsewhere, both at work and with DT projects coming your way in the next two weeks or so.....
Anyway, yesterday evening I had a little play time for myself, so made this little tag book, full of forgotten things as a) I wanted to ink up some stamps that had not seen the light of day (or ink for that matter) for ages, and b) I wanted to play in the Our Creative Corner Forgotten Things Challenge.

I started by gluing two tags together (Prima Mixed Media tags, I had quite forgotten I had a pack of 48 of these) They are quite thick and gluing two together made for a sturdy book cover. I created the outside with the help of all sorts of sprays, inks and paints and then used a number of forgotten stamps (including the little Craft Stamper one that I stamped on tissue paper). As you can see I also embossed a corner with a Tim Holtz/Sizzix Texture Fade folder.
The little crown embellishment I picked up during the summer while visiting a fab little scrapbook shop in the Netherlands called Scrap Delight They make their own resin embellishments very much like the Melissa Francis or Prima ones but at a fraction of the price and I got quite a few of them, and then of course promptly forgot I had them lol...
The inside pages were made by cutting a strip of the Tim Holtz French Industrial pad, inking it with various Distress Inks and then decorating it with all sorts of old and forgotten stamps. I am sorry but as I have had these for years and before I joined design teams never took much note of the companies that made them, I really can't tell you who made them.... So here are the inside pages:
I know the pens on the left are from Indigo Blue.
 The photo here is from the Tim Holtz paper collection. The Eifel Tower might be Oxfort Expressions, the ephemera bits are Tim Holtz and G45.
 Here I have no idea about the vocal stamps, the clock on the right hand page is Indigo Blue.

The words are Tim Holtz chit chat stickers. There is of course a little story behind the images, it's of a dapper gentleman travelling to Paris, meeting the love of his life and after many years they produced a pair of twins whose favourite past time was to sit together on a swing.... I leave you to imagine the rest.

Before gluing the inside pages to the cover, I tucked some hand died seam binding behind the back page and looped another bit through the front cover so the booklet can be tied shut. Like I said I am putting this for the Forgotten Things Challenge at Our Creative Corner

Hope you like it and thank you for visiting like always!

Hope you'll all have a good weekend when it comes

Related Posts Plugin for WordPress, Blogger...

One World One Heart

Photo

FEEDJIT Live Traffic Feed

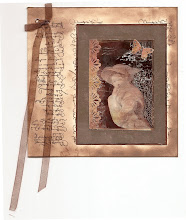
Birthday Card

Birthday Card
Just got a whole lot of new stamps from a brilliant place called the Stamp Smith. This is the image that I first saw on Docraft and really liked. I asked the friend who has used it in an ATC, where she got it. Well she borrowed it from a friend who got it from ebay as a one off. But.... it had a title. I googled the title, and hey presto found the site. They have great stamps and offer a really friendly fast service. I highly recommend them!

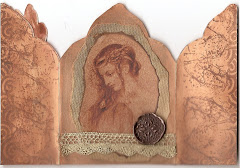
Gothic Arch Trifold inside

Gothic Arch Trifold inside

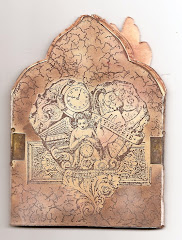
Back of Gothic Arch Trifold

Back of Gothic Arch Trifold

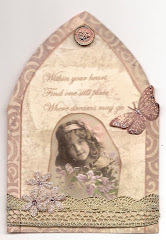
Gothic Arch Within the Heart

Gothic Arch Within the Heart

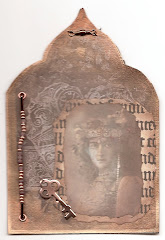
Gothic Arch, the Key

Gothic Arch, the Key