Thursday, 5 September 2013

Finn weekend part two....

Hello dear visitors, so glad you are here, it is lovely to have you drop by.
Today I am sharing the remaining projects I created last weekend under the guidance of the wonderful Finnabair. And for UK visitors, I wanted to let you know that Finn is doing further workshops, the next one being in Glasgow at Damselfly Crafts, information on these classes can be found HERE
As far as I know there are still a few places available on the Sunday for sure, but maybe even on the Saturday also. These classes will be worth every penny!!

Anyway, onto my projects: The first class we did was a LO, using Finn's wonderful papers, her mechanicals line, some sprays and plain and ordinary tea!
I'll show you two photos, one before and one after the spraying and splatting process:

To be honest, this was probably my least favourite project, I am just not a scrapbooker, it was also a class that was similar to one I did last year, but hey ho, it's always good to be reminded of techniques.

The second project was the canvas I showed in the post below this one, the 3rd was a journal. In the morning Finn guided us in making the cover and in the afternoon we created two journal spreads in different styles, the first one more vintage, the second more free style. Even though that was totally out of my comfort zone, it was probably the one I enjoyed most. I loved the kind of free flowing artyness of it.
Here are the covers, full of Finnabair style embellies:
 We did the front and the back at the same time and were meant to have put less embellishments on the back, but me being me, I got totally carried away, so there is not much difference between the two.
 This is meant to be the front, - the beautiful Prima mixed media album was part of our kit, as was all the other stuff used. The only thing we had to provide ourselves was some glue!
The back cover
All right, now for the inside pages, again, we created them two at the time which I thought was a brilliant idea:

 I had stupidly forgotten to bring photos, so used a Crafty Individuals image for the page above and a vintage image which the generous Jools provided for the one below.
Finally the arty pages:
 This handsome gentleman was also provided by Jools, I just noticed she used the same one for her spread, - great minds lol.

The word on the page above came from an older Finnabair collection I still had in my stash. I added it when I got home.

I am really looking forward to creating some more pages for this journal, if and when I have time. I'll leave you with a final photo of the journal when I put it together with the bookrings we received.
Thanks for visiting like always and for all your lovely comments, they are very much appreciated!!

Post Script: A face book friend just pointed out to me that the gentleman in the second journal spread is a youth photo of Joseph Stalin. I'm afraid I did not realize that, I just thought he was any odd handsome fellow. Had I known, I probably would not have honoured him with a journal spread.... Glad I added the word emotion rather than love lol. This man who killed thousands of innocents, must have had something wrong with his emotions that's for sure.....


Wednesday, 4 September 2013

A Fantastic Weekend

Hello everyone and thanks for dropping by. As many of you know I have just returned from the most fantastic weekend doing classes with the fabulous Finnabair. It was the most amazing event, not only because of all the wonderful classes Finn taught, but also because I met up with so many like-minded friends, old and new.

It's late at night as I write this post, so I will keep it brief and will show much more in the days to come, but for right now I at least wanted to share one of the projects we did and show you my version. No doubt you will be able to see many more in various places across blog land. It was a great inspiration to see what so many talented artist managed to create under Finns amazing guidance.
So today I will share an 8 x 8 canvas. I took a few step by step photos, but very soon I got so caught up in the creative process that I forgot to take more.....
Here you can see about step three. After covering the canvas with strips of randomly torn paper and canvas resist, we arranged our embellishments around a photo and then covered the bottom half with black acrylic paint.
Here is further stage, the canvas now sprayed with mica sprays, both over the black at the bottom and over the top half which had been thinly coated with gesso first.
The final stage, bringing the whole piece together with further layers of gesso and sprays, plus (in my case) a few high lights with some Treasure Gold.
As you can see, keeping the photo clean is not so easy, specially if you are a messy worker like I am.
Here are a few close ups still:
Some of the embellishments included in the very generous kits we received

I decided to give my lady some creative head gear... I chopped up some of the wooden bits that came with the canvas and cut up some of the larger bits to create the rest of the contraption.

Here you can see some of the fab texture created with the help of bits of canvas and lace. The paint, sprays and gesso bring all the textures to life.
Well, that's it for my first project (it was the second one we did in the classes) I'll leave you with a few happy snaps that capture some of the wonderful moments during the weekend.
Back row from left to right:
Lesley Ebdon, Alison (Butterfly) Brenda Brown, Emma Taylor
Middle row: Alison (Crafty Trog) Finn, myself and Tracey Bantoft
Front row, the "terrible twins" Nicky and Gillian

How's this for a photo composition?

With Alison, Finn and Brenda, - so wonderful to meet you all!!!

Here you can see all of us proudly displaying our canvasses after the class.
Well, that's it for today, but before I sign off I want to apologize that I have not been visiting nearly as many of your blogs as I would have liked in the last few days. I had a full day of work today, but hope to catch up with you all in the next day or two.

Thank you for visiting like always! Hugs

Saturday, 31 August 2013

Autumn Serenity

Hello everyone and lovely to have you visiting here today!
After a very hectic week, I needed to find a bit of peace in my soul, and what better way than to get out some inks, paints and stamps and have a little play.
The background to this stamp was created with the help of Distress Stains and then toned down a bit with Dylusion Spray in White Linen. Love that stuff, it can tone down anything that has gone too bright. When I was happy with the background, I stamped around the edges with a back ground stamp from Stempel Glede in  Gathered Twigs Distress Ink. The vocal image was stamped in Jet Black Archival and is a stamp I have had for years and years, I thought it was an Oxford Impression one, but I can't find it on their current list. If anyone knows who made it, I'd be happy to know.
The leaves were cut from some papers I made with various inks and sprays and then added salt, to give the lovely salt effect, but you cant see that very much any more.
I diecut them with Spellbinder and Sizzix dies. The idea for this came from the lovely Maria of Maria's Knutsel Plezier. If you don't know her blog, go check it out, she makes the most wonderful cards with amazing backgrounds!

The tag was finished with a little Autumn Quote, stamped on a scrap of paper, some twine,  a charm and button rusted with Rusting powder by Crafty Notions and a hand died ribbon.


I certainly felt a whole lot better after having a little play like this. I'm sure we all know that really, crafting in many ways is therapy for our hectic lives....

Thank you for visiting and hope you get some creative time too!!

Thursday, 29 August 2013

Tagbook for Snazzys

Hello everyone and thanks so much for dropping by. It's a busy week here I'm afraid to say. Here's a little sneakpeek of my second project for Snazzys, showing the 7 Dots Studio 9th wave collection designed by the wonderful Finnabair.
To see the full project please click HERE
Hope you'll take the time to look, these papers are fabulous.

I'm excited as tomorrow I am off to Snazzys for a full weekend of classes with Finnabair and hopefully I will get to meet some of you there in person!

I'll remember to take my camera, so look out for some pictures soon.

Thank you for visiting today
Hugs

Wednesday, 28 August 2013

Journal cover for Sin City Stamps

Hello everyone and I am so happy you came to visit.
Today I am showing you my first project using Sin City Stamps!

I was over the moon excited when they asked me to become part of their team as I adored their stamps just from looking at the pictures of them in the store. But when I received my stamps to work with, I got even more excited as these are the best stamps I have ever laid my inky hands on, - they are so deeply edged you just cannot go wrong. No ink in places where you don't want it with these stamps!

Anyway, on to my project: I decided to finally make the cover of the nature journal I have been working on all through my summer break, the Art Journaling with Terri Sproul set seemed just perfect for this, specially when teamed with the Love of Butterflies set, because of the nature theme of course.
I started by embossing a piece of 5 x 7" white card with one of the new Spellbinders 3 D M Bossabilities folders.


Next I coloured it with the help of some Ranger Distress Stains and Inks in the following colours: Willd Honey, Shabby Shutters, Rusty Hinge and Forest Moss


I squeezed some of the stains onto my craft mat, swiped my embossed piece of card through it, spritzt water over it to blend the colours, dried it with my heat gun and then blended the inks over and around it all until I was happy with the result. By that time I had lost quite a bit of the embossed detail but I did not mind that for this project. If however you do want a deeply embossed background, it is better to colour your card before you emboss it.


Next I cut and embossed one of my labels dies that matches this embossing folder and coloured with the same inks while it was still in the die, I then stamped some of the background stamps of the journaling set in Forest Moss and Rusty Hinge Distress Ink, these little stamps are just perfect to add some interest to a background..
Here you can see some of the detail:


Now for some more stamping to add a vocal point: - I stamped one of the butterflies twice in Library Green Archival Ink, cut them out and blended some Peeled Paint Distress ink around them to colour them further. I then adhered them together just in the middle, bent up the wings of the top one a bit for some dimension, added a pen nib and glued this onto my label


Time to start layering my background to create the actual cover....

This is what it looked like to start with:


I covered it with Kraftcard, inked around the edges with Gathered Twigs Distress Ink and stamped one of the journaling stamps along the left hand  side


Next I made a layering piece from a saved bit of corrugated card, coloured with various sprays and distressed around the edges

I then adhered it all together with a tiny scrap of lace tucked in between one of the layers.


Time for the final embellishments and some more stamping fun:
I cut a piece of plain cotton ribbon, coloured it with distress stains, distressed it a bit and stamped another one of the butterflies in Library Green archival along it:


Then I put it all together with some further stamped and cut out butterflies and some home made flowers and leaves. 


And here finally are some close ups still:
Another stamped butterfly, tugged between the flowers

Two words from the journaling set adhered with foam squares for some dimension


The stamped ribbon attached together with a little key charm
Well, there you have it, hope you like my first project and there are just a few days left still to use a fantastic fun scratch coupon code to get yourself a bargain! Click HERE, hover your mouse over the squares and your code will appear, how much fun is that, - keep scratching and you can get up to 40% off!!

See you next time


Tuesday, 27 August 2013

When was the last time you did something for the first time???

Hello everyone, welcome and thanks for dropping by!
So when did you do something for the first time?Well I did,  when I created this card, you can see full details on the Artistic Stamper Blog


This is just a tiny little detail obviously, - hope I have made you curious enough to hop along there, but in any case, thanks for stopping by here and have a wonderful creative day!

Monday, 26 August 2013

7 Dots Studio 9th Wave project for Snazzys

Hello dear visitors and thank you for dropping by.
Today it's my turn to show a project on the Snazzys DT blog.
Here's a little sneak peek
To see the full project with step by step, please click HERE
 Have a creative day

Related Posts Plugin for WordPress, Blogger...

One World One Heart

Photo

FEEDJIT Live Traffic Feed

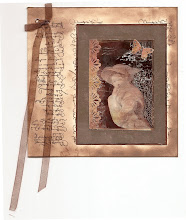
Birthday Card

Birthday Card
Just got a whole lot of new stamps from a brilliant place called the Stamp Smith. This is the image that I first saw on Docraft and really liked. I asked the friend who has used it in an ATC, where she got it. Well she borrowed it from a friend who got it from ebay as a one off. But.... it had a title. I googled the title, and hey presto found the site. They have great stamps and offer a really friendly fast service. I highly recommend them!

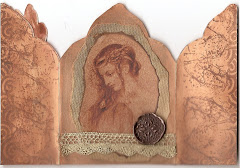
Gothic Arch Trifold inside

Gothic Arch Trifold inside

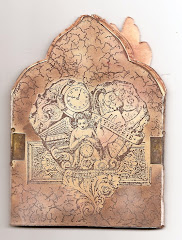
Back of Gothic Arch Trifold

Back of Gothic Arch Trifold

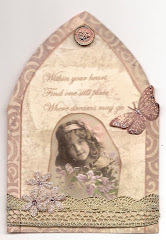
Gothic Arch Within the Heart

Gothic Arch Within the Heart

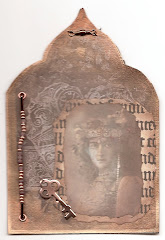
Gothic Arch, the Key

Gothic Arch, the Key