Showing posts with label Heartfelt Creations. Show all posts

Thursday, 25 February 2016

Butterfly Dreams

Hello all, thanks for dropping by. Today I finally have another page for my techniques journal to show. No step by step for most of these pages I'm sorry to say, as I am mostly just using this journal to play around with different techniques.
Above you can see the finished page, mostly put together with bits and pieces from my scrap box that never seems to get any emptier, - do you know that feeling?
Here you can see the background before I added the collage elements. Playing with different colour paints, my favourite stencil of the moment, one of Seth Apter's ones and some background stamping, using various IndigoBlu stamps.
The focal image was taken from one of the Tim Holtz Found relatives
Both sentiments were taken from a paper collection from Heartfelt Creations as far as I remember (like I said they were scraps from my box of "bits and pieces that might come in handy at some point")....
We don't normally think of boys having butterfly dreams I suppose, but I rather do like the dreamy look in his eyes, and after all, boys can have dreams too can't they?

Well, that's it for today, - just a bit of playing around, great for relaxation....
Thanks for your visit today and I hope you are having a good week.

Sunday, 17 January 2016

Sharing a little Sunshine

Hello all and thanks for dropping by!
Here in the UK we have had many, many dark and dull days, - as I was working on the project I am sharing with you today, my thoughts went back to brighter and sunnier days, - so hence the title of this post....
Now there is a little story behind this project: My kind and lovely daughter gave me an amazing present for Christmas, not just one, but three of the new Heartfelt Creations Flipfold albums, plus all of the inserts that come with them, because she knew that I like to make little books. If you have not seen these yet, do check them out!

Well I was super excited, but before allowing myself to start on one I felt I really had to finish another one that I had started ages and ages ago from scratch. I posted a first installment, way back in September 2014 (that's how bad I am in finishing certain projects...) If you want to see the first installment, click here.
Well, what you see above is the finished project, with all the tags and photos in place.
Below I will show you some more of the pages, but you will find all the details in the original post.
Here is the spine, it's about 1.5 inches wide and the complete book has 6 double pages plus numerous tags and photo mats (not showing those).
Close up of the front cover
Inside front cover
First double page with pocket and tags.
Further double pages below.


Well, that's it. I am glad I have finally finished this project and can now start with a clear conscience on using one of the new ones. Not sure yet whether I will turn it into another mini book or more into a journal, - maybe it will become more of a hybrid project, i.e some journalling and some more traditional mini book play with paper, tags and photos.....  Off to start on another "project" that's been waiting for a long time, - a massive craft room clear out. There may well be a give away coming soon, - stay tuned....
Meanwhile, thanks for visiting like always

Tuesday, 23 September 2014

A project in Progress

Well, this last weekend I had some time to play and make something just for myself. It's going to be a mini book, with 6 double pages and pockets all over the place. As you can imagine, a lot of work and a lot of photos to show, so I thought I would share it in stages.
The binding for the mini, which will hold family photos of my grand children, will be the so called "stack the deck" system, devised by the amazing Laura Denison. If you want to know how to do it, just click the link and it will take you straight to the video.

I am using the Heartfelt Creations Classic Sunflower paper collection that I fell in love with the moment I saw it. I made my mini out of handmade envelopes made with the paper collection. By trimming a small bit off the end on one side you then have a pocket for tags etc.

Anyway, there are loads and loads of tutorials out there on how to do these things, so I am just going to show you the pages and tags I have done so far.
Above is a page on which I created a little corner pocket for a small journaling spot and photo.
Here is the tag, - I love altering papers with stamping and stenciling.
This is one of the large tag that fits into the side pockets. I am going to make them all the same shape, they happened to be just the right size to use the strips of paper that were left after making the envelopes. The top is shaped with a Spellbinder die, the little lattice embellishment is a Sue Wilson die, I am going to add a little title relating to the photo in the center of it.
The back of the envelope, the flower was made with a stamp using another Heartfelt Creations collection.
The front of the next envelope, this one just has a side pocket. The image is a stamp from the Sunflower collection, I couldn't help but order a couple of the stamps when I got the papers....
The back of the envelope, again, flowers made with  Heartfelt Creations stamps. Some of the other embellies are from the Graphics 45 Place in Time collection.
The final envelope I have done so far, a pocket on the front this time, with a photo mat again.
Here is the back of the same envelope, again with a pocket at the front.
And here finally are the two tags that fit in those pockets, each decorated with Heartfelt Creations stamps. Oh and all of the colouring of the stamps was done with Prisma pencils.

Well, hope you like what I have done so far, more will follow as time will allow, including the cover.

Thanks for visiting like always and I hope you will find some time just to create, - it's good for the soul I'm sure!

Thursday, 24 July 2014

Obsessed with Flowers

Hello everyone and thanks for coming by today! I hope your week is going well.
I seem to be slightly obsessed with making flowers at the moments as you will be able to see from the posts below. So when I needed a special card for someone, guess what the central feature was going to be? Yep, you got it, more flowers. Hope you are not getting sick of them.
These flowers were made with the Heartfelt Creations Ariana Blooms dies and stamps, just like the tag you can see HERE. I love the fact this die can make such different flowers, depending on how you shape and or colour them.
This time I stamped the flowers in Burgundy dye ink and then coloured them with Victorian Velvet Distress ink. The leaves were stamped with Sage coloured pigment ink, clear embossed and then coloured with Iced Spruce, Bundled Sage and a bit of Walnut Stain Distress ink.
The bottle, which I think is a Graphics 45 stamp, was stamped, fussy cut (the label is a separate stamp, which fits perfectly inside an open space in the main bottle stamp), shaped a bit and then I stamped it once more, cut out the pink part at the top and adhered that to the main bottle. It was adhered to the card using foam tape for a bit of dimension.
The clock is a Cheery Lynne die which I over stamped with a Crafty Individuals crackle stamp.

Finally the sentiment is from Stempelglede.
I cut it into a little tag shape and adhered it to the top. The background was created with Tim's Spritz and Flick technique and over stamped with various stamps from a Tim Visual Artistry set.
Thank you for visiting and see you next time!! Stay inky!!

Thursday, 3 July 2014

Home made flowers and hand dyed ribbon second installment.

Hello everyone, hope your month is going well. Today I am back to share a second little project with you for the challenge I am hosting at Our Creative Corner
As you can see it is a tag, the flowers are made with dies and stamps from the Heartfelt Creations Adriana Blooms collection. If you are into making your own flowers, you should check out their stamps and dies!
I started by making a background for my tag using Tim Holtz sprits and flick technique in soft green tones, mainly Iced Spruce and Bundled Sage. I also used the Brushed Pewter Distress Stain and edged with Walnut Stain Distress Ink.
I added some background stamping with Coffee Archival and then made my flowers. Here is a link to a video giving you loads of different flower shaping techniques with these stamps and dies, if you are interested.
I stamped my flowers in sage coloured pigment ink, then clear embossed them and coloured them with a tiny bit of Gathered Twigs Distress Ink, both in the centre and on the edges. The stamping does not really show up on the photo, but on the leaves below you can see the effect a lot better:
I cut a piece of trellis with a Cheery Lynne die and then layered up my tag as you can see below:
Here are some close ups still:


Hope you like this little project. The original challenge project can be seen HERE.

Hope you'll decide to play along in the challenge! And for those of you that have no flower dies or even punches, - there are so many different ways in which flowers can be created out of lace ribbon or just cut by hand. In a couple of days I will be back with a last project for the challenge, showing how flowers can be made just using stamps!

Thank you for visiting and hopefully see you next time!


Related Posts Plugin for WordPress, Blogger...

One World One Heart

Photo

FEEDJIT Live Traffic Feed

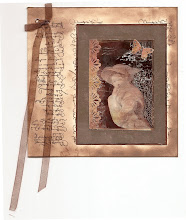
Birthday Card

Birthday Card
Just got a whole lot of new stamps from a brilliant place called the Stamp Smith. This is the image that I first saw on Docraft and really liked. I asked the friend who has used it in an ATC, where she got it. Well she borrowed it from a friend who got it from ebay as a one off. But.... it had a title. I googled the title, and hey presto found the site. They have great stamps and offer a really friendly fast service. I highly recommend them!

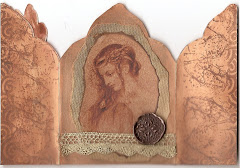
Gothic Arch Trifold inside

Gothic Arch Trifold inside

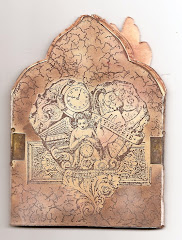
Back of Gothic Arch Trifold

Back of Gothic Arch Trifold

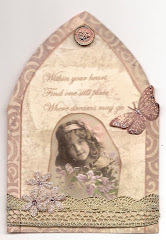
Gothic Arch Within the Heart

Gothic Arch Within the Heart

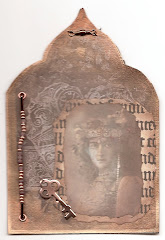
Gothic Arch, the Key

Gothic Arch, the Key