


Hello friends and thank you for joining me here today. I have been asked a lot recently about my journals and notebooks and how I make them, so I thought I would attempt to write a kind of tutorial for beginners.
So here goes (there are no step out photos, but I will try and talk you through the process).

This little album is made from a craft coloured file folder, but you could just as easily make it out card, I just happen to have a pile of these folders and I like the extension they have in their spine. I cut it to the size I wanted, mine is about 5" high and 8 " wide. I inked around all the edges and then covered both the front and the back with papers from the Shabby Damask paper collection in my Etsy shop.
As you can see I wrapped some coffee dyed lace around the spine, very easy to do by disolving the cheapest Nescafe you can find in a large mug with boiling water and then dipping your lace in it for just a few moments, and voila, instant vintage effect.
The front was further embellished with more lace, some bits of cheese cloth and some fussy cut embellishments from the Shabby Damask Add On kit, also in my Etsy

The closure is made with two little diamond shaped elements from the kit that I mounted on thick card, covered with Glossy Accents and once it had dried I glued on small bits of further card to lift them from the background so to speak, so that I then could simply wrap some 1mm hat elastic around them.

I glued the knot in the elastic onto the back cover, underneath the "button" and the loop can then just be wrapped around the button on the front cover.
OK, onto some of the inside pages. I created several flaps and pockets, mostly using leftover bits of the file folder. I'll let the photos do the talking, you can obviously add as many or as few as you wish.


The simplest way to add flaps is to cut leftover bits of the folder to the size you want them, score about 1/2 inch along one of the sides to attach the flap and then glue in place using a strong adhesive. Do this before you cover the inside main parts with you chosen papers, to hide the glue strips. However, for the more complicated shaped flaps and pockets, add paper before gluing it into the main part of the folder.
Here are some close up views of the different parts:

The inside of the cover. I added a pocket and a little notebook.

this is the front of the notebook
To make the notebook, cut however many pieces of any kind of paper plus a piece of thick card or greyboard to exactly the same size. Clip them at the top with some bulldog clips or similar, with the grey board at the bottom and then cover this whole wad with a thick line of glue. If you have bookbinding glue use that, I just used PVA and it works fine. You may have to move the clips while doing this, but then put them straight back so that it is all really clamped together. Next let it dry really well, preferably over night. Once dry cut a piece of decorative paper to the same width but about 3 inches longer than your notebook and wrap it around, gluing at the top and overlapping at the back.
Here you can see the back:

And here the side:


This is the inside view.You can leave it as plain as you want, I just used plain printer paper, but you could stamp, use decorative papers or whatever.
These little notebooks are perfect for using scraps of paper and make super little gifts just by themselves too.Well this post is getting way too long so I am just going to show you a few more pages, like I said, you can add as many pockets, flaps and tags as you want.

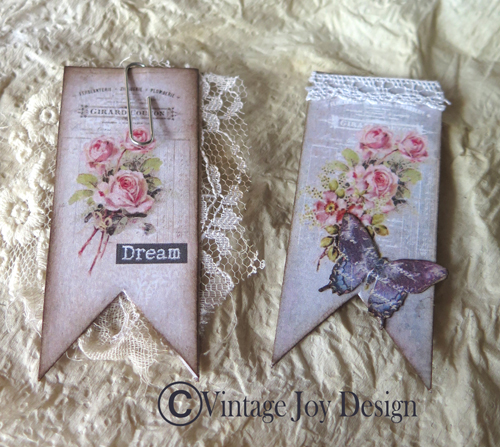
I made a little book with some coffe dyed papers and sewed that in behind one of the flaps.


A close up of the book mark above.


And now finally the freebie, here it is:

Thanks for visiting like always, and happy crafting!
xxxxx


8 comments:
By clicking on the right mouse button, I am able to open the freebie and enlarge it :)
However the previous freebie does not work this way.
My email is dorabella.santos@gmail.com.
Your work is lovely!
Totally stunning Astrid! Xx
So beautiful what an amazing project such patience and talent Love and hugs Carole x
Astrid, this is gorgeous! The entire album is such a treat with all the flips and tuck places. And that paper - wow!
Morning Astrid. Your creations are always so beautiful. I must set aside some time to do this one as I do love the style and of course I have got all the papers etc that I bought from your Etsy shop. Hope you are both well and staying safe. Hugs Rita xxx
So absolutely gorgeous and beautiful dear friend. I`m so loving every thing you did , the many flaps and pockets in your wonderful album, the sweetest tags, I`m in love with it all.
Thank you for the lovely freebie - Hugs, Dorthe
What a lovely album! Thanks for sharing!
Sorry I'm so late visiting, you have been busy! This is such a fabulous make 😀. I so enjoyed seeing how this album came together with those gorgeous vintage flaps, pockets and tags. Take care! Hugs, Jo x
Post a Comment