Saturday, 29 August 2020

Holiday project tutorial and a freebie

Hello lovely friends,
Today's post starts with a bit of a personal story. I have just returned from a holiday in the Netherlands. We had set up a home exchange with a family there well over a year ago, and despite everything, decided to go ahead with it, and yes we had a great time, but it was so, so hot, something we who live in Scotland, are not used to. So while there, sweating in about 34 degrees centigrate, and feeling too hot to go on many outings, I decided to design a new Christmas collection for my Etsy shop, full of snowy pictures and wintry elements. Can't say it made me feel much cooler, but at least it distracted my mind for a while :o) So today I am sharing a couple of projects I made with it since we are back home again (and in quarantine, as per government regulations), and yes, there is a freebie too to go along with it.

 This is the first project. A little folder made from two C6 envelopes that I slid together, by sticking the pointy flap of one into the opening of the other. I then covered the outside with one of the papers in the collection, that I had cut to size and stitched around all the edges.
 Next I made a little booklet by folding some coffee dyed papers, and used another of the printable papers as the cover, again cutting it to size so it would fit inbetween the two envelopes. I also glued a piece of ribbon that would serve as the closure on each end.
 Here you can see the front of the booklet, I sewed it into the envelope folder with my sewing machine which was easy enough as there are only 4 folded pages in total and it makes for a neat finish.
 I left the inside pages blank for writing or notes, but decorated the inside of the cover with my new favourite stencils (by Tim Holtz).
 As per usual for Tim's layering stencils, you can get them singly in a large size, or in a set of three in the small size. I love how you can layer them over each other using different tones of inks. (I used Gathered Twigs Distress Ink, and Ground Espresso Oxide ink here).
 For the back cover I even combined it with one of Tim's architectural stamps, but it got a bit busy I think...
 After the booklet was sewn in it was time to cover the insides of the folder. I cut the papers and glued them down in such a way to make sure the pockets of the original envelopes stayed in tact, in order to be able to insert journaling cards and tags.
 Here you can see some of them.
Finally I cut a strip of paper to glue around the spine of the folder, and hide the sewing. I embossed it with one of my embossing folders and highlighted the raised bits with Treasure Gold. I also added some embellishments, a little tag from the freebies, and a little resin element made with a Prima mold that I painted and sprayed to kind of match the rest of the project.

 The second project was another little folder into which you could insert a gift card, it's even simpler. I just cut a strip of one of the papers, about 8" high and 4" wide and folded it in three as you can see below. I rounded the corners at the top. The flap closes by tucking it under the circle, only half of which is glued down. Hope the picture shows what I mean. I glued it onto some coffee dyed card for strength, and then decorated with bits and pieces from the collection
 I used one of the elements as a belly band, and tucked two of the journaling cards underneath, but you could obviously also tuck in a gift card, or do both.
 Well, that's it for now, apart from the freebie of course, which you can get in high resolution for printing by sending me a quick email to my yahoo account, just click HERE
Well, there you have it, I know it's early for Christmas and I promise there will be an Autumn freebie (and collection soon), but hey, some of us like to start early on our Christmas projects, or indeed may just need some distraction from the heat.
Thanks for your visit like always, and happy crafting!
xxxxx

Friday, 7 August 2020

Tag You're It for a Vintage Journey #92, a journal and a freebie

Hello friends, it's that time again, the first Friday of the month and that means a new challenge is starting over at A Vintage Journey.
Amanda is our host this month and her theme is Tag You're it, this is what she has to say about the theme:
 'We would love to see what you create with, or on hang tags. Your hang tags can be created from any material or be any size. We would just love to see that iconic 'hang' shape front and centre in your design. Just remember to create your tag project in one of our preferred styles: vintage, shabby, mixed media, art journalling, industrial,  timeworn or steampunk.'

Well, who doesn't love to make tags, I certainly do, that's why I made 3 of them while I was at it anyway and like usual they will be part of one of my journals.


The base of the tags are book pages, I collaged, layered and stamped on them and then backed them with card to make them more sturdy.
I used scraps of paper napkins, which I adhered to the book page with collage medium, making sure on this one that some of the book page showed still too. I then added a butterfly and little label (some of these art part of a new downloadable paper collection that is available in my Etsy shop). I glued some coffee dyed cheese cloth underneath the embellishments and along the bottom there is part of a so called snipped rolled, made by gluing bits of scrap lace, paper etc to a strip of book page. At the top I fixed some lace with a couple of tiny staples.
The second one is made in a very similar way, more snipped roll along the bottom and in the middle some stamped callico fabric glued onto some lace. I forgot to mention that I cut the original pieces in the tag shapes just by hand and then zig-zagged all around them on my sewing machine.
The 3rd one is again very similar, just with a slightly different lay out. The butterfly here is actually another piece of a paper napkin.

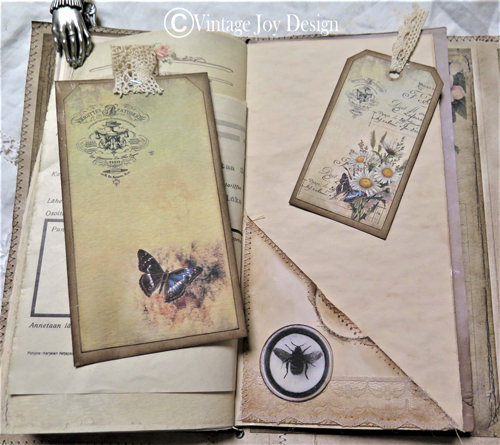
Here you can see how the tag will fit inside the journal which is a junk journal style travellers notebook. I'll probably  post more photos of that at some other point.
And here you can see how the final tag fits under a belly band.

Here are a few more of the journal pages using my new kit:


 And here finally is the freebie, it's for fussy cutting to embellish pages. To get the full resolution printable one, just email me. I often print mine out on sticker paper and then spend a happy evening fussy cutting away, very relaxing :o)


Well, that's it for now, do hop over to A vintage Journey to see the amazing tags my teamies have created and of course we hope you will decide to play along.
Happy Crafting and thanks for your visit.
xxxxx


Friday, 31 July 2020

A new journal, a freebie and tag Friday at A Vintage Journey


Hello friends, it's hard to believe it is the last Friday of July already. Here's hoping everyone has managed to stay safe and well!
Today I have a number of things to share, as it is tag Friday today over at A Vintage Journey,
let me start with that. I made this rather grungy tag to become part of an Autumn (sort of) themed journal.

Below some details of the tag, I made the background with a mix of Distress colours, did some stamping and then added some die cuts, cut from Kraft card, and an embellishment from my stash that I coloured a sort of coppery colour with Treasure Gold paste.


Now the journal that goes along with the tag is an A5 sized Junk Journal, I'll show you just a few of the pages, there are in fact many more, but I don't want to make this post too long.
Here first of all is the cover, it is decorated with some real dried flowers and leaves and a wax seal.
Below some of the inner pages, like usual with this type of journal, most of the pages are coffee stained printer paper, and then I added a mix of digital images, papers, ephemera, paper napkins and stamping and stenciling.


As you can see, there are lots of pockets, additional tags and journaling cards.

And then finally the bit, that I know many of you have been waiting for, - the freebie. It's nature themed I suppose you could say, and will go along well with some of my latest collections in my Etsy shop
There are journal cards, embellishments and words, enjoy!


Like usual, if you want the hi resolution version for printing, just email me (details in sidebar under contact me)


Well, that's it for today, happy crafting, thanks for your visit and stay safe and well!
xxxxx


Friday, 17 July 2020

A little fold er/notebook and a freebie

Hello friends, hope you are all keeping well! Nearly a month has passed already since I last posted here, and since it is Friday, I thought it was probably time to share a little project and a freebie once again, as I know how many of you like these.
So here first of all, the project with some brief descriptions:
Here you can see the outside of the folder which was made from a brown file folder. I cut it to about 6 1/2 inches high, trimmed of the tab and then folded it concertina style, into 4 equal parts more or less, each measuring about 4 3/4 inches wide. I numbered each of the panels and then cut the papers I wanted to use to size and inked all the edges. The reason I numbered all the panels, is because each one is slightly different in size, and I measured the papers one at the time and numbered them too, thus making sure they all fitted. Hope this makes sense. I then adhered them to all the panels of my folder.
Next I created a little notebook, slightly smaller than the folder, out of a mix of printed papers and coffee stained papers. I sewed them together with a 3 hole pamphlet stitch into the actual folder.
Here you can see one of the inside pages.
On this photo you can see some of the panels and on the left the back of the little notebook.
Here you and see how on some of the panels I added pockets, which I then filled with the tags, journaling cards and ephemera you can see below.

Here are some of the other panels on the back of the folder when they are folded out.
And the photos above and below show some close ups of the pockets decorated with some elements of the freebie.
The papers I used to decorate this folder are all from the Garden Grunge Collection in my Etsy shop, they match the freebie, but of course you can use that with any other papers too.

Like usual, this is just the low resolution image of the freebie. If you want the high res. version for printing, please email me (see sidebar) and I will send it to you. As you can see there are little tags, tabs to add to tags or journaling cards, postage stamps, and some bits to fussycut and decorate your projects. Enjoy and like always, thank you for visiting!
                  xxxxx

Related Posts Plugin for WordPress, Blogger...

One World One Heart

Photo

FEEDJIT Live Traffic Feed

Birthday Card

Birthday Card
Just got a whole lot of new stamps from a brilliant place called the Stamp Smith. This is the image that I first saw on Docraft and really liked. I asked the friend who has used it in an ATC, where she got it. Well she borrowed it from a friend who got it from ebay as a one off. But.... it had a title. I googled the title, and hey presto found the site. They have great stamps and offer a really friendly fast service. I highly recommend them!

Gothic Arch Trifold inside

Gothic Arch Trifold inside

Back of Gothic Arch Trifold

Back of Gothic Arch Trifold

Gothic Arch Within the Heart

Gothic Arch Within the Heart

Gothic Arch, the Key

Gothic Arch, the Key