Hello everyone and a warm welcome, thank you for taking the time to look in here. Today I am sharing the next page in my
altered book, a page around the beautiful Lily Grace.
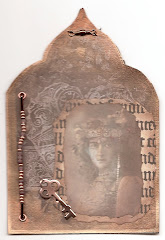
Lily Grace, or Grace as she was known, was my husband's great grandmother, this shows her in 1880.
I adore the expression in her face, to me she looks like a real charmer, dreamy and romantic. She would give birth to 5 children 4 girls and a boy. Unfortunately I have no photo of her husband, but I keep hoping he will have looked a little bit like his brother, whose photo you can see
here.
People are always asking me how I put my pages together, and I promise, I will do some full step by steps in the new year. Meanwhile, here are just a few "along the way" photos:
I covered the next double page in my book with some Tim Holtz tissue wrap, followed by a thinish coat of gesso. When that had dried I coloured the page with a mix of different acrylic paints (Tim Holtz Antique Linen, Paper Artsy paints in brown tones, both opaque and translucent) I used a brush and both a baby wipe and some kitchen roll to blend them together. I call this the wipe-on-wipe-off method. With the gesso underneath you can easily blend and merge the colours as long as they are still wet and with the help of the kitchen roll add additional textures to the paint.
Here you can see the different textures a bit better, achieved through the tooth in the gesso and the kitchen roll bunched together and pounced on the wet paint. When the paints had dried I sprayed on two colours of Sprays: Lindy's Stampgang Starburst spray in Bodacious Blush (what a name lol) and Tim Holtz Victorian Velvet. They both have wonderful old vintage pink tones and the star burst just adds a little sparkle.
Anyway, because I wanted a really romantic feel to these pages I then added the top layer of a rose tissue, a packet of which that I was lucky enough to find in a stationary shop.
I used Ranger Multi Matte Medium for this, my absolute favourite of the moment, because it really dries totally matte and has the perfect consistency.
I had this notion of Lily Grace writing romantic love letters so I stamped a number of vintage writing stamps on some tissue paper.
I stamped quite a few, just to have a choice and then selected just three to adhere to my page, tearing around the edges to avoid hard lines.
I could have left it at that, but could not resist the temptation of adding some more texture to the page with the help of some stencils. I never seem to learn the lesson of "less is more"....
By the time the texture paste had dried it was dark, so I could not take any more step by step photos.... (it gets dark here in Scotland just after 3:30 at the moment :o( )
So all I can show you now are some close ups of how I finished the page:
I mounted the photo of Lily on to some tags and other stamped elements and embellished with some flowers, sprayed with a mix of glimmer sprays. I also did some more background stamping with a little Prima stamp and added her name with the little Tim Holtz letter stickers.
Sticking with the love letter theme, I rolled up a bit of old book paper, tied it with some vintage lace, tucked in a little flower and added some other flowers underneath. Everything was adhered with the Ranger medium.
Well that was pretty much it. The page is probably a bit over the top, but then I think Lily was quite a full on lady.....
Sorry this post got a bit long, but for those of you who asked, I hope it has given you some idea of how I put it together. Hope you are having a good week and that you will find some time to be creative!
Thanks for visiting like always