Wednesday, 5 November 2014

Vintage Altered Book

Hello everyone and thanks for taking the time to come by here.
Today I want to share a first spread in an altered book I have started.
I have been hugely inspired by some of the vintage book projects I saw on Pinterest recently and wanted to try one myself. I want to make it into a kind of family chronicle, using old photos from both sides of our family to pass on to my grand children when they are older. This photo is my husbands great grand mother on his father's side.
Here is the original photograph:
I love the look on her face.
Anyway, I started by ripping out some pages from the old hard back book picked up at a junk shop.
Next I coated the first double page with gesso and when dry added texture with the help of texture paste and some stencils. I also used a texture tool for the texture in one of the corners.
I chose a neutral colour palette to go with the vintage theme using acrylic paints, a baby wipe and some kitchen roll to add further subtle textures to the background.
I stained one of the pages of the book with coffee to use behind the photo.
I tried to make it genuinely old looking. The way to do that is to crumple up the paper, then flatten it out again and cover it with some strong coffee made with instant coffee (never drink it, just use it for crafting lol, I only drink real coffee...)
Put the coffee dipped paper on a flat baking dish on top of some grease proof paper, sprinkle some more coffee grains on, because I used instant they started to kind of "bloom" out, making lovely spots. Next put it in a low oven until it has dried out (about 7 minutes or so) and you are done.
Here is a close up of the page

The other bit of paper behind the photo is a stamped (Finnabair stamp) piece of photocopy paper, inked with Vintage photo. The colour matched the coffee stained paper exactly. I also added flowers, background stamping, tissue tape,some die cuts and some Golden Brand Gold Mica Flake paste. The paste dries completely clear and you are left with some wonderful mica bits in the background. The stenciled word Hope was first coloured with a Faber Castell Big Brush Pen and then highlighted with Treasure Gold.
Here is the other side, done in a very similar way but leaving a large blank area for journaling.
The final step was to cover the photo with a wet baby wipe and then using some sprays on the embellishments and textured elements to bring them out more.
Here's a close up so you can see the effect of the mica flakes a bit better. I have had this stuff in my stash for ages, and only just re-discovered it, - it will be great to use on Christmas cards too I'm sure, but it's really hard to capture the effect in a photograph.
Thank you for visiting like always and I hope you are have a good week!
xxx

Monday, 3 November 2014

12 x 12 for 12

Hello everyone and welcome.
Today is a little bit of a different post.....

I have had to face it, after years of creating, blogging and being part of numerous design teams, I have had to decide to do a massive clear out. I am a huge hoarder of stamps and papers and my craft space is simply not big enough to hold it all, nor is there an earthly way I can use it all.

So here is the deal:
I am offering surprise packages for £12.

With Christmas not too far away, you may want to treat yourself or someone else with a little surprise pack like this....

For UK people the price of postage is included, for people outside the UK the price for postage has become so expensive, a minimum of £8 for the size of package you would be getting, that I would have to add a price onto the total and would have to request you pay for the postage too. I would negotiate a price with you depending on where you are.

Each pack will contain:
10 papers size 12 x 12" Brand new and in good condition
10 papers 6 x 6 and 8 x 8" (a mix of both) Brand new and in good condition
10 stamps (mounted rubber or polymer, a mix of both) these have been used so are not new, but in good condition!

And as a little bonus to say thanks, a card, tag or little book made by me.
Here is a sample of some of the papers, remember there will be 10 stamps also:

Papers will be a mix of older collections from: Graphics 45, Prima, Tim Holtz, Kaisercraft, 7 Dots Studios, Bo Bunny, Pion Design etc. All 12 x 12" papers are double sided, the other papers are a mix of one or two sided papers. All of the papers are high quality and will include some vintage, shabby chic etc styles. They can be used for scrapbooking, card making or mixed media work.
Most of my visitors here will know my style, I will try and be fair in the selection of both papers and stamps and include a good mix, there will be no cute stamps and some of them will even be brand new.

If you are interested, please email me 

STOP PRESS, THE SALE IS NOW CLOSED! THANK YOU FOR ALL YOUR INTEREST!

Now before I sign off I just wanted to show you how I used some of my papers to create backgrounds for some of my Christmas cards. Any paper can be altered to look totally different, that's part of the fun of using papers (well I think so anyway....)

Here is the finished card
Here is how it started, a piece of a Prima paper, not at all Christmassy.
Add some Gesso, sprays and paint (a piece of kitchen roll for texture and baby wipe to blend out hard edges are great for this).
Add a Tim Holtz Layered Snowflake, (I added another die on top and a little metal embellishment, spray them as well and add lots of glitter
Add a stamped sentiment, this one is from Tim Holtz
Mat it on matching card and you are done.

Here are two further finished samples, done in exactly the same way:
This one uses the Layered Leaf die, again on top of some Prima paper
And here is yet another one using the Layered Snowflake.

Well, hope this has given you some inspiration, have a good week!
Thank you for visiting and stay inky!!

Saturday, 1 November 2014

Inspired by Nature

Good morning all and thanks for visiting. It being the first of the month, it's always busy here, so, there are two new posts here today, and this is the second one. To see the previous one, click HERE

The project below was created for Our Creative Corner, where the theme is to use an inspirational nature photograph.
This is what Kerstin, our host had to say about the challenge:
Photographs can tell amazing stories of specific places or unforgettable moments in nature.
For this challenge use a favourite photograph and add some special colours, moods and effects.
Put these ingredients together in a vintage style and share your creative story with us. Especially suitable are classical scrapbook layouts (30 x 30) or canvases in mixed media style but you can also make cards or tags (as long as your project includes a magic nature photograph).

Note: if you don't like scrapbooking or are no photographer, the focal image can also be a cut out (or transferred) nature photograph from a postcard or magazine for example.

Well, I did something else and altered a photo frame:
This was a plain wooden frame I have had in my stash for ages. I started by giving it a coat of Gesso and when that was dry scraped on some texture paste with a palette knife in random patterns. I also added some crackle paste in the corners. Finally I  adhered some cheese cloth for further texture and to give a sort of cob webby feel.
I then starting the colouring process, using different acrylic paints in brown and black tones, keeping it lighter towards the center and darker towards the edges.
When I was happy with the result and all the paints had dried, I added some Treasure Gold in White Fire over the raised bits, to bring out the texture even more.

Then all that was left to do was to add some embellishments. I used various diecuts and berries, using some of the beautiful Autumnal colours around us in nature.
The dies are from Tim Holtz, Spellbinders and Impression Obsession (the ears of corn). The word Autumn was made with the Tim Holtz letter sticker thingies.
I found the photo on the internet, I loved the magical feel of it.

Well, that's it, thanks for visiting and have a great month of November. I'll probably be very busy getting my Christmas cards done....

Bugs and bees (butterflies allowed)

Hello everyone and welcome on this chilly first of November.
It being the first of the month, means it's the start of several new challenges, so this is the first of 2 projects I'll be posting today...
This one is for Countryview Crafts where the theme is Bugs and Bees (just to remind us of the warm days of Summer I guess), - oh and it is allowed to use butterflies too.

I decided to create a wall panel, using some of my favourite stamps and techniques:
I'll show you some close ups of the different panels with some brief descriptions:
Using Ranger embossing paste with a Tim Holtz folder, some stamping with Walnut Stain Distress Ink and further stenciling with another folder and Black Soot.
Using a background stamp from my stash, stencilling with another Tim Holtz layering stencil, the bee embellishment is paper clay into which I stamped a bee stamp from the Graphics 45 French Country stamps. I coloured it with Distress paints and Decoart Antiquing cream in black.
Another background stamp, this one from Artistic Outpost, using the embossing resist technique with clear embossing powder. More stenciling and the little letters came originally from Calico Craft who sadly no longer exist.
More stenciling with the texture paste, over painting with Golden Fluid Acrylics and then stamping with gesso and a small background stamp on top of that.
A piece of the Bee paper from the Wallflower paper stash by Tim Holtz. I thought it was just perfect for this challenge theme, so all I did was ink a bit around the edges.

Almost all of these products are available from Countryview Crafts, where if you live in the UK, you never have to pay postage!
Well, happy first of the month! I'll be back later with a project for Our Creative Corner.
Thanks for visiting!!


Friday, 31 October 2014

A Bountiful Harvest

Hello everyone and happy Halloween to you all.
Today is the start of a new challenge over at A Vintage Journey. The lovely Sandy is our host and this is what she had to say about the theme:
With Halloween's passing we step into fall. For this challenge let's think about the harvest. It seems that pumpkins, wheat, corn and even the Harvest Moon could be in order. For us in the US - a Thanksgiving theme could work but not necessary.

I decided to alter a book box, I want to use it for all the lovely crafty gifts I have received from blog friends and using the harvest theme for all these gifts of kindness, a different kind of thanks giving....
I had great fun altering it and adding lots of lovely autumnal embellishments. Unfortunately I got so caught up in the process, that I forgot to take a lot of step by step photos, but I'll try and talk you though at least some of it.
This project started as a large paper mache box. I first added lots of wrinkled bits of tissue paper to the box with matte medium. After it had dried, I covered it all over with gesso to seal, scraping it on with an old credit card for even more texture and then played around with various colours of Decoart Media acrylic paint until I was happy with the result.

I then added some verdigris embossing powder in places, added two little metal corners and highlighted the raised bits with Treasure Gold. The metal corners were treated with both Distress Paint in Peacock Feathers and Treasure Gold before before adhering them.
Of course it is important to treat the sides and back of the box too. In the photo above you can see how adding the strips of tissue almost gives a leather like appearance to the box after you have coloured them with the paints. My box had the raised bits on the side already, but if you like this "old book" feel, you can easily create that by adding some strips of card to the spine, before covering with tissue.
Next I took a piece of Core'dinations card stock in a sort of cinnamon colour and gave it a few spritzes with Walnut Stain Distress Spray. Loved the effect, but I wanted to add some "harvest" feel to it, so rant it through the Tim Holtz Thankful embossing folder.
I sanded it lightly to bring out the words. (Please note it is a good idea to emboss after you have used the sprays and not before as you will lose some of the depth of embossing by adding the wet medium).
I tore around the edges and embossed them with the same verdigris embossing powder, being careful to keep the words Thankful and Harvest.
I added an ornate plate, again altered with paints, glued a bit of book text behind the opening and then added the little dragonfly, just because I felt it needed something else. As you can see I continued the book text theme further down with a rusted up pen nib, all of course to add to the vintage feel of it all.

Finally I had great fun in adding some harvest themed embellishments in one corner, - a mix of die cuts, berries and some beech nuts, and that was it for the outside of the box.
The inside of the box was covered first with Brown chalk paint, then Decoart Weathered Wood Crackle medium and then when it was touch dry with another colour of chalk paint. In the lid I stamped a sentiment from the Way with Words set on a piece of Scrapbook paper and that was it.
I loved doing a harvest themed project, make sure you check out what my wonderful teamies have made, like usual, they have out done themselves, you don't want to miss it. Just click HERE.  And of course we all hope you will play along in the challenge, and you could even win a generous voucher from our wonderful sponsor Countryview Crafts

Thanks for dropping by and happy weekend!

Wednesday, 29 October 2014

Sneak peeks of Sheena Douglass upcoming weekender shows

Hi everyone, thanks for dropping in.
I am just sharing a few sneak peeks of projects I made for Sheena Douglass's upcoming weekender shows on Create and Craft. We are launching some amazing new Pebeo mixed media paints as well as some new stamps. You don't want to miss this, all happening this coming weekend!
Here are just some of the samples I made: The first lot, all use the new paints and in some cases also the wonderful Aquatints:

Wall hanging with three mini canvasses
Canvas Board
8 x 8 canvas
Card with 3 tags

The next few are all made with the stamps that will be on the show and a mix of Distress Inks and Aquatints


Hope you'll take the time to watch the shows on either Saturday or Sunday, as this is a weekender, shows will be on all through the day. Sheena like usual will be demonstrating some amazing techniques, you won't want to miss this!
xxx


Related Posts Plugin for WordPress, Blogger...

One World One Heart

Photo

FEEDJIT Live Traffic Feed

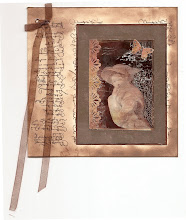
Birthday Card

Birthday Card
Just got a whole lot of new stamps from a brilliant place called the Stamp Smith. This is the image that I first saw on Docraft and really liked. I asked the friend who has used it in an ATC, where she got it. Well she borrowed it from a friend who got it from ebay as a one off. But.... it had a title. I googled the title, and hey presto found the site. They have great stamps and offer a really friendly fast service. I highly recommend them!

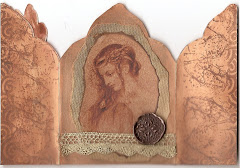
Gothic Arch Trifold inside

Gothic Arch Trifold inside

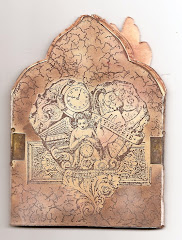
Back of Gothic Arch Trifold

Back of Gothic Arch Trifold

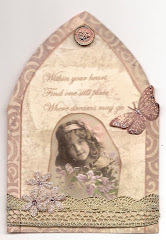
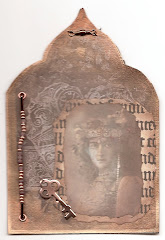
Gothic Arch Within the Heart

Gothic Arch Within the Heart

Gothic Arch, the Key

Gothic Arch, the Key