Friday, 8 August 2014

Time Flies when you are having fun....

Hello everyone and lovely to see you here today.
Time Flies is the theme the lovely Chris has chosen for the latest challenge over at A Vintage Journey

Well, time certainly does seem to fly and most certainly when you are having fun and I had loads of fun when altering this canvas.


I started with an 8 by 8" prepped canvas and began by adding some texture through Tim's Latticework Stencil, still one of my favourites, though some of the new ones are stunning too!
I used Wendi Vecchi's Texture Paste, now this is actually white, but obviously I had not cleaned my stencil well enough... oops. Ah well, as neutral were going to be my colour scheme, I decided not to worry.
I made sure some of the texture would also go over the sides:
For some further interest I added some strips of Tissue Tape and some scraps of a paper serviette.
Next I added some (further) colour with the help of Antique Linen Distress Paint and Vintage Photo and Walnut stain Distress Inks using the new mini ink pads.
Now for the embellishments, I decided to use the Weathered Clock and Layered Wings dies, taking the theme literally (and not very originally...)


I cut all pieces from Grunge Paper and then the clock again from a piece of Prima paper from the Time Traveler's Collection. (That seemed suitable, but I loved the paper anyway...)

I layered the wings up and then gave them a coat of Tarnished Brass Distress Paint. As it looked a bit too browny for my liking and I wanted a more shimmery effect I also added a coat of Decoart Dazzling Metallics in Luminous Gold. This gives a lovely golden glow, hard to see from the photo.
After cutting the clock from Grunge Paper I gave it a coat of Picket Fence Distress Crackle paint and when that had done it crackling magic, rubbed over some Walnut Stain Distress Stain to seem into the cracks and rubbed Walnut Stain Distress Ink around the edges.
I glued the centre bit of the paper clock onto the grunge paper one for strength and then covered that in Clear Rock Candy Crackle Paint, to fit in with the rest of the clock.
Time to put it all together: As you can see from the main photo, I layered the wongs behind the assembled clock and then made a flower cluster using the Tattered Florals die, I used SU Vanilla card a lovely gift from my friend Jennie of Live the Dream, I also followed one of her amazing flower tutorials.
Some scuffed up letter tiles finished it all up.

Well, hope you like my altered canvas, I had great fun making it.
Mke sure you check out the new challenge at A Vintage Journey, you are going to love all the amazing inspiration from my teamies, they have totally out done themselves again and fingers crossed you fill find a moment to play along. You could be in with a change to be one of our winners!!
Enjoy the rest of the month and see you next time, - stay inky!!!

Thursday, 7 August 2014

Memories, altered notebook for Calico Crafts.

Hello everyone and thanks for dropping by!
Today is just a sneak peek day I'm afraid to say
To see the full project and a step by step of how I made it, please head over to the Calico Craft Blog. If you have been there lately, you will need to refresh the page to see the latest project. It's a Wordpress blog and that seems to be the case with Wordpress.... Anyway, I would love it of course if you took the time to have a look and tell me what you think. Hope you are having a creative week and I will be back tomorrow with another project for the latest challenge of A Vintage Journey.

Tuesday, 5 August 2014

Life is always full of surprises...

Hello everyone and thanks for dropping in. Hope August is going well for you.
Life is always full of surprises and today I actually found the time to do some journaling in my big water colour journal.
The background to this page was created with the help of texture paste and stencils, Gesso and my newly received Bister (see previous post).
 Now before I go on, - so many of you asked what Bister is, so here is an explanation: It's  highly pigmented crystal powder available in different colours, you use a dry small paint brush and add a few crystals to your substrate and then spay with water, the colours disperse and give the most wonderful random splatter effects. Many of the Dutch crafters use it in combination with bleach to achieve wonderful results. (Not tried this myself yet). As far as I know there is something very similar on the market in the UK called Brusho. I have linked to a site where you can find out more.

Back to my journal page:

The central tag was cut from some Prima packaging with the Tim Holtz tag die.. I added some stamping with some little Prima stamps. The other elements were mostly cut from Kraft card and then treated with Gesso and more of the Bister.
The two tags on the side can slip in and out of the central tag and hide some secret journaling. Below are some further detailed pictures:

Dry brushed Gesso and some bits and pieces from my scrap box.

Heart from a Movers and Shapers die, Gesso and Bister (black) again and a couple of chit chat stickers.
Key on the central tag is a Heartfelt Creations stamp and die.

Well I hope you like my page, - after my previous long post I have tried to keep this one short and let the pictures do the talking.

Thank you so much for visiting today and all your comments are always much appreciated!!
Stay inky!!

Sunday, 3 August 2014

Blog friends are the best!!

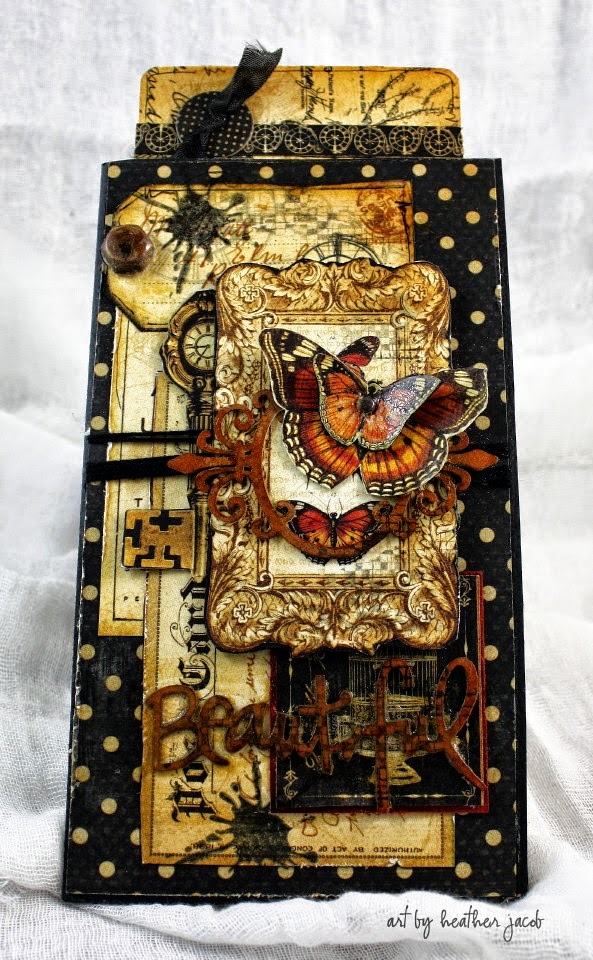
When I was in Australia recently I was lucky enough to meet my wonderful blog friend Heather Jacobs
for the first time in real life. Not only did we spent the most fabulous day together, we had arranged to do a swap and I received the most amazing gifts from Heather:
Heather and I in front of the wonderful restaurant where we had lunch together with her lovely husband Baden.

Having the best of times inside the restaurant.
 Below are some photos of the wonderful gifts I received:
A beautifully decorated gift bag

A stunning tag holder and tag

The most touching and poetic message inside, with all of Heather's special touches.

The tag and holder from the inside

A view of all the beautiful layers on the front.
Now if that was not enough, Heather also made the most stunning birthday card for me, even though my birthday is not until October.

The most gorgeous holder, just look at all those layers again!!
If you don't know Heather's amazing work, do check out her blog, and if you want to see what I made for Heather, you can see it on her blog by clicking HERE.

But my story of wonderful blog friends still goes on. Some of you may have seen the work of some Dutch crafters using an incredible product called Bister.

Now the amazing thing is, that while in Australia, another blog friend Anneke Voskuil from Anneke's Card Art contacted me to say she would get me some of this and send it to me as a gift, and all of this just in response to me having left a comment on her blog. Now I ask you, how kind is that? Eight little packets arrived just the day after I returned from Australia and included was this beautiful tag made by Anneke and of course it uses Bister for the background.

I just love the effect of the Bister on the background!


Well of course I had to have a play with it straight away and below you can see the card for Anneke to say thanks. Both the background and the little sea horse were made using Bister.


I had great fun doing this, but did realize that I need a lot more practice!!!
Now I cannot finish this post without mentioning one other wonderful blog friend, Anne Redfern, also known as Redanne. Anne and I met a little while back and will soon meet again. Anne makes the most amazing ATBs, if you have not seen them check them out, here is a link to just one of them, but there are many more on her blog.
Well just before I left for Australia, Anne sent me two packs of extra thick card to make ATBs with, how amazingly kind was that??? I cannot wait to start to play with it and make some more ATBs, ha, I might even combine it with using Bister.


So what more can I say,, but BLOG FRIENDS ARE THE BEST!!!

Thank you so much Heather, Anneke and Anne, I cannot tell you how much your gifts are appreciated!!!


Friday, 1 August 2014

Summer Time!

Hello everyone and thank you for dropping in today!! It's been rather quiet here for the last few weeks, I have been to Australia to visit my grand children. Wonderful, but busy days, and I have fallen badly behind with visiting your lovely blogs. However, I will try to catch up with you all in the days to come.

It being the first of the month today, it's time for a new challenge at Our Creative Corner, and the lovely Laura has chosen the theme of Summer Time!


I love to make projects that can turn into useful gifts, that's why I decided to make a little folder out of two hand made envelopes. You can tuck a gift card or tag inside or it could even hold photos or whatever you like. If you want to know how to make the folder, you can find a tutorial on a previous post HERE
For this particular project I made two 5 x 7" envelopes out of Cored'nations Kraft core. Next I made the front and back covers. I cut two pieces of card to slightly smaller than my envelopes, painted them with various colours of acrylic paints in red and browns and ran them through an embossing folder, this one is by Darice.
Next I high lighted the raised bits by dry brushing with Gesso.
I love how this brings out the pattern of the embossing and tones down the colours.
I then created a collage on the front with various ephemera pieces from my box of scraps
Below you can see a bit better how I layered them. Some bits are from various Graphics 45 papers and some Tim Holtz ephemera pieces.
The sentiment was stamped with alphabet stamps from the Madame Perauds collection on one of the Tim Holtz tattered banners.
I also added a pen nib and a strip from an Tim Holtz Industrious sticker.
Below you can see the back, another collage put together from scraps from my scrap box.
 The key etc is a stamp from a  Heartfelt Creations floral key collection, coloured with Distress Markers and a water brush.,
I lined the inside of the folder with papers from the Graphics 45 French Country collection
Well, there you have it, hope you like it, - I have tried to represent the summer theme mainly through the colours and sort of summery elements I have used.
Thank you so much for visiting today, make sure to check out the amazing projects my teamies have created, I promise you will not be disappointed, and of course we all hope you will join in our challenge!

See you next time and have a creative month of August!!


Thursday, 24 July 2014

Obsessed with Flowers

Hello everyone and thanks for coming by today! I hope your week is going well.
I seem to be slightly obsessed with making flowers at the moments as you will be able to see from the posts below. So when I needed a special card for someone, guess what the central feature was going to be? Yep, you got it, more flowers. Hope you are not getting sick of them.
These flowers were made with the Heartfelt Creations Ariana Blooms dies and stamps, just like the tag you can see HERE. I love the fact this die can make such different flowers, depending on how you shape and or colour them.
This time I stamped the flowers in Burgundy dye ink and then coloured them with Victorian Velvet Distress ink. The leaves were stamped with Sage coloured pigment ink, clear embossed and then coloured with Iced Spruce, Bundled Sage and a bit of Walnut Stain Distress ink.
The bottle, which I think is a Graphics 45 stamp, was stamped, fussy cut (the label is a separate stamp, which fits perfectly inside an open space in the main bottle stamp), shaped a bit and then I stamped it once more, cut out the pink part at the top and adhered that to the main bottle. It was adhered to the card using foam tape for a bit of dimension.
The clock is a Cheery Lynne die which I over stamped with a Crafty Individuals crackle stamp.

Finally the sentiment is from Stempelglede.
I cut it into a little tag shape and adhered it to the top. The background was created with Tim's Spritz and Flick technique and over stamped with various stamps from a Tim Visual Artistry set.
Thank you for visiting and see you next time!! Stay inky!!

Friday, 18 July 2014

Sponsor Spotlight for Our Creative Corner

Hello everyone, hope your week is going well!
Today it is my turn to show a project for our current sponsor over at Our Creative Corner.

Sorry I can only show a sneak peek here but I hope you will take a look to see the full project. All you need to do is click here


Thank you for visiting and have a great weekend!

Related Posts Plugin for WordPress, Blogger...

One World One Heart

Photo

FEEDJIT Live Traffic Feed

Birthday Card

Birthday Card
Just got a whole lot of new stamps from a brilliant place called the Stamp Smith. This is the image that I first saw on Docraft and really liked. I asked the friend who has used it in an ATC, where she got it. Well she borrowed it from a friend who got it from ebay as a one off. But.... it had a title. I googled the title, and hey presto found the site. They have great stamps and offer a really friendly fast service. I highly recommend them!

Gothic Arch Trifold inside

Gothic Arch Trifold inside

Back of Gothic Arch Trifold

Back of Gothic Arch Trifold

Gothic Arch Within the Heart

Gothic Arch Within the Heart

Gothic Arch, the Key

Gothic Arch, the Key




