Sunday, 8 December 2013

Positivity Journal, instalment 2

Hello everyone, thank you for dropping in and I hope you have had a good weekend.
I have been busy getting all of my Christmas cards ready to go out, but today I want to share the next double page of my little positivity journal with you.

If you are wondering what this is all about, you can read about it HERE
Many of you said you want to join me in this, that is fantastic!! There seems to be a little misunderstanding though, some of you said you would only be able to do it once a week... anything is fine of course, but I am not going to art journal every day either. What I will do every day though, is write one positive thing that has happened that day. (Hence all the tags and pockets). Now that does not need to take very long at all, it can be done in two minutes, but I do think it is kind of important to do that bit every day, really to get into the habit of it, but of course everyone can do what they like and what suits their life!

Anyway,for this page I have used one of my old favourite collage techniques, but basically it's very similar in technique to the first one.
1: Add some texture paste through a stencil of your choice.
2. Add some scraps of book pages, tissue and/or washi  tape or even scraps of DP
3. Cover with a thin layer of Gesso
4 Add colour with whatever medium you like, I used mainly Gelatos again
5. Add background stamping
6, Add a vocal image either stamped and fussy cut, or stamped directly onto the page or a collage image (as I did this time from the Graphics 45 Place in Time collection)
7. Add rub ons, pockets, tags or whatever you want and the most important bit: HAVE FUN!!!
Here are some close ups still:


Well there you have it, for the tags and pocket I used little scraps of Prima Romance Novel papers.

Hope all your preparations for the festive season are going to plan, keep breathing!!!

Saturday, 7 December 2013

Busy, busy, busy

Hello everyone and thank you for dropping in here at this hectic time of the year.

Like many of us I think I have been busy creating Christmas cards. Here is a small collection. The first two were put together with some of my freebies, you can find them HERE
All I did was add a bit of stamping, inking and some die cuts and embellishments.

The background to this one is a left over bit from a Pion design paper

The Noel die cut was a gift from my lovely friend Annie. I painted it with Rockcandy Crackle paint and then inked over with Distress stain and Treasure Gold.

The final one is very different, I was experimenting with some rusty effects using Decoart paints and Antiquities Rust Embossing powder, and then decided to turn my experiment into a card.


Hope you are all well on track with your own Christmas preparations! Have a good weekend everyone and thank you for visiting!!

Thursday, 5 December 2013

Vintage Filigree Christmas Decorations

Hello everyone and thank you for visiting.
I would like to start by saying thank you for all the support for the positivity journal I shared a few days ago. So many of you have been in touch. I promise I will post some more pages soon.
Now for today's offering, some decorations that can also be turned into cards if you want.

I first saw something similar on Pinterest and then decided to adapt it to what I had to hand.
These decorations are mainly made from die cuts cut from an empty cereal packet, a few scraps of DP and some little embellishments.

They are extremely simple to make and could of course be adapted to whatever die cuts or punches you may have in your collection. Here you can see some of the die cuts I used.

I cut two of each, glued them together with the printed side of the cereal packet on the inside and when dry gilded them with Treasure Gold in Pewter. You could of course also paint them in any colour you like, but I love the subtle metal glow of the gilding wax (hard to see from the photo). As you can see I also cut some out of DP. Once everything was cut and dry, all I had to do was layer them up together, using a mix of glue dots and hot glue, attach some embellishments and some silver coloured string and that was it.
Here are some close ups:


The metal embellishments that I used in between the die cuts were bright silver, too bright and not vintage enough for my liking, so I coloured them with Espresso alcohol ink.

If you are not really into Christmas decorations, these can also be turned into cards, simply by mounting them with a piece of mounting foam or some hot glue. Below is an example of that.

We were hit by a hurricane last night, but luckily no major damage was done. I hope anyone else that was hit by the storm, is safe and well!!!

Thank you for visiting today and have a creative time!

Tuesday, 3 December 2013

Mixed Media positivity journal

Hello everyone and thanks so much for dropping by!
Today I want to share a new journal that I started, well I am sharing the first page lol...
The journal itself is quite small, 3 3/4 by 6" only, but it has a lot of pages. I want to use it as from January. A few years ago I set myself the challenge to for a whole year write down every day, one positive thing that had happened on that day. Nothing big, just something positive, say someone who gave me a smile, held open a door, or even just the sun light falling through the trees. I managed to keep it up for most of the year, and it's amazing once you start to look for the positive, how many things you suddenly notice. So starting this year I thought I would do it again, but this time in a fun little art journal. So right now I am preparing the pages, ready to start in the new year.
I am following the same technique that I describe in this post, using Gelatos, stencils and stamps etc.
I have to say, I have fallen in love with this technique, it is so versatile and makes a nice change from the usual paints and inks. I have also just discovered stamping with Faber Castell Stampers Big Brush pens, LOVE IT!!! I have added loads of colours to my Christmas wishlist.
The flower is from a large Prima 12 x 12 stencil, using Golden moulding paste.
On this side I created a pocket with a Tim Holtz In The Bag die. I am going to create loads of pockets for the pages in this journal with lots of tags to write those positive thoughts/happenings on..
Here is one of the tags:
The pocket is deep enough to hold several tags, so I may well create some more, though I will only be using one a day!

I have just had an idea, - wouldn't it be fun if a few of us started doing this....? we could share our pages on our blogs as we make them and fill the world with lots of positive thoughts..... now how is that for a good start for 2014? If you are interested, email me, -just so I can come and visit your blog, no other obligation and no pressure what so ever, just an idea.......

Well, that's it from me today, I'll leave you with a quote for once
“Dwell on the beauty of life. Watch the stars, and see yourself running with them.” 
― Marcus Aurelius, Meditations


Stay inky!!

Monday, 2 December 2013

And onto tag number 10 FJ style

Hello everyone, just a quick post from me today to share my version of Linda, the Funkie Junkie's tag number 10.
Now I think this time you will really be hard pushed to find any similarity to Linda's example which can be found HERE, and yet there were various things that inspired me: The use of an ornate looking frame as the vocal image, the embossed background and a star on a ribbon. I don't have the Sizzix ornate frame so I used a little frame that my lovely friend Margy sent me all the way from Australia! If you don't know her blog, do check it out, she makes fabulous things!
I used the Tim Holtz Stars stencil for my background (I don't have the holly one yet), most of it got covered over, but here you can see it a little bit peeping through between the number 25, another gift from my lovely friend Annie.
I treated it with Rock Candy Crackle.

And here is the star, a rusty one, on the ribbon, my third inspiration point:
I created the background colours with my Gelatos again, applied over a layer of Gesso, I'll be sharing some journal pages done in the same technique soon.

This tag challenge as you probably know is sponsored by the Funkie Junkie Boutique. Only two more to go now, so nearly at the finishing line.....
Well that's it from me for today, can't wait to start on number 11.

Hope you are all doing well with your preparations for this busy time of year and thank you for visiting like always!

Sunday, 1 December 2013

Last minute gift idea....

Hello everyone, hope you are all keeping well during this busy season and happy December to you all!!.
It's challenge time over at the Artistic Stamper! The theme this month is "Anything Goes", just perfect for this busy time of the year....
Having the coming season on my brain, I decided to make another Christmas project, a bookmark and a little holder to send it in. The perfect little hand made gift accompaniment for a book gift I reckon. (Not saying mine is "perfect" lol)....

I used several of the Artistic Stampers Christmas stamps, (links can be found on the blog there). I used Distress Inks in various blue tones, mainly Stormy Sky, and did my stamping in Cornflower Blue Archival. Also used some of the Tim Holtz stencils as you can see and a little snowflake embossing folder.
I left the bookmark without any embellishments, just stamping and dry embossing with the snowflake folder, (the backing is 2 x 6 Kraftcard).


The actual holder was also made from Kraftcard, 1/2" larger all round and embellished with bits and pieces from my stash.


Hope you will play along with the challenge, you could win a fabulous price, so do make sure to check out the details HERE.

Thank you for visiting and all the best with your seasonal preparations, hope they include some creative time too!!!

Friday, 29 November 2013

Finally a Friday Freebie

Hello everyone and thanks for visiting!
Well it's been an absolute age since I posted a new freebie here, but today I finally have one to share with you. Just in case you need some Christmas background papers or a few quick last minute tags, - here you are...
Backgrounds created by me and images either gifts or free images from the net.


As you can see there are 5 different designs, each with their matching tag. Hope these are going to be useful for some of you, enjoy!

I also wanted to share a quick project I made using one of them...
As you can see, matching card and tag, just added a bit of inking and stamping (with Pumice Stone and Plum Archival) to the main paper plus. a few embellies to match. Here's a close up of the card:
Hope you like it and I am happy, for that is my first present wrapped and ready to go.

Good luck with your own festive preparations and I hope all my American friends had a great Thanksgiving yesterday.


Wednesday, 27 November 2013

Thanks Giving Table Setting for Sin City Stamps

Hello everyone and thanks for dropping by here today.
It's my turn to share a project over on the Sin City Stamps blog. And as it is Thanksgiving in the US tomorrow I created a Thanksgiving table setting with some of their beautiful stamps:
If you would like to see the project in detail, please click HERE

Like always, your visit and kind comments are much appreciated!!
If you celebrate Thanksgiving I hope you will have the most wonderful time! I love that festival and wished we had it here in the UK, there
is always so much to be thankful for!

Tuesday, 26 November 2013

Christmas is coming

Yes, and just as if you didn't know that already. Less than a month away now....
Sharing a quick gift idea on the Artistic Stamper Creative Team blog today. Here's a sneak peek.
For more details please click HERE

Thanks for visiting today!

Related Posts Plugin for WordPress, Blogger...

One World One Heart

Photo

FEEDJIT Live Traffic Feed

Birthday Card

Birthday Card
Just got a whole lot of new stamps from a brilliant place called the Stamp Smith. This is the image that I first saw on Docraft and really liked. I asked the friend who has used it in an ATC, where she got it. Well she borrowed it from a friend who got it from ebay as a one off. But.... it had a title. I googled the title, and hey presto found the site. They have great stamps and offer a really friendly fast service. I highly recommend them!

Gothic Arch Trifold inside

Gothic Arch Trifold inside

Back of Gothic Arch Trifold

Back of Gothic Arch Trifold

Gothic Arch Within the Heart

Gothic Arch Within the Heart

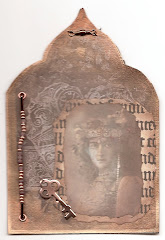
Gothic Arch, the Key

Gothic Arch, the Key