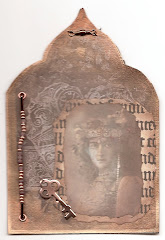
Hi everyone and thanks for dropping by here, lovely to have you visiting.
I am hooked, - hooked on participating in Tim Holtz's tag challenge that is. After 3 years or so of not joining in, I am now doing my second one. Well, after being one of Tim's winners last month, I couldn't give up now could I?
So here is my November tag:
As most of you will know, Tim's original can be found HERE, demonstrating the Chalkboard technique that he showed in the last video of CC102 already. Unlike Tim I did not want my whole tag to be black, so I basically created a chalkboard panel using the Baroque die, but because for once I had all the right products I followed his technique exactly, just using totally different stamps.
Here's my mini chalkboard cut from a black size 12 tag.
Next I created my background on a size 10 Manila tag, with Pumice Stone, Iced Spruce and Picket Fence Distress Paints using the marbling technique. This was followed by some Distress Inks, Gathered Twigs and Evergreen Bough, a bit of Tissue Wrap and some background stamping, both with Ink and with some Sticky Embossing powder and Clear Rock Candy glitter for a bit of sparkle. Oh there was also some Perfect Pearls Heirloom Gold Spray in the mix.
Now for some embellishments. I cut various leaves with my dies and took a little rose from my stash, coloured the leaves lightly with Distress Inks and gave them the Rock Candy Glitter treatment too.
Time to put it all together with a hand died seam-binding ribbon and some died cheese cloth scraps and a little stamped message.
Now I could have left it at that, but for some reason, even though I had quite liked the original background, I really did not like the way it looked now... what to do, bin it? I did not want to waste all my carefully prepared embellishments, so instead I took a deep breath, brought out my Picket Fence and Chipped Sapphire Distress paints and straight from the little bottles painted right over the background to create a kind of snowy scene, spritzing water and Heirloom Gold to marble the colours and blending it all a bit with a baby wipe. And this is what it looks like now:
Not much left of the original background, but hey-ho, that's life and I am a bit happier with it now...
Thank you for visiting and I hope you are having a creative time yourself. Can't wait for the December tag now! I would also like to thank Tim for all the inspiration he has given me over the last few weeks, and as I said at the start of this post, - I am now hooked!!
Friday, 8 November 2013
Wednesday, 6 November 2013
12 tags of Christmas Funkie Junkie style 6
Hello everyone, thanks for popping in here. Just a quick post from me today to share my tag # 6 as inspired by Linda from the Funkie Junkie Boutique.
As you can see, I made mine into a Christmas Card again. I love how doing this challenge, for once gets me to create some cards in good time. Anyway, you can see Linda's example HERE
Mine has turned out very different, mainly because I am using a much smaller tag, but there are several things that inspired me on Linda's: Some stitching of a background paper, a bit of paper cut with the torn notebook die, the use of a tree, the number 25, the touch of red of the cardinal and the snowflake, though I did not add a ribbon to mine.
Here are some close ups:
I stamped the Tim Holtz tree stamp with Iced Spruce DI I then embossed it with sticky embossing powder by Ranger and then added Rock Candy Distress Glitter for a bit of sparkle.
The numbers are grunge board, painted with Picket Fence Distress Crackle paint and then I rubbed Walnut Stain Distress Stain over it to bring out the crackle a bit more. The little cardinal was a Tapestry Stamp peg stamp.
The sentiment is another Tim Holtz stamp, stamped with Potting Soil Archival and embossed with clear powder.
A wooden snowflake with a flower treated with Distress Glitter and some little berries, for another little touch of red.
As you can see, I made mine into a Christmas Card again. I love how doing this challenge, for once gets me to create some cards in good time. Anyway, you can see Linda's example HERE
Mine has turned out very different, mainly because I am using a much smaller tag, but there are several things that inspired me on Linda's: Some stitching of a background paper, a bit of paper cut with the torn notebook die, the use of a tree, the number 25, the touch of red of the cardinal and the snowflake, though I did not add a ribbon to mine.
Here are some close ups:
I stamped the Tim Holtz tree stamp with Iced Spruce DI I then embossed it with sticky embossing powder by Ranger and then added Rock Candy Distress Glitter for a bit of sparkle.
The numbers are grunge board, painted with Picket Fence Distress Crackle paint and then I rubbed Walnut Stain Distress Stain over it to bring out the crackle a bit more. The little cardinal was a Tapestry Stamp peg stamp.
The sentiment is another Tim Holtz stamp, stamped with Potting Soil Archival and embossed with clear powder.
A wooden snowflake with a flower treated with Distress Glitter and some little berries, for another little touch of red.
The green Core d'nations paper was run through a snowflake embossing folder, sanded to reveal the core and then highlighted a bit with Treasure Gold in Pewter this time.
Well, that's it, still running one week behind.....
Anyway, if you are interested, there is still time to join in. All the details about the challenge can be found HERE and if you fulfil all of the challenge requirements, there are wonderful prizes to be won sponsored by the Funkie Junkie Boutique
Thank you for visiting today and for all the lovely comments you always leave me!
Have a creative day and look after yourselves
Monday, 4 November 2013
Love what you do, do what you love!
Hello lovely visitors and thank you so much for dropping in here.
It's been a bit quieter here than usual, that's because life has been rather busy as far as my day job is concerned and that made me reflect on the title of this post. I do love my day job, but if I don't get the time to create, life goes out of balance for me, so I knew I had to make time to do something just for me. What I love more than anything is to create little books and that is what I want to share today.
It's like a little mini journal, for me to reflect on all the things I am grateful for....
The whole little book is made out of 1 sheet of 12 by 12 thin card and I'll start with a very brief explanation of how I made it:
1. Score your piece at 6", turn 90 degrees and score again at 4 and 8"
2. Cut between panel 1 and 4 and 3 and 6 as shown
3. Start folding your piece into a booklet: Fold panel 1 down to 2, then fold those two behind 3, fold 3 up to 4, 4 behind 5 and finally 5 down to 6.
4. You will now have a fat little packet of 4 by 6" pieces all attached because of the folds.
Piece 1 and 6 are single end pieces, and 2 and 3 as well as 4 and 5 are double. They can either be glued together, or attached just at the top or bottom to form pockets, which I did for this booklet.
I cut two separate pieces of Kraft card to 4 1/4 by 6 1/4" for the cover, plus a 2 by 6" piece for the spine.
Here is how I finished the cover:
The main stamps are by The Crafts Meow, I also did a lot of background stamping, but they kind of disappeared in the process. The dies are all Tim Holtz. The flower is from Prima I think.
Here is the first page, I recently bought this stamp second hand, and I just had to use it, can't tell you who made it, but the sentiment is from Donna Downey Empowered Words set by Unity Stamps. As you can see the background is more inky play with book pages, background stamping and stencilling thrown into the mix.
On the left, the inside cover was just covered with some Tim Holtz paper, a bit more stencilling and the sentiment that really informed my whole thinking about this booklet, "Let what you love be what you do"....
It's been a bit quieter here than usual, that's because life has been rather busy as far as my day job is concerned and that made me reflect on the title of this post. I do love my day job, but if I don't get the time to create, life goes out of balance for me, so I knew I had to make time to do something just for me. What I love more than anything is to create little books and that is what I want to share today.
It's like a little mini journal, for me to reflect on all the things I am grateful for....
The whole little book is made out of 1 sheet of 12 by 12 thin card and I'll start with a very brief explanation of how I made it:
1. Score your piece at 6", turn 90 degrees and score again at 4 and 8"
2. Cut between panel 1 and 4 and 3 and 6 as shown
3. Start folding your piece into a booklet: Fold panel 1 down to 2, then fold those two behind 3, fold 3 up to 4, 4 behind 5 and finally 5 down to 6.
4. You will now have a fat little packet of 4 by 6" pieces all attached because of the folds.
Piece 1 and 6 are single end pieces, and 2 and 3 as well as 4 and 5 are double. They can either be glued together, or attached just at the top or bottom to form pockets, which I did for this booklet.
I cut two separate pieces of Kraft card to 4 1/4 by 6 1/4" for the cover, plus a 2 by 6" piece for the spine.
Here is how I finished the cover:
The main stamps are by The Crafts Meow, I also did a lot of background stamping, but they kind of disappeared in the process. The dies are all Tim Holtz. The flower is from Prima I think.
Here is the first page, I recently bought this stamp second hand, and I just had to use it, can't tell you who made it, but the sentiment is from Donna Downey Empowered Words set by Unity Stamps. As you can see the background is more inky play with book pages, background stamping and stencilling thrown into the mix.
On the left, the inside cover was just covered with some Tim Holtz paper, a bit more stencilling and the sentiment that really informed my whole thinking about this booklet, "Let what you love be what you do"....
Another second hand stamp with a further quotation from the Donna Downey set.
The facing page, this one includes some scraps from paper serviettes and some Prima stamps designed by Finnabair.
Below you can see both facing pages together
And finally the last page, again using similar techniques:
The back cover end piece was kept simple again, Tim Holtz paper with just some stencilling with one of his masks.
And finally the outside back cover
I used a Sizzix Tim Holtz texture fade for this.
Now because I had made the inside pages into pockets, I really wanted to make some tags to go inside. The backs of the tags were covered with more paper and then left blank for journaling.
This one was created with the help Distress Inks, paper serviette scraps, stencilling and La Blanche and Tim Holtz stamps.
For this one I stamped the beautiful Leonardo drawing (had this stamp for so long, I can't remember where it is from), in Sepia Archival, I then masked it, inked around it with Distress Inks and did further back ground stamping. For the ticket I combined a Tim Holtz Ticket stamp and a Whimsy Stamps sentiment stamp.
Well there you have it, a rather long post, I'm sorry. Hope you like my little booklet, and like always thank you so much for visiting. Hope you will make some creative time for your self, you will feel all the better for it, trust me!!
Labels:
Booklet,
Donna Downey,
La Blanche,
The Crafts Meow,
Tim Holtz
Friday, 1 November 2013
Happy News
Hello everyone and thank you for dropping in. If you celebrate Halloween, I hope you had a great time yesterday!
I have some happy news to share: I have been invited by the wonderful Laura to become a member of the Our Creative Corner challenge blog design team. When she approached me it took me about 5 seconds to decide lol. This challenge blog has been one of my all time favourites since I found out about it. I think many of you will already be familiar with it, but if you are not, do check it out!! There is a monthly challenge and twice a month half the team shares their artwork to inspire you. I feel most honoured to be part of such an exciting team. This month Claudia, also known as Von Pappe has prepared a challenge for us, and all of you who know her work, will not be too surprised at her chosen theme: Steampunk Tic Tac Toe.
My project is not due to appear until the 15th, so right now I will just share a tiny sneak peek with you:
Hope you will head over to Our Creative Corner to see what my amazing teamies have created, I am sure you will not be disappointed! And hopefully you will even be inspired to play along!
Have a wonderful creative weekend
I have some happy news to share: I have been invited by the wonderful Laura to become a member of the Our Creative Corner challenge blog design team. When she approached me it took me about 5 seconds to decide lol. This challenge blog has been one of my all time favourites since I found out about it. I think many of you will already be familiar with it, but if you are not, do check it out!! There is a monthly challenge and twice a month half the team shares their artwork to inspire you. I feel most honoured to be part of such an exciting team. This month Claudia, also known as Von Pappe has prepared a challenge for us, and all of you who know her work, will not be too surprised at her chosen theme: Steampunk Tic Tac Toe.
My project is not due to appear until the 15th, so right now I will just share a tiny sneak peek with you:
Have a wonderful creative weekend
Wednesday, 30 October 2013
A bit of this and that.....
Hi everyone and lovely to have you drop in today.
I am sharing a few little projects today.
First up is my tag no 5 for the 12 tags of Christmas Funkie Junkie style. You can find all the details for this challenge by clicking the link.
This time, my tag is rather different from Linda's original, and as you can see, I have made it into a card again. Thank you Linda, this is just perfect for me to get my CCs done.... Though mine is different in colour, I liked the way Linda had used the corrugated card and I took inspiration from that. You can see her original here. Her tag is much longer, so she could fit much more on, but I also used some lace and a poinsettia flower. The central image is one of the beautiful designs from Nicecrane, Happy Christmas by Bowley DSC, love this vintage black and white image. I cut it with a Spellbinder die.
Here are some details still.
I just love the beautiful vintage feel of these images and it seemed perfect for this card, which I further embellished with the little key and wing charms you can see below, altered with some verdigris gilding wax.
I am sharing a few little projects today.
First up is my tag no 5 for the 12 tags of Christmas Funkie Junkie style. You can find all the details for this challenge by clicking the link.
This time, my tag is rather different from Linda's original, and as you can see, I have made it into a card again. Thank you Linda, this is just perfect for me to get my CCs done.... Though mine is different in colour, I liked the way Linda had used the corrugated card and I took inspiration from that. You can see her original here. Her tag is much longer, so she could fit much more on, but I also used some lace and a poinsettia flower. The central image is one of the beautiful designs from Nicecrane, Happy Christmas by Bowley DSC, love this vintage black and white image. I cut it with a Spellbinder die.
Here are some details still.
I just love the beautiful vintage feel of these images and it seemed perfect for this card, which I further embellished with the little key and wing charms you can see below, altered with some verdigris gilding wax.
The tag challenge is sponsored by the Funkie Junkie Boutique and doesn't close until December 22, so there is still plenty of time to play, even though Linda is up to tag 6 already.
While playing with the Nicecrane images I decided to also make a couple of little gift bags, using one of my new Sizzix Tim Holtz dies
I used images from the Vintage Christmas Cards set, mounted them on a Spellbinder die cut and then attached them to the bags with a little tag.
Quick, easy and fun to do, and a great little gift to have on hand (filled with a few cookies) for little visitors at Christmas time.
Well, that's it. Hope everyone is having a good week. I'm rather busy right now, so it will be quiet here for a few days, but I'll try and get around to see what you are all up to.
Thanks for visiting like always
Labels:
Funkie Junkie Boutique,
gift bags Nicecrane,
tags
Monday, 28 October 2013
The Writing on the Wall....
Hi everyone and lovely to have you drop by! Welcome to all followers, old and new.
Today I am sharing my final Halloween piece for this year:
I created this piece just for fun and to participate the the latest challenge over on the Ranger Blog.
I used a chipboard photo frame for my piece and started by adding texture to the frame with bits of tissue paper. I also added some hot glue squiggles, something that a few people have been using lately and is inspired by the work of the amazing Contadina K. It's not a new technique really, but it was great to re-visit it..
After the tissue had dried and the glue hardened, I gave it a coat of Gesso and when that was dry painted it with Antique Linen, Weathered Wood, Peeled Paint and Frayed Burlap Distress Paints, Spritzing with water to get the marbled effect we all love so much.
Next I added some Distress Crackle Paint in Clear Rock Candy and then put the whole thing aside to air dry while working on the central panel.
I cut a piece of 5 x 7 Kraft Card and covered it with pre-crinkled Kraft Glassine paper. I then painted that with Antique Linen, Ripe Persimmon and Aged Mahogany Distress Paint, deepened it with the same colours of Distress Ink and added some Walnut Stain Distress Ink around the edges. When it had dried I stamped a script stamp in Vintage Linen DP.
I also prepared the other elements I wanted to add to my piece. Sadly I don't actually own the fabulous skull stamp by Tim Holtz, but my lovely friend Annie let me stamp it while visiting her recently, so I fussy cut that stamped image and coloured it with some Pumice Stone Distress Ink, to make it look more 3D.
I also die cut the bottle and feather with the Tim Holtz Alterations Writing Desk set, first in white card and then the bottle again out of some acrylic packaging. This last piece was treated with some Rock Candy Crackle again, using a fabulous technique Tim shows in Creative Chemistry 102. I gave it a greenish tone with some alcohol ink. I added the little poison label, also stamped while I was with Annie and then adhered that coloured bottle to the white card one to make it more visible.
I love how it pretty much looks like old glass now.
Time to return to the frame. I deepened the colours with some home made sprays, made with Distress Ink re-inkers. I used a whole mix of colours, Pine Needle, Chipped Sapphire, a bit of Peacock Feathers and some Walnut Stain.
Time to put the whole thing together: I stamped and cut a couple of leaves out of Kraft Glassine paper with the Leaf Blueprint stamp and dies set by Sizzix and coloured them with Aged Mahogany, Rusty Hinge and Walnut Stain Distress Stains. I also added a stamped Halloween ticket and a flower cluster and then computer generated the sentiment. The final bits were to colour the feather with some Pumice Stone, to add a few bits of tissue tape to the frame and a few highlights with some inevitable Treasure Gold White Fire.
Oh, I also added some shadow with a black charcoal pencil still, to give a bit more depth to it all.
As the theme over at Simon Says Stamp and Show Monday challenge is anything goes, I will add this there also.
Hope you like it, I had great fun making it and thank you so much for visiting once again. I really, really appreciate the lovely comments you always leave me!
Hope everyone will have a creative week and look after yourselves!
Today I am sharing my final Halloween piece for this year:
I created this piece just for fun and to participate the the latest challenge over on the Ranger Blog.
I used a chipboard photo frame for my piece and started by adding texture to the frame with bits of tissue paper. I also added some hot glue squiggles, something that a few people have been using lately and is inspired by the work of the amazing Contadina K. It's not a new technique really, but it was great to re-visit it..
After the tissue had dried and the glue hardened, I gave it a coat of Gesso and when that was dry painted it with Antique Linen, Weathered Wood, Peeled Paint and Frayed Burlap Distress Paints, Spritzing with water to get the marbled effect we all love so much.
Next I added some Distress Crackle Paint in Clear Rock Candy and then put the whole thing aside to air dry while working on the central panel.
I cut a piece of 5 x 7 Kraft Card and covered it with pre-crinkled Kraft Glassine paper. I then painted that with Antique Linen, Ripe Persimmon and Aged Mahogany Distress Paint, deepened it with the same colours of Distress Ink and added some Walnut Stain Distress Ink around the edges. When it had dried I stamped a script stamp in Vintage Linen DP.
I also prepared the other elements I wanted to add to my piece. Sadly I don't actually own the fabulous skull stamp by Tim Holtz, but my lovely friend Annie let me stamp it while visiting her recently, so I fussy cut that stamped image and coloured it with some Pumice Stone Distress Ink, to make it look more 3D.
I also die cut the bottle and feather with the Tim Holtz Alterations Writing Desk set, first in white card and then the bottle again out of some acrylic packaging. This last piece was treated with some Rock Candy Crackle again, using a fabulous technique Tim shows in Creative Chemistry 102. I gave it a greenish tone with some alcohol ink. I added the little poison label, also stamped while I was with Annie and then adhered that coloured bottle to the white card one to make it more visible.
I love how it pretty much looks like old glass now.
Time to return to the frame. I deepened the colours with some home made sprays, made with Distress Ink re-inkers. I used a whole mix of colours, Pine Needle, Chipped Sapphire, a bit of Peacock Feathers and some Walnut Stain.
Here are a couple of close ups of the crackle and texture
:
Oh, I also added some shadow with a black charcoal pencil still, to give a bit more depth to it all.
As the theme over at Simon Says Stamp and Show Monday challenge is anything goes, I will add this there also.
Hope you like it, I had great fun making it and thank you so much for visiting once again. I really, really appreciate the lovely comments you always leave me!
Hope everyone will have a creative week and look after yourselves!
Labels:
Halloween,
Ranger Ink,
Sizzix Distress Paints,
Tim Holtz
Subscribe to:
Posts (Atom)
FEEDJIT Live Traffic Feed
Birthday Card
Just got a whole lot of new stamps from a brilliant place called the Stamp Smith. This is the image that I first saw on Docraft and really liked. I asked the friend who has used it in an ATC, where she got it. Well she borrowed it from a friend who got it from ebay as a one off. But.... it had a title. I googled the title, and hey presto found the site. They have great stamps and offer a really friendly fast service. I highly recommend them!
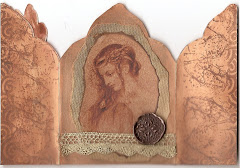
Gothic Arch Trifold inside
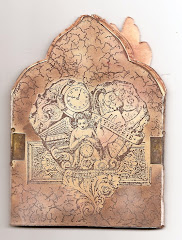
Back of Gothic Arch Trifold
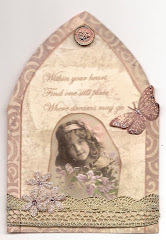
Gothic Arch Within the Heart
Gothic Arch, the Key