Hello everyone and lovely to see you here. A special welcome also to my new followers, I feel honoured you decided to follow me.
Well, today I managed to complete the gift set I made for my SIL:
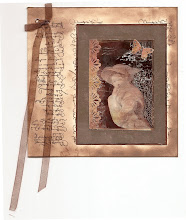
The bag and tag I showed already in my last post, but I have now managed to finish the card:
I followed the same technique as with the bag and tag, to make them all match more or less of course. The little postcard this time is from the Graphics 45 French Country Collection stamps.
One of the elements cut from the 6 x 6 paper collection. (You can read more about that here )
Some flowers from Wild Orchid Crafts, layered with some leaves and a bit of tea dyed cheese cloth
And finally another butterfly with some strips cut with the Tim Holtz tattered banners die.
Now to the news: Some of you might remember that I was chosen to be a member of the Sincity Stamps Design Team. Well, today would have been the day of my first post, but..... all of the stamps they sent me to work with got stuck in customs so I never received them in time. So meanwhile I thought I would just show you some of the wonderful stamp sets I will be working with:
They are really reasonably priced if you are interested (only $20 for a full rubber sheet) and they have many amazing designs, from Art, to Steampunk to Seasonal, so much to choose from, I fell in love with them straight away and am now keeping my fingers crossed they will get here soon.....
Thank you for dropping in today and see you next time!
Wednesday, 7 August 2013
Monday, 5 August 2013
Who should be so lucky?
Well, I was, when I was lucky enough to win the wonderful Vintage Garden Collection from Pion Design recently. But before I go on , first of all, thank you for dropping in here today!
It's taken me a long time to finally cut into these wonderful papers, instead of just stroking them, because they are so beautiful, but today I finally took the plunge.
I needed a special gift bag for my SIL whose birthday is coming up soon, and I thought these papers would be perfect to decorate it. So I had great fun layering several ones on top of each other, distressing the edges etc.
There are so many fun elements to play around with in this paper pack. I received both the 12 x 12 and the 6 x 6 papers (such a lucky win....).
But of course I also wanted to do some stamping to add to it all. So I used my lovely rose postcard stamp (I think it's a Stampendous one) and coloured it with Distress Inks to match my chosen papers. I used Picked Raspberry and Victorian Velvet together and it matched perfectly as you can see from the butterfly that I cut from the papers and added to the postcard. I cut a few doilies from one of the papers (made a bit paler by washing some watered down Gesso over it) and tucked a few other pieces behind and around it.

A couple of sentiments from the Tim Holtz Simple Sayings set pretty much finished it all off.
Next I made a little tag to go with it. The 6 x 6 papers are perfect to decorate them. I layered and distressed the papers in the same way and then decorated with another little postcard, but this time cut from one of the papers.

Well, there you have it, a fun and easy project to do. Now all I have to do still is to make a matching card, but that I will show in another post.
Hope you like my little gift set. I brought some edible goodies from France to go inside the bag.
Thank you for visiting and have a good week ahead!
It's taken me a long time to finally cut into these wonderful papers, instead of just stroking them, because they are so beautiful, but today I finally took the plunge.
I needed a special gift bag for my SIL whose birthday is coming up soon, and I thought these papers would be perfect to decorate it. So I had great fun layering several ones on top of each other, distressing the edges etc.There are so many fun elements to play around with in this paper pack. I received both the 12 x 12 and the 6 x 6 papers (such a lucky win....).
But of course I also wanted to do some stamping to add to it all. So I used my lovely rose postcard stamp (I think it's a Stampendous one) and coloured it with Distress Inks to match my chosen papers. I used Picked Raspberry and Victorian Velvet together and it matched perfectly as you can see from the butterfly that I cut from the papers and added to the postcard. I cut a few doilies from one of the papers (made a bit paler by washing some watered down Gesso over it) and tucked a few other pieces behind and around it.
A couple of sentiments from the Tim Holtz Simple Sayings set pretty much finished it all off.
Next I made a little tag to go with it. The 6 x 6 papers are perfect to decorate them. I layered and distressed the papers in the same way and then decorated with another little postcard, but this time cut from one of the papers.

Well, there you have it, a fun and easy project to do. Now all I have to do still is to make a matching card, but that I will show in another post.
Hope you like my little gift set. I brought some edible goodies from France to go inside the bag.
Thank you for visiting and have a good week ahead!
Saturday, 3 August 2013
And a few more ICADs.....
Hello everyone and happy weekend to you all.
Today I am sharing a few more ICADs and a different kind of holder to store them in. If you don't know what ICADs are, check out this post
Here is the holder first of all:
If you are a regular here, you will have seen this design before. This time I used the wonderful images of Nicecranesdesigns Talking Clock pack, love these sweet nostalgic images.
Here you can see a close up and some photos of the inside:
This is how I made the holder, for those of you who are interested:
Take a piece of 12 x 12 card and cut it to 5 3/4 by 12". Score at 2 1/2, 2 3/4, 71/4 and 7 1/2". The quarter inch increments are to allow for depth when you shut the holder with the cards inside. Shape one of the sides with a decorative die I used the Tim Holtz Tattered Doily die but you could use any die, just to give it a decorative edge. Crease all the scorelines.
Line both the outside and the inside with papers of your choice, but leave the 1/4" increments uncovered, otherwise your holder won't fold well.
You can make the pocket in anyway you like, I edged mine with a Spellbinder die and made it quite deep by scoring 1/4" around the two sides, and two times 1/4 inch around the bottom, to allow for a strong base. It was a bit of a fiddle to be honest and giving a clear description would take ages, one day I will learn to do videos, so I can show you more clearly....
Anyway, onto the little cards to fit inside. This time I made 4 of them again, two to fit in the folder and two that won't because I put too many embellishments on lol.
Here they are: First the two that were too fat to fit inside the pockets, so I made them into little tags. Because I don't want this post to be too long, I'll let the pictures tell the story:
The backgrounds were created with Distress Inks, stencils and stamps and raised areas mostly highlighted with Treasure Gold in White Fire
The next two were done with a mixture of different Tim Holtz techniques. I swooshed Distress Inks on my craftmat, swiped my cards through them several times, drying them with my heatgun inbetween, until I was happy. I then sprayed them with water, crinkled them up, spread them out carefully and then dried them with the heatgun again. I then inked around them still with my inkblending tool. Love the leathery effect you get. This time embellishments were bits of chippies, treated with inks and sprays, a home made flower and some brads.
Well, that's it. Hope you like my second batch of these little 3 x 5s, they are a great size to play with and fun to try out different background techniques with too. If something goes wrong, at least all you have wasted is a bit of 3 x 5" card.
Oh and if you are looking for some super collage images to add to cards or LOs, don't forget to check out the wonderful collections Nicecrane Designs offers.
Thank you so much for visiting again and have a creative weekend! Hope the sun will shine!!
Today I am sharing a few more ICADs and a different kind of holder to store them in. If you don't know what ICADs are, check out this post
Here is the holder first of all:
If you are a regular here, you will have seen this design before. This time I used the wonderful images of Nicecranesdesigns Talking Clock pack, love these sweet nostalgic images.
Here you can see a close up and some photos of the inside:
Take a piece of 12 x 12 card and cut it to 5 3/4 by 12". Score at 2 1/2, 2 3/4, 71/4 and 7 1/2". The quarter inch increments are to allow for depth when you shut the holder with the cards inside. Shape one of the sides with a decorative die I used the Tim Holtz Tattered Doily die but you could use any die, just to give it a decorative edge. Crease all the scorelines.
Line both the outside and the inside with papers of your choice, but leave the 1/4" increments uncovered, otherwise your holder won't fold well.
You can make the pocket in anyway you like, I edged mine with a Spellbinder die and made it quite deep by scoring 1/4" around the two sides, and two times 1/4 inch around the bottom, to allow for a strong base. It was a bit of a fiddle to be honest and giving a clear description would take ages, one day I will learn to do videos, so I can show you more clearly....
Anyway, onto the little cards to fit inside. This time I made 4 of them again, two to fit in the folder and two that won't because I put too many embellishments on lol.
Here they are: First the two that were too fat to fit inside the pockets, so I made them into little tags. Because I don't want this post to be too long, I'll let the pictures tell the story:
The backgrounds were created with Distress Inks, stencils and stamps and raised areas mostly highlighted with Treasure Gold in White Fire
The next two were done with a mixture of different Tim Holtz techniques. I swooshed Distress Inks on my craftmat, swiped my cards through them several times, drying them with my heatgun inbetween, until I was happy. I then sprayed them with water, crinkled them up, spread them out carefully and then dried them with the heatgun again. I then inked around them still with my inkblending tool. Love the leathery effect you get. This time embellishments were bits of chippies, treated with inks and sprays, a home made flower and some brads.
Well, that's it. Hope you like my second batch of these little 3 x 5s, they are a great size to play with and fun to try out different background techniques with too. If something goes wrong, at least all you have wasted is a bit of 3 x 5" card.
Oh and if you are looking for some super collage images to add to cards or LOs, don't forget to check out the wonderful collections Nicecrane Designs offers.
Thank you so much for visiting again and have a creative weekend! Hope the sun will shine!!
Friday, 2 August 2013
FFFF (Friday Freebie French Flowers)
Good morning everyone, happy Friday and thank you so much for stopping by! A very warm welcome to visitors old and new and specially to new followers, wonderful to have you joining me here.
Did you notice that Google Reader is still working just like before? So all the worry was totally for nothing, but... whether you follow me through Google Friends Connect or Bloglovin, I just want to thank you so much for your support and hope you will find a little inspiration now and then.
Well, it's been ages since I posted a freebie, but here you are, hope you enjoy and find some use for it.
Like always, thank you so much for visiting, I hope you like it this week's freebie and I will be back tomorrow with another crafty project. Have a creative end of the week and a super weekend when it comes and happy August to you all!
Did you notice that Google Reader is still working just like before? So all the worry was totally for nothing, but... whether you follow me through Google Friends Connect or Bloglovin, I just want to thank you so much for your support and hope you will find a little inspiration now and then.
Well, it's been ages since I posted a freebie, but here you are, hope you enjoy and find some use for it.
Like always, thank you so much for visiting, I hope you like it this week's freebie and I will be back tomorrow with another crafty project. Have a creative end of the week and a super weekend when it comes and happy August to you all!
Thursday, 1 August 2013
Who has heard of ICADs?
Well, I certainly hadn't, until a few days ago that is... ICAD stand for Index Card A Day. But before I go on, I first want to say: " lovely to see you here today and a warm welcome to all my visitors"!
Alright, back to ICADs. A few days ago I found out about these little cards, and I immediately liked the idea of them. They are cards, 3 x 5 inches, the size of an index card, and you can make them in what ever style you want.
I started by making 4 of them. Regular visitors will see that the wild flower theme from my nature journal. is still very much in evidence. Now 5 x 3s are really nothing terribly new, we used to call them Skinnies and I for one always loved the format (just that bit bigger than ATCs) and have swapped many in the past. The idea of calling them ICADs I think originated with this lady. She started a project to create one every day between June 1 and July 31, so in fact the official project ends today. Trust me to find out about it right at the end, but, - who cares really, I would not want to make them every day anyway, but I certainly will return to them, but more about that in a minute....
I decided I would make my first badge like little tags and then I made a holder for them. Here it is:
Done in the same style as the cards, lots of inking, spritzing a bit of stenciling and stamping. On the inside is a double pocket card to hold the ICADs
The two pockets to hold two of them comfortably
I know the back one sticks up, I just wanted to show it for the photo, but it can easily be pushed down.
Here are a few quick close ups of the actual little cards still:
Stamps are mostly Kaisercraft and Chocolate Baroque.
Alright, now back to the concept of the ICADs, though as I am not planning to do them every day, it's a bit of a misnomer, but..... I do want to make more and I would love to swap some of them, so, if you are interested in a swap, please be in touch!!!
This is what I propose: Make as many cards as you want, but a minimum of two. You can put them in a little holder if you want, but you don't have to. You can make them in any style you want, the only rule is that they should be 3 x 5 inches. This swap will start today and run until September 11 (I specially chose this special date, to counteract what happened on that day) so you will have 6 weeks to make your cards. The idea is that it is a group swap, you make two you get two in return from any of the players. So be in touch by either saying so in a comment or by emailing me if you want to play, and I will give you more detail on how it will all work.
Here's to friendship and having some creative fun.
Have a joyful day and thank you for visiting
Alright, back to ICADs. A few days ago I found out about these little cards, and I immediately liked the idea of them. They are cards, 3 x 5 inches, the size of an index card, and you can make them in what ever style you want.
I started by making 4 of them. Regular visitors will see that the wild flower theme from my nature journal. is still very much in evidence. Now 5 x 3s are really nothing terribly new, we used to call them Skinnies and I for one always loved the format (just that bit bigger than ATCs) and have swapped many in the past. The idea of calling them ICADs I think originated with this lady. She started a project to create one every day between June 1 and July 31, so in fact the official project ends today. Trust me to find out about it right at the end, but, - who cares really, I would not want to make them every day anyway, but I certainly will return to them, but more about that in a minute....
I decided I would make my first badge like little tags and then I made a holder for them. Here it is:
Done in the same style as the cards, lots of inking, spritzing a bit of stenciling and stamping. On the inside is a double pocket card to hold the ICADs
The two pockets to hold two of them comfortably
Here are a few quick close ups of the actual little cards still:
Stamps are mostly Kaisercraft and Chocolate Baroque.
Alright, now back to the concept of the ICADs, though as I am not planning to do them every day, it's a bit of a misnomer, but..... I do want to make more and I would love to swap some of them, so, if you are interested in a swap, please be in touch!!!
This is what I propose: Make as many cards as you want, but a minimum of two. You can put them in a little holder if you want, but you don't have to. You can make them in any style you want, the only rule is that they should be 3 x 5 inches. This swap will start today and run until September 11 (I specially chose this special date, to counteract what happened on that day) so you will have 6 weeks to make your cards. The idea is that it is a group swap, you make two you get two in return from any of the players. So be in touch by either saying so in a comment or by emailing me if you want to play, and I will give you more detail on how it will all work.
Here's to friendship and having some creative fun.
Have a joyful day and thank you for visiting
Postcard Canvas
Good morning everyone, so nice to have your company here for a while.
Can you believe it is August already? The first of the month always means a challenge over at The Artistic Stamper and this month the theme is Postcards, Travel and Holidays.
Well, I have just returned from my holiday in France so decided to make another little French Themed canvas. This is the companion piece to a canvas I made earlier in the month.
I painted the background with a variety of different acrylic paints. Added some background stamping with some of the Artistic Stampers Ephemera stamps and then added a wonderful piece of textured fabric which was a fantastic gift from the lovely Annie. I then layered various elements from the Graphics 45 French Country collection, including a stamped image of one of the post card stamps. A die cut ribbon slider and some string finishes it all off.
Here are some close ups:
Hope you like it, and please hop over to the Design Team blog to see what my lovely teamies have created for the challenge. And of course if you decide to play, you are in with a chance to win one of the fab stamp sets from the Artistic Stamper.
Can you believe it is August already? The first of the month always means a challenge over at The Artistic Stamper and this month the theme is Postcards, Travel and Holidays.
Well, I have just returned from my holiday in France so decided to make another little French Themed canvas. This is the companion piece to a canvas I made earlier in the month.
I painted the background with a variety of different acrylic paints. Added some background stamping with some of the Artistic Stampers Ephemera stamps and then added a wonderful piece of textured fabric which was a fantastic gift from the lovely Annie. I then layered various elements from the Graphics 45 French Country collection, including a stamped image of one of the post card stamps. A die cut ribbon slider and some string finishes it all off.
Here are some close ups:
Hope you like it, and please hop over to the Design Team blog to see what my lovely teamies have created for the challenge. And of course if you decide to play, you are in with a chance to win one of the fab stamp sets from the Artistic Stamper.
Labels:
Artistic Stamper Challenge,
Graphics 45,
mini canvas
Subscribe to:
Posts (Atom)
FEEDJIT Live Traffic Feed
Birthday Card
Just got a whole lot of new stamps from a brilliant place called the Stamp Smith. This is the image that I first saw on Docraft and really liked. I asked the friend who has used it in an ATC, where she got it. Well she borrowed it from a friend who got it from ebay as a one off. But.... it had a title. I googled the title, and hey presto found the site. They have great stamps and offer a really friendly fast service. I highly recommend them!
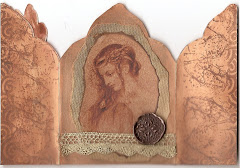
Gothic Arch Trifold inside
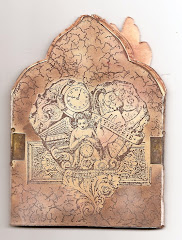
Back of Gothic Arch Trifold
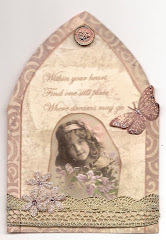
Gothic Arch Within the Heart
Gothic Arch, the Key