Showing posts with label layered card Tim Holtz. Show all posts

Friday, 16 December 2016

And Finally... Funkie Junkie tag 12

Welcome friends and thanks for dropping in. Regulars will know that I have been playing along with Linda Mc Coughlin's 12 Tags of Christmas challenge. This challenge started way back at the end of September and every week Linda has been posting one of her tags, to inspire us for our own festive holiday creations. Well, we have finally reached week 12 !!! Here is my version
I adored Linda's original, you can see it HERE I made my background in pretty much the same way, just using a different text background stamp. I also couldn't resist giving my branches some red berries (using some paint)
I also adored the idea of a pocket with ephemera tucked in. Mine is a bit different in colour, I added a stamp and another ephemera piece to the front, but used the same branches sticking out ☺
Finally, I used the same die as the main sentiment.
And that was pretty much it.

Here is a quick review of all of my tags or in my case cards:
1, 2 and 3
4, 5 and 6
7, 8 and 9

10 and 11
And finally....
12
Well, there you have it, - all 12 complete. I would like to thank Linda for all the inspiration  she has given and for the amazing prizes she is offering for this challenge. Just in case you would like to check the details of this challenge, they can all be found HERE.

It's probably a bit late to start with the challenge now, but I bet, seeing this is now the 5th year, Linda will do another one in 2017. It's such a good way to start your own Christmas crafting and I have enjoyed every minute. Thank you so much Linda!!

Well, I am happy to say my cards are all done now and most have gone in the post.... Thanks for your visit and enjoy this very special time of year!
xxxxx

Friday, 27 November 2015

Snowy Christmas Card for Shimmerz

Hello all and thanks for dropping in at this busy time of year.
Today I have a snowy card to share on the Shimmerz Blog, with a step by step of course.
Here's a little preview.... To see more detail, all you need to do is CLICK HERE.
Hope you are managing to get some creative time, nothing more relaxing than that.....
Stay safe and warm and thanks for your visit like always!

Saturday, 13 September 2014

Nautical Voyage for Countryview Crafts

Hello everyone, it's a busy day here again in my little place in Crafty Blogland. If you want to see what I made and shared earlier today, just click HERE

For this post I am sharing my second project created for Countryview Challenges,where the theme is "Nautical".
I created a card, and it was quite a challenge to come up with something, as really at the time I made it I did not have any supplies that fit the theme. (Since then my lovely blog friend Julie sent my some wonderful die cuts and some little shells, thank you so much Julie!!)

Well, nothing like a challenge right, - so I decided to create my own stuff.
I started my creating a background for my card. I cut a piece of manila card and inked around the out side with Antique Linen, Frayed Burlap, Vintage Photo and Walnut Stain Distress Inks.
Next I printed an old map found at the Graphics Fairy on some tissue paper. This is a bit of a fiddle, but if you adhere the tissue with some low tack tape to some printer paper, you can run the whole thing through the printer and this can make for some great backgrounds.
I adhered the map to my card with Glue 'n Seal and then inked around the edges a bit again.
As you can see, I was not quite careful enough and the tissue, which is of course very delicate, tore a bit, - ah well, embrace imperfection, I knew it would partly be covered anyway later on.
 Now for some embellishments:
A "rescue ring", made from a ring of card, cut with two Nestability dies.
I coloured it with Fresco paints, added some shadow with Distress Markers and wrapped some twine around.
I had a little chip board compass rose, I think t is from Tando Creative. I coloured it with Picket Fence crackle paint and then inked with some Walnut Stain Distress Stain and ink.
For the center of the compass, I created another piece, made by stamping the compass stamp from the Classic 1 set by Stampers Anonymous onto some metal foil coloured with Espresso Alcohol Ink in Jetbalck Archival. I then cut out the center.
Another bit of metal, coloured in the same way was run through the rivetted metal embossing folder to add another layer to the card.
Finally a little bottle, cut with the Apothecary Movers and Shapers die from Kraft card. I then coloured it first with Tumbled Glass Distress Paint and then various Distress Markers.
I love how you can give a flat piece like this much more of a 3D look just by the way you colour it and add shadows. These dies are designed so cleverly..

I stamped the word Voyage from the Classics 1 set and added that as my sentiment..
Her are some details still of the finished card:
The bottle, a little metal clock and two glass pebbles on a piece of dyed cheese cloth.
The compass and ring all layered up together.

A Philosphy Tag altered with some Tumbled Glass Distress Paint.
Well, there you have it, a nautical card made with mostly home made embellishments. Hope you like it, and if you have not done so yet, why not play along with our challenge over at Countryview Challenges!

Thank you for visiting and stay inky!


Related Posts Plugin for WordPress, Blogger...

One World One Heart

Photo

FEEDJIT Live Traffic Feed

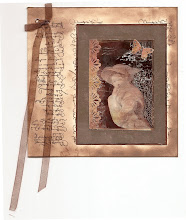
Birthday Card

Birthday Card
Just got a whole lot of new stamps from a brilliant place called the Stamp Smith. This is the image that I first saw on Docraft and really liked. I asked the friend who has used it in an ATC, where she got it. Well she borrowed it from a friend who got it from ebay as a one off. But.... it had a title. I googled the title, and hey presto found the site. They have great stamps and offer a really friendly fast service. I highly recommend them!

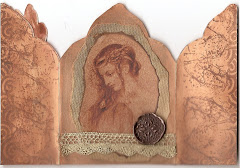
Gothic Arch Trifold inside

Gothic Arch Trifold inside

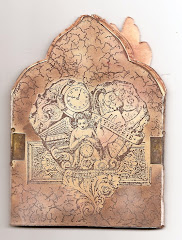
Back of Gothic Arch Trifold

Back of Gothic Arch Trifold

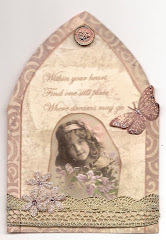
Gothic Arch Within the Heart

Gothic Arch Within the Heart

Gothic Arch, the Key

Gothic Arch, the Key