Hello everyone and happy first of December!!
I know, I know, it's scary with Christmas coming ever closer, but I for one am hugely looking forward to it!
Here is a Christmas project I created for the latest challenge at Our Creative Corner.
The lovely Alison chose the theme "Have Yourself a Merry LITTLE Christmas". She would like us to make ATCs, chunky ATCs or ATBs. Well as you can see, I chose to make an ATB (Artist Trading Block) and turned it into a little lantern.
I started by cutting the largest of the Eileen Hull ATBs out of thick (480 grms) white card and cut circular openings with the Sizzix circle die.
Next I added texture to the sides with the help of some memory box stencils and texture paste, and when that had dried,coloured with a mix of sprays, inks and some treasure gold over the raised bits. I cut 4 squares of parchment paper, and stamped some snowflakes and script on to them and then embossed with copper embossing powder. I glued those on the inside behind the circular openings. I also found a vintage snow angel online, re-sized it and then printed two of them, one reversed so I could glue them together and it would look alright from both sides.
Hope you can see from the photo how I folded the bottom of the angel, so that she would be able to stand on the top.
Next I made a little stand from a scrap bit of card to rest the rest of my embellishments against and give the box some backing.
I cut a decorative circle with a Spellbinders die, inked it with a mix of Vintage photo and Victorian Velvet, to pick up some of the colours in the snow angel and then embellished my box as you can see from the photos below with some greenery cut with the new Tim Holtz greenery die and a Johanna Sheen die.
I also made a little book with the Spellbinders labels 9 die and some coffee stained book pages and added a bit of cheese cloth to soften it all a bit.
I used a Stampendous Christmas Greeting on the background circle, one of the stamps I also used on the vellum.
Some little bits of Diamond Stickles here and there finished it all off.
Hope you are all well ahead with your Christmas preparations! Have a creative week and thanks for visiting!
Monday, 1 December 2014
Nostalgic Christmas for Countryview Crafts
Hello everyone and happy December!! I don't know about you, but I for one am really looking forward to Christmas. (Probably specially because I am going to visit my grand children in Australia)...
The first of the month means a new challenge over at the Countryview Crafts Challenge blog, and this month I got to choose the theme, and of course it had to be Christmas, so as I love vintage projects I chose the theme "A Nostalgic Christmas"
I made a tag card, by making a first and second tag and connecting the two with a lace ribbon. On the first tag I made a simple background by blending Faded Jeans and Gathered Twigs Distress Inks. I then stamped some snowflakes with Coffee Archival ink.
Here are a few close ups of the first tag
A snowflake created with two Spellbinder dies layered on top of each other, glittered with Rock Candy Distress Glitter.
Two layered hearts, the bigger one coloured with Brushed Pewter Distress Stain and then glittered in the same way. A smaller one made with a Sizzix Movers and Shapers die, old book paper onto card and some Tim Holtz letter stickers. I also added a little ticket, made with a Tim Holtz stamp from the Odds and Ends set.
A pine cone cluster, the pine cones were made using the Tim Holtz pine cone die. I added some Vintage Photo Distress Glitter to them for a bit of sparkle.
The second tag was more of a mix media creation. My DH gave me a full set of Gelatos, last year for my birthday and I have hardly used them at all, so thought I would give them a go, just for fun.
I started by covering my second tag with Tim Holtz Tissue Wrap and some Tissue Tape and then covered that with a thin layer of Gesso, rubbed on with my fingers for better control.
Next came the Gelatos and some back ground stamping. Love how you can just swoosh them all over your project and take them away again with a baby wipe if it gets too dark.
Also added some background stamping.
And finally a sentiment layered up with some Spellbinder dies.
And here you can see the two together, I was pleased to see how well the colours of the Gelatos matched the Distress colours on the first tag.
Thank you for visiting and hope you will play along with our challenge!
The first of the month means a new challenge over at the Countryview Crafts Challenge blog, and this month I got to choose the theme, and of course it had to be Christmas, so as I love vintage projects I chose the theme "A Nostalgic Christmas"
I made a tag card, by making a first and second tag and connecting the two with a lace ribbon. On the first tag I made a simple background by blending Faded Jeans and Gathered Twigs Distress Inks. I then stamped some snowflakes with Coffee Archival ink.
Here are a few close ups of the first tag
A snowflake created with two Spellbinder dies layered on top of each other, glittered with Rock Candy Distress Glitter.
Two layered hearts, the bigger one coloured with Brushed Pewter Distress Stain and then glittered in the same way. A smaller one made with a Sizzix Movers and Shapers die, old book paper onto card and some Tim Holtz letter stickers. I also added a little ticket, made with a Tim Holtz stamp from the Odds and Ends set.
A pine cone cluster, the pine cones were made using the Tim Holtz pine cone die. I added some Vintage Photo Distress Glitter to them for a bit of sparkle.
The second tag was more of a mix media creation. My DH gave me a full set of Gelatos, last year for my birthday and I have hardly used them at all, so thought I would give them a go, just for fun.
I started by covering my second tag with Tim Holtz Tissue Wrap and some Tissue Tape and then covered that with a thin layer of Gesso, rubbed on with my fingers for better control.
Next came the Gelatos and some back ground stamping. Love how you can just swoosh them all over your project and take them away again with a baby wipe if it gets too dark.
Also added some background stamping.
And finally a sentiment layered up with some Spellbinder dies.
And here you can see the two together, I was pleased to see how well the colours of the Gelatos matched the Distress colours on the first tag.
Thank you for visiting and hope you will play along with our challenge!
Friday, 28 November 2014
One for the Birds
It's Friday and every second Friday we have a new challenge over at A Vintage Journey, as most of you will know. Can you believe we are onto challenge 20 already! Wow, how time flies! But this week it's not just time that's flying, because the lovely Chris who is hosting this challenge has chosen "Birds of a Feather" as her theme, and this is what she had to say about the challenge:
Get out your inks, paints, chalks, Gelatos etc and grab your bird dies, stencils, masks, stamps, whatever avian stash you have and conjure up something that sings of our feathered friends. Whatever you create, we want to see Tim's influence clearly identified. Let's see your magic!
So onto my project:
With it being the end of November and the dreaded C word (really I LOVE Christmas), coming ever closer, my project turned into a Christmas gift for one of my crafty friends. It's big enough to hold a size 8 tag inside and there is also a place for a special Christmas message.
Below is a quick step by step with a lot of photos.
1.You need to start with a piece of A3 card, I am lucky enough to have Kraft card in that size, so used that as my substrate as it is so strong. But any card would do. Cut it to 7" (18cm) by 16.5" (41.5 cm).
Fold it in half length wise and then fold each side to close to the middle, gatefold style.
2. Open it out again and then fold the corner of each side down, like you can see in the photo below.
This is the inside view and as you can see, you have created two pockets once you glue the sides, the bottom and corners down, but don't do this yet!
3. For the outside, glue on a ribbon, this will make it possible to close your booklet/folder later.
Time to cover your base card
I chose two different kinds of paper, cut to about a quarter inch smaller than your out and insides.
Here are my approx. sizes:
Outside: 2 times 4 by 6 7/8" (10.3 by 17.5 cm)
Inside: 2 times 4 by 6 7/8" (10.3 by 17.5 cm) in contrasting paper
Inside flaps: 2 x 4 by 3.25" (10 by 8.2 cm)
Corner flaps: 1 time 3.5 by 3.5" (9 by 9 cm) cut diagonally and then trimmed to fit properly.
4. Now the fun begins, altering the papers with inks, stencils, texture paste, sprays, whatever your heart desires:
Below are some photos of how I altered mine:
![]() |
| Wendy Vecchie Crackle Paste through Tim's Latticework stencil |
![]() |
| Adding some watered down gesso |
![]() |
| Two colours of Distress Sprays: Brushed Pewter and Walnut Stain. |
![]() |
| Embossing around the edges of the paper for a special finish. I used Stampendous Aged Silver. |
The back cover was done in a similar way, but instead of using a stencil, I just scraped on the crackle paste randomly with a palette knife.
To alter the insides I just used inks as most of them would be covered by the flaps anyway. The flaps themselves were done in the same way as the outsides. Now it is time to adhere your altered papers to your base card and to glue the flaps down to create the pockets.
I chose to embellish with different die cuts and of course a bird!! Below is a selection of what I used:
The 25 was given a metal look with the help of the same embossing powder. The bird is an Artistic Outpost stamp coloured with Distress Inks.
Finally some close ups of the finished project:
![]() |
| The inside, after I glued down the sides. The embellishment on the left, was bright silver to start with. A quick spray with Walnut Spray ink turned it all aged looking. |
![]() |
| Another little bird, one of Tim's ideaology pieces. |
Finally I chose one of the tags made for a previous project to fit inside as it fitted perfectly.
Well, that's pretty much it. Make sure to check out the challenge over on A Vintage Journey, where you can see all the amazing projects from my teamies and of course we hope you will play along, for your own creative enjoyment, but also to be in with a chance to win a fab voucher from our sponsor Country View Crafts
Thank you for visiting like always and have a great weekend!
Labels:
A Vintage Journey,
Christmas gift.,
Distress,
Tim Holtz,
Wendy Vechhie
Wednesday, 26 November 2014
Tag time and happy mail!
Hello everyone and lovely to have you visiting! Welcome to followers old and new.
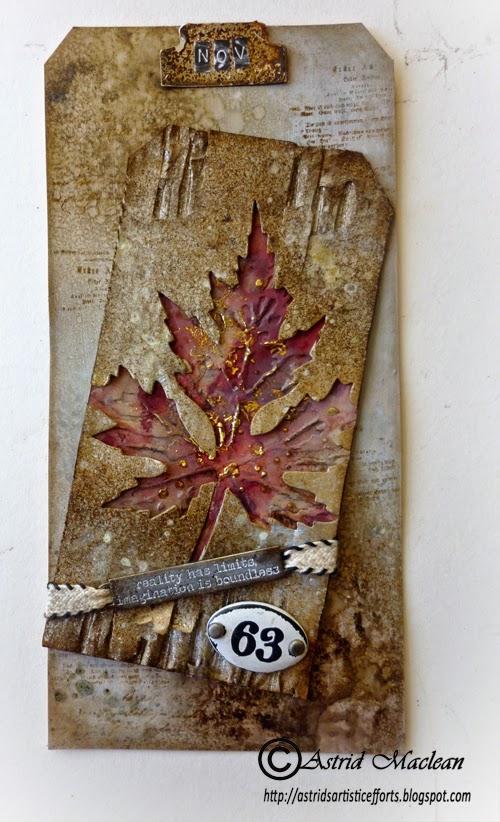
Today I want to share my Tim Holtz November tag. The original can of course be found HERE.
I followed Tim's instructions pretty much exactly, so I won't go into how I made it as you can read all about that on Tim's blog. I just used a different colour scheme, as here in Scotland, the Autumn colours have pretty much disappeared, so I kept it more wintery. The colours I used were Antique Linen, Pumice Stone and Aged Mahogany, for the background, and Walnut Stain and Brushed Pewter on the corrugated card.
I don't have the Ranger foil, so I used Pebeo instead, it's actually much lighter gold than it came out on the photos, so really goes quite well with the pewter colour, even though I normally would not mix gold and silver....
I did not have the embellishments Tim used, so used a word band and enamel number instead.
I decided at the beginning of the year to mount all of my 12 tags on a larger size 10 tag, so stuck with that idea, here is the background to the larger tag:
I painted the tag with Snow White Fresco Finish paint and then spritzt with Brushed Pewter, Iced Spruce and Walnut Stain sprays and did a little bit of background stamping too.
I cut a little tab for the top with the tiny tags and tabs die out of silver Mirri card and then aged it with Brushed Pewter and Walnut Stain sprays. When I heat set it, it started to bubble and gave a cool metal effect, - great new discovery that..
I added the month with the little Tim Holtz letter stickers, sanding them a bit first to distress them, a cool trick I learnt from the wonderful Paula Cheney a while back.
I adhered the smaller tag onto the larger one at a slight angle and that was pretty much it.
Now while I was at it, I decided to turn the leaf which had been cut from corrugated card into a Christmas card, using a very similar colour scheme:
I decorated the inside of my card in a similar way as my previous set of cards, as all the stamps etc were still on my desk.
Well, that's it for today. I'll be back on Friday when there is a new challenge over at A Vintage Journey.
I am of course adding my tag to Tim's Tag Challenge for November. Not much time to spare, but at least I made it...
Now to the Happy Mail: A while back I did some translating for the wonderful Dagmar, who lives in Germany and struggles with English. Well, look what arrived in the post a couple of days ago:
![]() |
| This stunning tag! It was a project she posted on the Countryview Challenge blog as she was a winner and I helped her translating the description, it's so stunning! |
But, that was not all, look at this:
![]() |
| A stunning little folder, not only beautiful, but practical too, for inside it looks like this: |
![]() |
| There is a space to keep notes: Gift ideas, To do list, shopping list and Christmas cards. Such a clever and practical idea. |
And last but not least, a lovely little desk calendar booklet:
![]() |
| Love the mail art style of the covers! |
Here is the inside:
Thank you sooooo much Dagmar!!!
Well that is it for now. Have a fantastic week everyone!!
Subscribe to:
Posts (Atom)
FEEDJIT Live Traffic Feed
Birthday Card
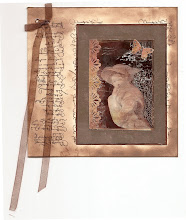
Just got a whole lot of new stamps from a brilliant place called the Stamp Smith. This is the image that I first saw on Docraft and really liked. I asked the friend who has used it in an ATC, where she got it. Well she borrowed it from a friend who got it from ebay as a one off. But.... it had a title. I googled the title, and hey presto found the site. They have great stamps and offer a really friendly fast service. I highly recommend them!
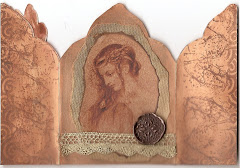
Gothic Arch Trifold inside
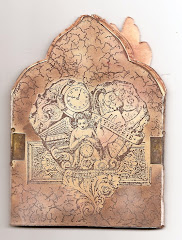
Back of Gothic Arch Trifold
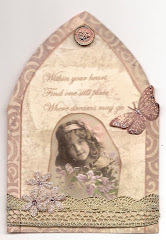
Gothic Arch Within the Heart
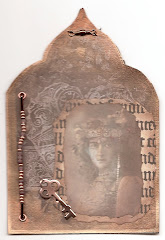
Gothic Arch, the Key