Monday, 27 October 2014

My version of TOT (Tim's Autumn Tag)


Hi everyone
Well last month I am afraid to say, I did not manage to do my Tim Tag, so this month I was determined to get it done, even if rather late in the day....

At the beginning of the year I decided to always create double tags, a size 8 on top of a size 10 and add the month at the top. Why? Who knows, just thought it would be fun and it does give you more room to play....
Now for those of you who don't know, Tim's original can be seen here. For once I had pretty much all of the products he used (well almost). I also loved the colours he used, so mine are pretty similar and I used exactly the same techniques he shows for my background.
But, on my small tag I decided to use a different stencil with the spider stamp, I used the shattered one.

I also decided to use the skull  and little label stamps rather than the pumpkin, but they are from the same set, I did use the little letter tiles, I just put them at an angle because I thought it would suit my design better.

I don't have the tinsel, I have an absolute hatred for tinsel of any kind, so I then finished my tag quite differently.
I added a little Halloween Ticket from the Odds and Ends set:

I also don't have the ideaology monocle, but I was lucky enough to have another one which was a gift from my lovely friend Louise, I think it is a genuinely old one which she got on ebay so I added that instead and used different remnant rubs as I don't have the holiday ones.

I used the Halloween words stencil on the background tag:

I highlighted the raised bits with Treasure Gold in Copper, but it does not show up very well on the photo....

Well, that's it. I had fun making my October tag and of course I am going to add it to Tim's challenge.
Have a great week everyone and thank you for visiting!!


Saturday, 25 October 2014

Mixed Media and Shabby Chic Chirstmas - the final two tags

Hello dear visitors and thank you for dropping in.
Today I am sharing the final two tags I put together for A Vintage Journey's Destination Inspiration post.
Here is the first one, a mixed media tag:
This started out as a plain size 8 tag over which I scraped some gesso with an old credit card.
I then pressed a piece of scrap card over it, pulled it off again and that gave me the cool textured pattern. Next I sprayed with various blue tones from the Distress Sprays: Salty Ocean, Peacock Feathers and some Iced Spruce
I wanted to tone it all down a bit and give it more interest, though I was impressed with how well the sprays adhered to the gesso.
I added some strips of tissue wrap and stenciled some numbers with the help of the Cargo layering stencil. When the texture paste had dried I did some stenciling with Picket Fence Distress Paint and the Bubble Layering stencil. I also added a little home made spray using Chipped Sapphire re-inker and water. I then put the number stencil back in place and darkened the number with black Stazon Ink.
Time to embellish the tag:
I stamped the compass rose from the Classic 1 set twice, once straight onto the tag and then again on card. I fussy cut the actual compass rose and adhered it to the base and then added a little gear and nut which I had rusted up in the center.
I stamped the gents from the Steampunk set on smooth card, cut two of them out, inked them and then stuck them to the bottom of the tag with a little stamped round label.
Finally I stamped the sentiment from the Going Somewhere set onto some book paper, cut it out, distressed the edges and stapled it to the center of my tag and that was it.
The next tag is very different and much more feminine. No doubt it will eventually be integrated into a Christmas card.
For this one I used clear embossing paste from Wendy Vecchi and Tim's Harlequin layering stencil.
Next I used Vintage Linen, Iced Spruce and Brushed Pewter sprays for the background.
When it had dried I added a bit of Black Soot to the edges. As you can see it made a nasty wet edge at the bottom, but a bit of added water soon took care of that. I loved the wintery feel of this colour combination and at that point decided to make it into a Christmas tag. I created a kind of ornament by layering several die cut snowflakes and other dies on top of each other.

It's maybe hard to see from the photo, but there are three different dies layered on top of each other. Number 1 and 3 are from a Spellbinders snowflake set, in between is a die from the Ironwork accents. The central bit is a little metal filigree piece (available from the Funkie Junkie Boutique I believe
The little sentiment at the bottom was stamped with little letter stamps from the Papermania Madame Peraud collection, I punched them out and glued them to one of the Tattered Curvy Banner die-cuts and further embellished with some roses and pine branches and a piece of cheese cloth.
Well, that's it for today, thanks for visiting like always and have a good weekend!

Thursday, 23 October 2014

Tag time again

Hi all and thanks for dropping in here again.
A few days ago I did a long post over at A Vintage Journey, sharing an outline of my experiments with the new Tim Holtz Distress Sprays. Here on my own blog I will be sharing some more of the details on how I made some of the finished tags. So here goes, on to the next two tags:
For this one I scraped some Wendy Vecchi Crackle paste through the Tim Holtz Crocodile Layering Stencil, one I don't use very often.
When using crackle paste you want to use something with big openings, otherwise the effect of the crackle would just disappear.
Next I spritzt the tag with water to make sure the sprays would mix well. For this one I used Tea Dye, Iced Spruce, Peeled Paint and Evergreen Bow. I dried them with my heat gun, as you can see they adhere beautifully to the paste and pool in all the cracks and crevices.

Now I would have loved to add the Layered Dragonfly die to this, but it is too large for a size 8 tag, so I stamped the dragonfly from the Classic 1 stamp set instead. I stamped it twice, fussy cut the first one and for the second one I just cut the wings and ran them through an embossingfolder to give the wings some texture. I coloured both with the same colours of Distress ink and then highlighted the raised bit with treasure gold. Finally I finished the tag with some further embellishments, a little key, coloured with some Distress paints, a stamped ticket and a philosophy tag. The damask shape behind the dragon fly was an old Sizzix die and I cut it from some Tim Holtz packaging

The next tag is a Christmassy one, using various embossing folders:

I put a size 8 tag again through an embossalicious snowflake embossing folder:
Next I used the Brushed Pewter and Black Soot sprays and then added quite a bit of  Picket Fence to lighten it.
Now this bit is important: If I did it again, I would colour the tag first, let it dry and only then run it through the folder as you loose quite a bit of the embossing in the background through the water content in the sprays.

Anyway, I then ran a bit of white card through a Sheena Douglas embossing folder. This one has really large beautiful flakes on it. So I cut out one of the flakes, highlighted the raised bit with Pewter Treasure Gold and used that as an embellishment.

I added a little old clock face to the center of the flake just for some added interest.
For the bottom of the tag I added a torn strip with some smaller flakes that are on the same embossing folder.
Again, the raised bits are highlighted with the pewter treasure gold. Finally I used the candy cane from the Christmas Blueprints 3 set.
I coloured it with Derwent Inktense pencils.

Well, that's it for today's installment, I may do a couple more in a few days time.

Thanks for visiting like always and I hope you get some creative time, - it's good for the soul!
xxx


Tuesday, 21 October 2014

Sparkle and Shine for Countryview Challenges

Hello everyone, hope you are having a good week!
Today it is my turn to share a second project on the Countryview Challenge blog, - another Christmas card I'm afraid to say
I used The Vintage Cabinet card die, the Stacked Snowflakes die, and the Holiday Greens Sizzlits die, all by Tim Holtz. Now before I go on I want to tell you about a fabulous new product I just discovered, amazingly useful if you love to use die cuts, specially delicate ones. The stuff is called Stick It and was invented by Ken Oliver. Ken, who has been a Facebook friend for some time, sent me some to try out, and I have to say, I LOVE IT!!. Here is a link to a video where Ken demonstrates how it works:
 For my project I started by cutting 4 of the cabinet cards with the small die inside to create a frame. I cut them from cereal packets, so the frame would be sturdy and have some depth. I glued them together, gave them a coat of gesso and then added Picket Fence Distress crackle paint. When everything had dried I coloured it and  a backing piece with the new Distress Stains. I used Brushed Pewter and Faded Jeans, plus a tiny bit of Picket Fence.
I inked all he edges with Walnut Stain Distress Ink and then gave the centre of the backing a spritz of Black Soot, so there would be a good contrast for the Snowflake I was planning to add.


Sparkle and Shine was added by covering everything in Mat medium and then sprinkling with Clear Rockcandy Distress Glitter.
I stacked the snowflakes up, edged with Walnut Stain again and then also gave them the glitter treatment.

I adhered the frame to a card blank, inked with a mix of Gathered Twigs and Walnut Stain DI and then stamped one of the stamps from the Christmas Nostalgia set around the edges, also in Walnut Stain.

I embellished with some branches from the Holiday Greens, coloured with Iced Spruce and more glitter.
I also added a few tiny berries to the branches, they came from my Christmas box....
Well, that's another Christmas card done, so I am happy about that. There is still a week left to play in the challenge if you have not done so yet, do go over and check it out, we would love to see you there!

Monday, 20 October 2014

Destination Inspiration for A Vintage journey, - sprays and pastes.

Hello all and lovely to have you drop in. Today it is my turn again to share a project over at A Vintage Journey under the heading of Destination Inspiration. As I was thinking about what to write for what I have done, I came to the conclusion that Destination Inspiration is perhaps not quite the right title for my project,  Destination Exploration would be a better name for it on this occasion, for when I started I had no idea where I would land up, as really I was just experimenting.... But I hope that what I am about to share, may give you some inspiration along the way too to explore and discover....

So I decided to play with the new Tim Holtz Distress Sprays and try them out on as many different substrates and texture pastes as I could. I created a series of 9  different tags, I will number them, and here on my own blog I will share step by steps for some of them in greater detail than I did over at the Vintage Journey blog, where I am showing all 9 in one go.


So here goes:
Tag 1
Sprays on a plain manila tag:
Colours used: Antique Linen, Vintage Photo, Walnut stain. I wetted the tag and then sprayed my three chosen colours, spritz some more water and then dried with a heat gun.
Next I used the Shattered Layering Stencil and sprayed with the Walnut Stain spray, adhering the stencil onto the tag with some removable spray adhesive so it would stay in place.
Next I did some background stamping, using the Classics 14 and Mercantile stamp .sets in Black Archival
Finally I collaged other stamped elements and finished it all off with some embellishments, including the little alpha tiles that I was lucky enough  to receive the other day as part of the huge parcel I got from my win at the Compendium of Curiosities challenge.


Alright, on to:
Tag 2
Sprays on a Black tag:
I die cut a tag from thick black card and gave it a first spraying with two of the metallic sprays, Tarnished Brass and Antique Bronze. To be honest, I was not too excited with the result, so gave it a second spraying, this time using Picket Fence and Peacock Feathers.
Much better I reckon, love the verdigris effect of this, definitely one to remember I think.

Now before I go on, I just want to mention that I think it is a good idea to put some large sheets of scrap paper underneath your work area when using the sprays as I found they tend to go everywhere, this also gives you some great backgrounds, as inevitably they will soak up some of all that lovely spray. Here is a piece of mine that I decided to use on this tag:
I decided to  die cut a leaf with the new leaf and matching embossing folder:
This became the main embellishment for the finished tag, here it is:
I used some remnant rubs (they adhere perfectly on the sprays, unlike on top of Distress Inks)! and finished off with some other bits and pieces.
Well, that's it for just now. Tomorrow I have a different project going live, but in the days to come I will post some more details of some of the other tags I made. If you want a quick over view, please head over to A Vintage Journey, and if you have come from there, then thank you for dropping by here.
Have a great week ahead and look after yourselves. xxx

Related Posts Plugin for WordPress, Blogger...

One World One Heart

Photo

FEEDJIT Live Traffic Feed

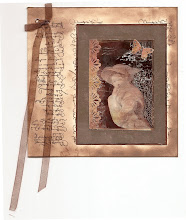
Birthday Card

Birthday Card
Just got a whole lot of new stamps from a brilliant place called the Stamp Smith. This is the image that I first saw on Docraft and really liked. I asked the friend who has used it in an ATC, where she got it. Well she borrowed it from a friend who got it from ebay as a one off. But.... it had a title. I googled the title, and hey presto found the site. They have great stamps and offer a really friendly fast service. I highly recommend them!

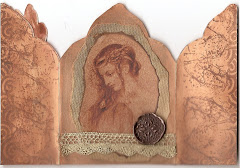
Gothic Arch Trifold inside

Gothic Arch Trifold inside

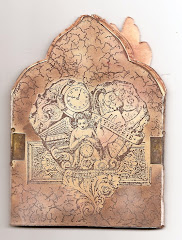
Back of Gothic Arch Trifold

Back of Gothic Arch Trifold

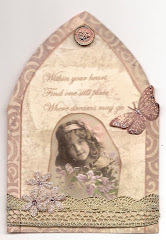
Gothic Arch Within the Heart

Gothic Arch Within the Heart

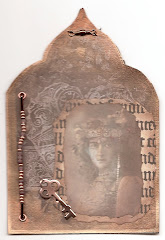
Gothic Arch, the Key

Gothic Arch, the Key