Sunday, 27 October 2013

Oh No, not another tag.....

Ehrm, well yes, yet another tag I'm afraid to say....
But before I carry on, please let me start by saying thank you for dropping by today!
So today's tag is my version of Tim's Tag for October. Now my big confession is that I have NEVER played in any of Tim's tag challenges before, but after having done the recent Creative Chemistry 102 classes I enjoyed myself so much that I finally decided to play along.....
Of course as most of you will know, all of the details can be found on Tim's blog HERE.
This months it is all about using the new Distress Glitters. Now I am not really a glitter girl and the only Distress Glitter I own is the Clear Rock Candy that came out last year already. But as Tim explained in his October tag of 2012 (yes, I do usually read all about them), you can colour Clear Rock Candy glitter with Alcohol Inks, so that's what I did.
The background to this tag was done with Distress Paints, spritzt and marbled as Tim explains on the first video of CC 102. I used Salty Ocean, Broken China and Frayed Burlap. Then I added various Distress Inks, edged with Black Soot, added a few squirts of home made gold mica spray. For the rest I am going to let the pictures do the talking as we are all busy people and you have probably better things to do than read my detailed descriptions. If you have any questions, just email me.

Here you can see some of my home made Distress Glitter (so hard to photograph decently). I coloured the little book-plate with Adirondack Espresso ink and then mixed my Rock Candy Glitter with some drops of Espresso Alcohol Ink. Have to say, love the result, NOTHING like any other kind of glitter. Also added a few touches to my die cut leaves.

Added another few touches of glitter to the top of the bottle which is of course a Blue Print one.
Here you can see a bit of the embossing and background stamping and stencilling I did and that is basically it.
Well, there you have it, my October tag complete. Quite a lot different from Tim's original, but I did use the techniques, so I hope it counts.
Thanks for visiting like always and hope you will have a creative inky time yourself.

Saturday, 26 October 2013

Now what's that crackle???

Hello everyone and lovely to have you drop in here.
Today is my day to post over on the Artistic Stamper Creative Team blog
Now just for once I am going to have you guessing.... what's that crackle???
To see what the crackle is, just click HERE
Thanks for stopping by and have a great creative weekend!

Friday, 25 October 2013

12 Tags of Christmas Funkie Junkie Style # 4

Welcome everyone and thank you for dropping in here.

Well, it's busy here this week but I have just managed to fit in another tag for the Funkie Junkie 12 tags of Christmas Challenge. If you click the link you can read all the details about this challenge, great fun to do and I have now nearly managed to catch up...
Here's my version of no 4
You can see Linda's original HERE. Once again, there were many of her ideas that inspired me, - the use of Burlap, her background and the whole home spun country feel of her tag.
I don't have the paper Linda used, so created my own ephemera paper with the help of stamps
My letters were also stamped, punched and mounted on some die cuts.
I just added one poinsettia only, mine was made using Spellbinder dies.
Like I did with earlier ones I made it into a Christmas card again.
The challenge is sponsored by the Funkie Junkie Boutique and is great fun to do.

One more to do and I'll be all caught up and I will have a good start on my Christmas cards. As it's not even Halloween yet, I'm feeling quite pleased with myself about that.

Thanks for visiting like always

Wednesday, 23 October 2013

Gather a Harvest of Love gift bag

Hello everyone and thank you for dropping in. Today it is my turn to show a project over at Sin City Stamps
To see the full project and a step by step on how I made it, all you need to do is click HERE.
Last time some of you had problems commenting there, but that has been sorted now, all you need to do is click on the title of the post, so I hope you'll take the time to have a look.
Thanks for visiting like always

Monday, 21 October 2013

12 Tags of Christmas Funkie Junkie style tag 3

Hi everyone, welcome and thank you for dropping in again.
I am busy trying to catch up with The Funkie Junkie's tags of Christmas, so here is my tag no 3...

Linda's original can be seen here, and though mine was definitely inspired by hers, mine is quite different as I had none of the stuff she uses. I was inspired by her colour scheme again and how she used texture at the bottom of her tag. I also really liked some of her background techniques and adopted something similar. I also liked the use of the word Noel, but as I don't have the lovely Tim Holtz die, I had to use what I had.
The N was a wooden letter, the others were die cut with Spellbinder dies. Coloured with white Distress Crackle paint, swiped over with Walnut Stain Distress Stain and then bits highlighted with Treasure gold.
 Stamps are Tim Holtz and the texture at the bottom was created with the help of a Crafty Individuals stencil and Paper Artsy Grunge Paste, mixed with gold paint and while still wet sprinkled with Distress Rock Candy Glitter.

As I did not have the little stars Linda used I finished the top of my tag with a rusty heart and punched star instead.
You can read all the rules for the challenge HERE  and it is well worth playing as the challenge is sponsored by the Funkie Junkie Boutique and there are fab prizes to be won.

I decided to turn my tags into Christmas Cards as Tim Holtz describes in his bonus video of Creative Chemistry 102. Here you can see both my tag no 2 and no 3 turned into cards.
Well, that's it, hope you like my version and thank you for visiting!!

Sunday, 20 October 2013

The Funkie Junkie 12 tags of Christmas tag 2

Hello everyone and lovely to see you here.
A quick post from me today, sharing my second tag for the Funkie Junkie 12 tags of Christmas Challenge.

I joined this challenge last year already, (it's great fun) but of course in my usual way I am way behind yet again, but I am determined to catch up. (Linda is on to tag 5 already)
You can read all about the challenge HERE. Great examples and fabulous prizes to be won, so if you don't know about this challenge yet, do check it out!

I loved Linda's second tag, you can see her original here. I was inspired by both the colours she used and some of the design elements, but because I did not have the things she used I had to adapt quite a bit.
I used Picket Fence and Frayed Burlap Distress Staines and also added some Perfect Pearls Gold powder. It all turned a bit brownish, so I added some Picket Fence Distress Paint to the centre part of the tag.
My background stamp is from La Blanche.

 The deer is from the Tim Holtz Holiday Joy stamp and die set, which is available from the Funkie Junkie boutique, though currently out of stock. I stamped a background script stamp in Picket Fence DP, then stamped the deer in Gather Twigs and subsequently cut it out with the matching die.

The stamp is from another Tim Holtz set, Mini Holidays 5.

And as I don't own the star dies that Linda used I used some Rusty Stars instead
A flower and piece of ribbon finishes it all off.

Well, that's it, on to tag number three......
Thank you for visiting and until next time.

Friday, 18 October 2013

Friday Freebie Note Cards

Hello everyone, lovely to have you dropping in and welcome to all, specially new followers, thank you for joining me on my creative journey.
Today I am sharing a sheet of note cards. I think we all know that the art of letter writing is somewhat an activity of the past, - who still writes letters? I know I hardly ever do, after all an email is just so much quicker (and cheaper). But..... sometimes it is handy to have a note card ready to send someone a quick thank you or whatever it might be. I always like to have some of these to hand, so this week I thought I would share some vintage note cards with you. They are designed to be printed at 3.5 by 5" and that is how they will come out if you print the whole sheet, but below I will also put some individual cards that if you want you can print in a different size.


Here you can see how I made a couple of mine up, just by inking around the edges a bit and mounting on some Kraft Card. Of course you could add stamping and embellishments too, but I don't really need to tell you that....
Well, hope you like them, my TOUs are like usual, you are free to use these in whatever way you like as long as you don't sell the files unaltered.
Have a great and creative weekend and thank you for visiting!

Thursday, 17 October 2013

Creative Chemistry 102 - The next instalment....

Hi everyone and so lovely to see you here.

I've been away for a few days with hardly any internet access, so am lagging behind with visiting, but hope to catch up soon.
Well here is my next batch of tags from Tim's Creative Chemistry 102 class. This is still only day 2, so loads to catch up with still, but with life time access that's no problem, I will just do them as and when I can.
This one is my take on Stamping Through Stencils (for those of you who don't know, day 2 is all about stencils).
This one Tim called Sketching
This one I found the trickiest, Ink Monoprint, - I had to do it twice to get more or less the result I wanted. I was heartened to see though in Tim's blooper video, that the same happened to him.
Here's a close up:
Finally, the last one, Paint Monoprint. Again it took me a couple of goes to get it more or less right, but I do rather like the result. Again, a close-up perhaps shows the effect a bit better.

Well, that's it for day two now, on to day three.

Thank you for dropping in today and have a wonderful and creative day!

Monday, 14 October 2013

Creative Chemistry Day 2

Hello everyone and thanks for dropping in.

Well I am still running way behind as Tim's class is well and truly over now, but this is a life time class anyway, so no stress or hurry really.
Today I am sharing the first three tags for day two, tomorrow (hopefully) I will show you the next batch.

Here you can see my take on Mixed Media Layering, not too happy with this one, it all got a bit dark, one to come back to for sure.
Here is Embossing With Stencils, great fun to do and also worth exploring further... but here are a few close ups:

And here is the last one of this batch, Embossing Through Stencils.
One of my all time favourites I think, it opens up so many new possibilities with the stencils. I combined the embossing straight on the background and on Core D'nations on one tag. Now Tim demonstrates how to do this on the Vagabond and I don't have one. It did work with the Big Shot too but it was quite heavy going, just as well it's such a sturdy machine and you definitely need the sandwich Tim demonstrates, I experimented with different sandwiches, but only that one worked...
Love the  softness of the embossing on the tag, like Tim says, great for stamping over the top.

Love also how it turns out on the Kraft Core.

Anyway, that's it for today. I know everyone has enjoyed this class so much and I certainly have too!

Related Posts Plugin for WordPress, Blogger...

One World One Heart

Photo

FEEDJIT Live Traffic Feed

Birthday Card

Birthday Card
Just got a whole lot of new stamps from a brilliant place called the Stamp Smith. This is the image that I first saw on Docraft and really liked. I asked the friend who has used it in an ATC, where she got it. Well she borrowed it from a friend who got it from ebay as a one off. But.... it had a title. I googled the title, and hey presto found the site. They have great stamps and offer a really friendly fast service. I highly recommend them!

Gothic Arch Trifold inside

Gothic Arch Trifold inside

Back of Gothic Arch Trifold

Back of Gothic Arch Trifold

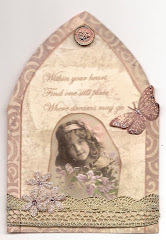
Gothic Arch Within the Heart

Gothic Arch Within the Heart

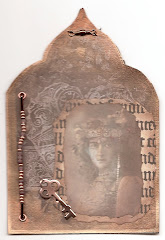
Gothic Arch, the Key

Gothic Arch, the Key