Monday, 12 September 2011
Pion Design Papers Christmas Card
Just recently I discovered the stunning papers from the Swedish Company Pion Design. In the UK they are available from Dies to Die for. They are just the most beautiful, soft papers.
Here is a Christmas card made with the papers which I am going to put in for the Swedish (I think) Challenge Blog "Sketchy Colours". Here are some more views from the inside etc.
The tags are from the paper collection. I followed the sketch pretty much using nestability die cuts and flowers from Wild Orchid Crafts and my local craft shop. The little angel image was flying around in my stash...
Sunday, 4 September 2011
Crafty Individuals September challenge "Hanging About"
The theme for the crafty Individuals Challenge this month is "Hanging about".
This is the first time I am taking part and I decided to make a heart shaped hanger.
I free cut a heart shape out of cardstock. Coated it with Gesso, inked the edges, then used one of the Crafty Individuals swirl stamps around the edges. The image is from one of their glossy A4 sheets.
Clicking on the title of this post will take you to the Crafty Individuals blog where you can see more creative entries.
This is the first time I am taking part and I decided to make a heart shaped hanger.
I free cut a heart shape out of cardstock. Coated it with Gesso, inked the edges, then used one of the Crafty Individuals swirl stamps around the edges. The image is from one of their glossy A4 sheets.
Clicking on the title of this post will take you to the Crafty Individuals blog where you can see more creative entries.
Saturday, 3 September 2011
Gingersnap Creations Chestnut Challenge Babes and Tots
Pfew, I only just made it still for the Chestnut challenge over at Gingersnap creations. The closing date is tomorrow (September 4). I got this cute little image on a collage sheet by Digital Daydreams on Etsy. I altered it a bit and then used it as the vocal point on this Christmas Card.This is the outside.
And this is the inside. The papers used are from Bo Bunny Etc and Father Christmas ranges.
More information and great examples can be found here
And this is the inside. The papers used are from Bo Bunny Etc and Father Christmas ranges.
More information and great examples can be found here
Spicy Supply Challenge at Ginger Snap Creations
Some of you may have noticed that I was chosen to be the Ginger Muse for the month of September over at the Gingersnap Creations blog.
One of the challenges this month is to create something with baby wipes.
Here is a tag I made
Baby wipes were used for a background scrap, the embellishments on the left and the ribbon at the top.
Normally I only use wipes for spreading paint around or sometimes for cleaning stamps. Playing around with it like this was great fun. I discovered all sorts of things. Once they are dry they take ink and sprays beautifully. I found I could not die-cut them with punches, but other dies work beautifully, though you have to be very careful with intricate dies. The most exciting bit was to discover that when you dry the sprayed wipes and/or die-cuts with a heat gun, they crinkle and shrink (do it in a well ventilated room, as the fumes are probably not too healthy). This gives a wonderful crinkly grungy effect. I loved the fact I could even use strips to tie bows like a ribbon. Die-cut leaves look almost real when they are dried and crinkled a bit. I am sorry this does not really show up in the photo.
If you have not played with baby wipes yet, give it a go, it's great fun.
You can add your pieces here under Spicy Supply Challenge and even be in with a chance to win a prize.
One of the challenges this month is to create something with baby wipes.
Here is a tag I made
Baby wipes were used for a background scrap, the embellishments on the left and the ribbon at the top.
Normally I only use wipes for spreading paint around or sometimes for cleaning stamps. Playing around with it like this was great fun. I discovered all sorts of things. Once they are dry they take ink and sprays beautifully. I found I could not die-cut them with punches, but other dies work beautifully, though you have to be very careful with intricate dies. The most exciting bit was to discover that when you dry the sprayed wipes and/or die-cuts with a heat gun, they crinkle and shrink (do it in a well ventilated room, as the fumes are probably not too healthy). This gives a wonderful crinkly grungy effect. I loved the fact I could even use strips to tie bows like a ribbon. Die-cut leaves look almost real when they are dried and crinkled a bit. I am sorry this does not really show up in the photo.
If you have not played with baby wipes yet, give it a go, it's great fun.
You can add your pieces here under Spicy Supply Challenge and even be in with a chance to win a prize.
Friday, 2 September 2011
September monthly calendar
It's that time of the month again, monthly calendar time!
You can find out more about this here
Here is my filled in August pageAnd September all ready to go. I created it with my usual technique, a mix of Golden acrylic paints, gesso,stamping and paper napkins
Wednesday, 31 August 2011
Black shrink plastic
Today I am doing a review on Blank Shrinkplastic over at the Snazzys Design Team Blog
If you want to see more head over there.
Monday, 29 August 2011
First Christmas Cards
I know it's only August, but these are the last days of my holidays and I was in the mood for using some of my vast collection of scrapbook papers, so here are my first creations.
If you are interested in how to do the start card, you can find a good tutorial here starcard. It's in German but Google translate and the pictures will probably help.
This is the card closed:
And here it is open.
Here is a simpler card made out of a piece of 6 x 12. If you want to know how to make it, email me.
If you are interested in how to do the start card, you can find a good tutorial here starcard. It's in German but Google translate and the pictures will probably help.
This is the card closed:
And here it is open.
Here is a simpler card made out of a piece of 6 x 12. If you want to know how to make it, email me.
Tuesday, 23 August 2011
Altered envie for mail art swap
Here is an altered envelope I created for a swap in one of my art groups.
The Background was created with acrylic paints, distress stain in wild honey, a paper napkin and some gesso. I then added details with papers and stamps from Bo Bunny's new etc range, - love that line of papers. The images of the cute guys are from Altered Artifacts on Etsy.
This is the back
And this is the front
Monday, 22 August 2011
Back at last
Got back from two fabulous weeks in Ireland last night. Had no internet there at all, so really look forward to visit you all!
Here are a few pages from the smashbook I worked in while away. A couple of journal entries and a couple of sketches of some of the characters we saw.
Also wanted to let you know that today I posted my first design team project for the Snazzys Design Team Blog
Here is a sneak peak. Hope you will go and have a look, they have fantastic products.
Here are a few pages from the smashbook I worked in while away. A couple of journal entries and a couple of sketches of some of the characters we saw.
Also wanted to let you know that today I posted my first design team project for the Snazzys Design Team Blog
Here is a sneak peak. Hope you will go and have a look, they have fantastic products.
Wednesday, 3 August 2011
Off on holiday


Tomorrow I'll be off to Ireland for 2 and a half weeks. I probably won't have much access to the internet.
Every year I toss about what and how much in the way of art materials to take. Usually I play in a journal. This year I thought I'd make my own Smash book, just to see whether I like using that sort of thing.(They seem to be very popular right now).The plan is just to use "finds" i.e. tickets etc and scraps. I made different sections for my smash book, one for notes, one for ideas, one for things to keep. one for sketches and a few more including a "random" one for anything else. I had great fun making my book with may different kinds and types of paper, a load of pockets and spaces for tags and things to stick in of course.
Here is the cover. The image I could not resist using is a freebie from my wonderful friend Terri, you can find her website here.
See you all when I get back on the 22nd.
Monday, 1 August 2011
Monthly Calendar Journal August
As many of you know, Kate Crane hosts a monthly calendar challenge. I have been doing this for over a year now and it is great fun. You can find out more on Kate's blog here
Here is my July page all filled in:

And here is my August page ready to go

For this page I started to put Gesso all over, then used many layers of Golden fluid acrylics, blended with a baby wipe.The paper out of which I punched the circles was created in a similar way but then I stamped all over them. As they were quite dark I added more gesso and paints (Titan Buff). The imagery was created with the help of a paper napkin. August 2011 was stamped as were some of the other details on the page. I set myself the challenge not to use any digital images this time.
Here is my July page all filled in:

And here is my August page ready to go

For this page I started to put Gesso all over, then used many layers of Golden fluid acrylics, blended with a baby wipe.The paper out of which I punched the circles was created in a similar way but then I stamped all over them. As they were quite dark I added more gesso and paints (Titan Buff). The imagery was created with the help of a paper napkin. August 2011 was stamped as were some of the other details on the page. I set myself the challenge not to use any digital images this time.
Sunday, 31 July 2011
Card for Fashionable Stamping Challenges
As I was in the mood for creating a card today I thought I would join in with a new challenge blog fashionablestampingchallenges
The theme this week was easy, "Anything goes". No digis are allowed, so really stamping only.
I used a Bo Bunny Time Piece stamp set and created my background with distress inks Victorian Velvet, Chipped Sapphire and Weather Wood. I also used a Stempel Glede stamp and a Judikins stamp embossed with clear embossing powder for the background. The Lock and Key are part of the time piece set. I grunged them up with distress stickles and various colours of Perfect Pearls.
The theme this week was easy, "Anything goes". No digis are allowed, so really stamping only.
I used a Bo Bunny Time Piece stamp set and created my background with distress inks Victorian Velvet, Chipped Sapphire and Weather Wood. I also used a Stempel Glede stamp and a Judikins stamp embossed with clear embossing powder for the background. The Lock and Key are part of the time piece set. I grunged them up with distress stickles and various colours of Perfect Pearls.
My first post for Snazzys
Today is the first time I will be posting in my new job as DT member for Snazzys. Here is just a little sneak peek.

To see the full post and also see the great projects of the other DT member hurry along to the Design Team Blog
Hope you feel inspired and have a wonderful Sunday!!

To see the full post and also see the great projects of the other DT member hurry along to the Design Team Blog
Hope you feel inspired and have a wonderful Sunday!!
Thursday, 28 July 2011
Exciting News!!!
This morning I can finally reveal that I am a proud Design Team Member for a wonderful company called Snazzys
This family run business is owned by Val and Don who will shortly be opening a brand new online shop.
Today our new design team blog has been launched by Gillian our DT leader
Over the next few days each of the DT members will be introducing themselves to you with some of their projects. The other two members are Paula and Lesley
If you don't know their work yet, go check them out!!
To see the new blog and keep up to date with the Snazzys Stamping and Scrapbooking shop, go to the new blog right now, you'll find them here: Design Team Blog
Hope you'll come and visit us and leave a comment. I will be posting on Sunday the 31st
This family run business is owned by Val and Don who will shortly be opening a brand new online shop.
Today our new design team blog has been launched by Gillian our DT leader
Over the next few days each of the DT members will be introducing themselves to you with some of their projects. The other two members are Paula and Lesley
If you don't know their work yet, go check them out!!
To see the new blog and keep up to date with the Snazzys Stamping and Scrapbooking shop, go to the new blog right now, you'll find them here: Design Team Blog
Hope you'll come and visit us and leave a comment. I will be posting on Sunday the 31st
Wednesday, 27 July 2011
Wedding Lay Out
I am not really a scrap booker but often admire the work of some of the amazing scrapbookers out there and I certainly LOVE many of the wonderful scrapbook papers that are available.
Having said all that, I did want to create some LOs from all the hundreds of wedding photos we now have of my son's wedding, so here is the first one....


The papers I used are mainly from the Prima Botanical Collection with some elements from Pink Pailee's Butterfly Garden and Bo Bunny's Gabrielle papers. I was amazed how colour wise they pretty much all fitted together.
Having said all that, I did want to create some LOs from all the hundreds of wedding photos we now have of my son's wedding, so here is the first one....
The papers I used are mainly from the Prima Botanical Collection with some elements from Pink Pailee's Butterfly Garden and Bo Bunny's Gabrielle papers. I was amazed how colour wise they pretty much all fitted together.
Monday, 25 July 2011
Wedding Day
As some of you will know, it was my youngest son's wedding this weekend.
I don't usually post personal photos on my blog but thought I would make an exception this one time as I know some of you would like to see some of the photos.
Two pictures of the happy couple.


Two proud families, the Australians on the left, the Scots on the right

The Australian bride among the members of her new family, brother in Law, father in law, uncle and cousin all wearing the traditional Maclean kilts

A truly Scottish wedding as you can see.
I don't usually post personal photos on my blog but thought I would make an exception this one time as I know some of you would like to see some of the photos.
Two pictures of the happy couple.


Two proud families, the Australians on the left, the Scots on the right

The Australian bride among the members of her new family, brother in Law, father in law, uncle and cousin all wearing the traditional Maclean kilts

A truly Scottish wedding as you can see.
Wednesday, 20 July 2011
Wonderful post
Today I received some amazing post. 3 ATCs as returns from Marion who organised a great swap this summer called Mona and Friends.
This one was from the wonderful Martina

The next one was from Fiona Randall. I did not know her work at all, so it was great to get to see her work this way.

Finally the last one is from Xela

Aren't they just great. I really want to thank Marion for organising this great swap and sending me these wonderful returns!
This one was from the wonderful Martina

The next one was from Fiona Randall. I did not know her work at all, so it was great to get to see her work this way.

Finally the last one is from Xela

Aren't they just great. I really want to thank Marion for organising this great swap and sending me these wonderful returns!
Sunday, 17 July 2011
Steampunk themed book card

Been busy creating a "book card" with a steampunk theme. A book card is a card with a cover and a kind of shadow box inside. I found the idea for this on the blog of a brilliant Swedish blogger that also does quite a few videos on Youtube. You can find out more here
I decided to put this card in for one of the challenges over at gingersnap creations. The theme there is cogs, wheels and watch parts. It's the spicy supply challenge which closes on August 7, just in case you are interested in playing. I used papers from Graphics 45 Steampunk and Renaissance collections. The gears are chipboard pieces from Imaginarium Design, a brilliant Australian company. I coloured them with distress stain in vintage photo and then used perfect pearls and some vintage photo embossing powder on them to give them the metal effect.
This is the inside

and this is the inside


and finally a side view.
Wednesday, 13 July 2011
Charms for a swap in my art group
Monday, 11 July 2011
Monthly Journal Prompt for July
My friend Roc posts a journal prompt every month, (you can find a link to her blog along my sidebar). For July the prompt was "If you had 3 wishes, what would they be?"
Well, of course all of us have lofty wishes for world peace, happiness for all, no more hunger in the world, those certainly are wishes that I carry in my heart everyday of my life. Journaling however, is also something personal, so I decided to journal about more personal wishes for this particular prompt.
The background was created with the usual, - acrylic paints, gesso, old book pages, stamps, stencils and spray inks,wax creations, charcoal pencils and pens.
the colourful words from Tumblefish Studios at Deviant Scrap
The images came from Altered Artifacts. The border came from a sheet created by Gail Smith from Shabby Cottage Studios
Please click anywhere on the picture to see more detail.
Thanks for visiting and have a great week
Well, of course all of us have lofty wishes for world peace, happiness for all, no more hunger in the world, those certainly are wishes that I carry in my heart everyday of my life. Journaling however, is also something personal, so I decided to journal about more personal wishes for this particular prompt.
The background was created with the usual, - acrylic paints, gesso, old book pages, stamps, stencils and spray inks,wax creations, charcoal pencils and pens.
the colourful words from Tumblefish Studios at Deviant Scrap
The images came from Altered Artifacts. The border came from a sheet created by Gail Smith from Shabby Cottage Studios
Please click anywhere on the picture to see more detail.
Thanks for visiting and have a great week
Subscribe to:
Posts (Atom)
FEEDJIT Live Traffic Feed
Birthday Card
Just got a whole lot of new stamps from a brilliant place called the Stamp Smith. This is the image that I first saw on Docraft and really liked. I asked the friend who has used it in an ATC, where she got it. Well she borrowed it from a friend who got it from ebay as a one off. But.... it had a title. I googled the title, and hey presto found the site. They have great stamps and offer a really friendly fast service. I highly recommend them!
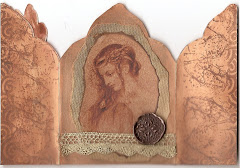
Gothic Arch Trifold inside
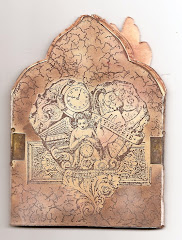
Back of Gothic Arch Trifold
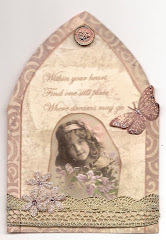
Gothic Arch Within the Heart
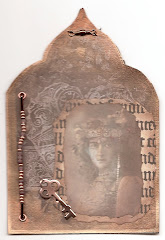
Gothic Arch, the Key