Saturday, 6 January 2018

Bullet Journal, - the journey continues

Hello lovely visitors, - I hope the new year has started well for you so far.
Today I am sharing some of my completed bullet journal pages and my set up for Janauary so far.
There is not much to say about the pages really, I think they speak for themselves.
Here first of all are my final December pages:


All the elements are hand drawn. For those of you who are into stationery, I used Micron pens, Tombow Brushmarkers and Crayola Supertips. I just noticed that I photographed the above spread before it was filled in, trust me, I filled all of it in by now 😄.

For the new year I decided to change things up a bit, - this is what I love about bullet journaling, it is totally up to you how you want to do it.

A hand-lettered quote and the 2018 title page, because I starated in October there is still loads of space left in this journal, so I decided to just continue in the same one ( The Leuchtturm1917 dotted journal).
This is probaly my favourite page in the whole journal so far, unlike the January page below, which I don't like at all, but hey ho, some pages work and some don't, I guess it's all good practice. That's one of the things I like about bullet journaling, not only does it help me to stay on track, it also makes me paint and draw almost every day.


I decided to go with a sort of snowy wintry theme for my January pages, and my accent colour is grey. There will be more January pages to follow, but for now I will finish with my future log where I can note down any main things coming up between now and June.
Well that's it for now, thanks for your visit. I know this is not the usual mixed media stuff I normally blog, but it's part of my artistic journey right now, and therefore I decided to post these kind of spreads here every once in a while. I have decided to add this to Susi's Art Journal Journey where the theme is new adventures.
xxxxx


Thursday, 4 January 2018

Three is not a Crowd for Frilly and Funkie

Hello lovely visitors, I hope you are all well and happy. Today I am sharing a special card with you created for a guest designer post for the Frilly and Funkie blog.
I was lucky enough to be the winner of the Frilly and Funkie November challenge and was invited to do a guest post for their latest challenge theme which is "Three is not a Crowd"
This is what Cec, who is the challenge host had to say about the challenge:
Create a vintage or shabby chic project that includes three of something. Examples of three of something could be three different patterned papers, three colours, three layers, three flowers, three bows – the list goes on. This would be a perfect time to use some of the new supplies you received for Christmas or to make space in your stash by using up old supplies. Just remember to think in multiples of three.

Well, this theme had me well stumped for the longest time, but in the end I came up with this card that is based on triangles. I also tried to include threes in some of the embellishments.
So here is a short description of how I made it:
This is what you will need:
1 sheet of 12 x 12 card for your substrate, - I used Kraft card
1 sheet of 12 x 12 card or paper for matting
Either scrapbook paper or card for your final layer.
Inks, stamps and stencils plus whatever you like to decorate and finish your card.

I created a template to help with the construction:
1.To create the triangle, mark the middle of the top and bottom side, put your ruler along and draw a line of about 2.5" down. Next go to the bottom right corner and draw a line the the line you just drew and make a mark at exactly 12". Do the same from the left bottom corner and where the two meet is the top of your triangle.
2. Cut out your triangle.

3. Score and fold as shown on the template, below you can see which are valley and which are mountain folds.
4. Now comes the tricky part, matting and layering. There are no doubt many ways to do this, I created another template using strips of white card:
Truth is, it did not turn out very accurately and if I did it again I would probably create another triangle, slightly smaller and use that to mat by cutting the different sections just slightly smaller too.

Anyway, on to the decortaion. I used distress inks, stamps and stencils for mine, below first the inside and back and then some close ups of the different sections:


Here are somee of the smaller triangles and one of the other sections, I mostly used various Tim Holtz layering stencils and a variety of stamps, stamped either in Distress or Archival inks in various green tones.


And here you see the card when folded together:

I added a little bird image to each of th 3 panels that show at the front. They are from an old Kaisercraft collection I had in my stash.

A larger one was added to the central triangle in the middle together with a little sentiment from one of Tim Holtz's stickers.
Finally 3 little roses and a little metal leaf decorate the top, - see I tried to stick with the theme of threes.... :o)

Well, that's it for now, thank you for your visit and thank you to the team over at Frilly and Funkie for the honour of creating this little project for them.
xxxxx

Monday, 1 January 2018

Ring in the New for Mixed Media Monthly challenge 44

Hello lovely friends and welcome to my second post today! HAPPY NEW YEAR TO YOU ALL!!
The theme over at MMM is "Ring in the New", and I decided to do that by using some of the old 😉.
I created a tag using up left over papers and embelishments fromrevious projects created throughout the year. Now my desk is clear (well mostly anyway) so I can ring in the new. But before I give you an overview of how this was put together, - here is our beautiful graphic for this month:
Remember to add it if you are going to play along with our challenge.

I started by cutting two tags with a Tim Holtz die from pieces of left over Blue Fern papers, wetted the one that was going to be on top slightly to make it easier to roll up and then attached the two together as you can see in the picture.
I also stencilled a couple of snow flakes to give it all a bit more of a wintry feel.
Next I cut a number of branches from the same papers using the Tim Holtz greenery die and selected a few other embellishments that I thought would work together on this tag.
And here you can see how I put it all together...
The sentiment was computer generated, cut to size and then I edged it with Stampendous Ancient Silver EP to add a bit of dimension.
The little dove is a resin embellishment, I highlighted the raised bits with treasure gold in Pewter.
The heart was cut from chipboard with a Tim Movers and Shapers die, given was the crackle treatment as follows: Paint it dark brown with acrylic paint, add a coat of  Decoart Weathered Wood Crackle glaze and when this is touch dry, add a second layer of paint, (I used a cream coloured one) - the cracks will start to appear pretty much straight away. I then added some Distress inks still around the edges and finnally wound some rusty wire around it all. The branches were tucked in at the top and that was pretty much it.

Well, I hope you like my tag, and if you have not been over yet, please check out the MMM Blog to see what my teamies have created, and of course we would love it if you played along. Check out the blog for details of our prize this month and happy creating. Have a fantastic month!
xxxxx

Happy New Year and a calender for the Mini Album Makers challenge blog.

Hello friends, welcome and a Very Happy New Year to you all!!!

It being the first of the month I have two new DT projects going live today, so here is number 1.
Made for the Mini Album Makers Callenge, where our sponsor this month is no other than
For this project I set myself the challenge to make something that would be really useful and to only use leftover stash from last year's projects, so I decided to make a desktop calendar in the form of a mini album.
The substrates for the different pages are textured coloured chipboard pieces, 6 x 4 " in size that I picked up years ago in Michaels when visiting the States. I have no idea who makes them and whether they are still available, but they were just perfect for this. I punched holes at the top of each, using a cropodile, and the whole little book is held together with twine, which makes it really easy to turn the pages to the next month.
Here is January. I always adhered a month to both sides of my substrates, so January and February are both attaches to a light blue piece, for a wintry feel. For each of the months I used leftover Maja Design papers in neutral colours, added some inks, stamping and die cuts to make them match the season.
February got a bit of a Valentine's romantic feel, with a little image found on Pinterest and fussycut, but otherwise is still kept in a wintry mood.
March and April both have a light buff coloured background, but the images and elements used now become more Springlike. For this one I did some stencilling in green tones of Distress inks, added scraps of a paper napkin and a St Patricks image fussy cut from Graphics 45 Place in Time collection.
More stencilling, paper napkin scraps and some little diecuts I have had in my stash for years, I think they are from K & Co.
May and June are both on a Sage coloured substrate. For May I used one of Tim Holtz's layering stencils and texture paste, and when that had dried coloured it with Tombow brush markers and finally added some of Tim's botanical ephemera pieces and some tiny Prima flowers.
June, another paper napkin scrap, plus  another little diecut from my stash.
July and August are both on a golden yellow substrate and this July page is enhanced with paper napkin scraps and an image cut from a paper collection I have had for years. So useful to finally use some of these hoarded bits and pieces...
More of the same, the background paper is from the Prima Love Clippings collection. After cutting it to size I made a litte slit along some of the roses so I could tuck the calendar bit underneath before adhearing it to the substrate.
With the next two month we get into Autumn here in the Northern Hemisphere. The substrate is a warm orangy red, like the leaves outside. I used fussy cut elements from the Graphics 45 Seasons collection and some gorgeous chip board corners from Gypsy Soul, one of our wonderful sponsors.
October is a mix of further fussycut elements from the G 45 Seasons collection and some Heartfelt Creations stamps, cut with matching dies and then coloured with Brushmarkers again.
Finally, November and December have a deep red/burgundy substrate. November has a mix of images from the G 45 Place in Time and Seasons collections and is inked in brown tones, again to reflect what is happening in nature outside.
And with December we have pretty much come full circle and I mostly used leftover bits and pieces from my Christmas card making that were still flying around on my desk.
For the cover I ised a postcard size piece from the G45 Seasons collection, edged it with Stampendous Embossing Powder in Ancient Silver and added 2018 with some sticky chipboard letters from my stash.
I think they came originally with a Bo Bunny collection of papers that again I have had in my stash like forever, so glad I found a use for them now.
Well, that's it for now, thank you for your visit and I wish you all the most fantastic New Year with lots of creative happiness within it. 

If you want to get loads of inspiration, do not forget to visit our challenge blog and of course we all hope you will share your own mini album creations with us!! And don't forget, you could win a $25 voucher from Lyndy's !!!


Related Posts Plugin for WordPress, Blogger...

One World One Heart

Photo

FEEDJIT Live Traffic Feed

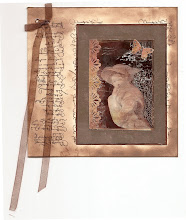
Birthday Card

Birthday Card
Just got a whole lot of new stamps from a brilliant place called the Stamp Smith. This is the image that I first saw on Docraft and really liked. I asked the friend who has used it in an ATC, where she got it. Well she borrowed it from a friend who got it from ebay as a one off. But.... it had a title. I googled the title, and hey presto found the site. They have great stamps and offer a really friendly fast service. I highly recommend them!

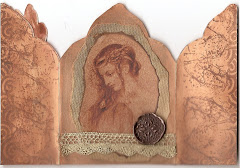
Gothic Arch Trifold inside

Gothic Arch Trifold inside

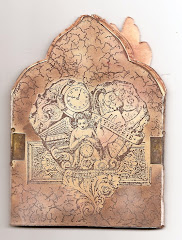
Back of Gothic Arch Trifold

Back of Gothic Arch Trifold

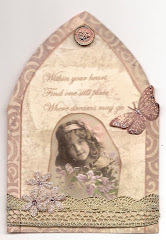
Gothic Arch Within the Heart

Gothic Arch Within the Heart

Gothic Arch, the Key

Gothic Arch, the Key